Neither are they incredibly cost-effective in relation to flooring the entire house of yours with them. You are able to also mix and match several materials also. If for most obscure reason a tile for the floor cracks or perhaps breaks, just about all you have to carry out is actually replace the one tile. Maintaining tiled floors demands a great deal of energy and time from restoring professionals as well as homemakers.
Images about Can I Paint My Ceramic Tile Floor
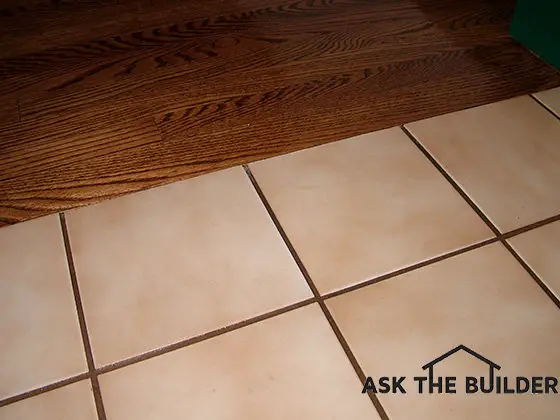
Ceramic tiling is actually an attractive learning resource generally used for bathroom floors, skirting together walls and even kitchens. Which means you do not need to worry about staining them. Today, you are able to use tiles to beautify your family room, make your bedroom much more dramatic and so forth. Instead of mostly smooth tiles, you can discover tile flooring in textures that are raised or even dimpled.
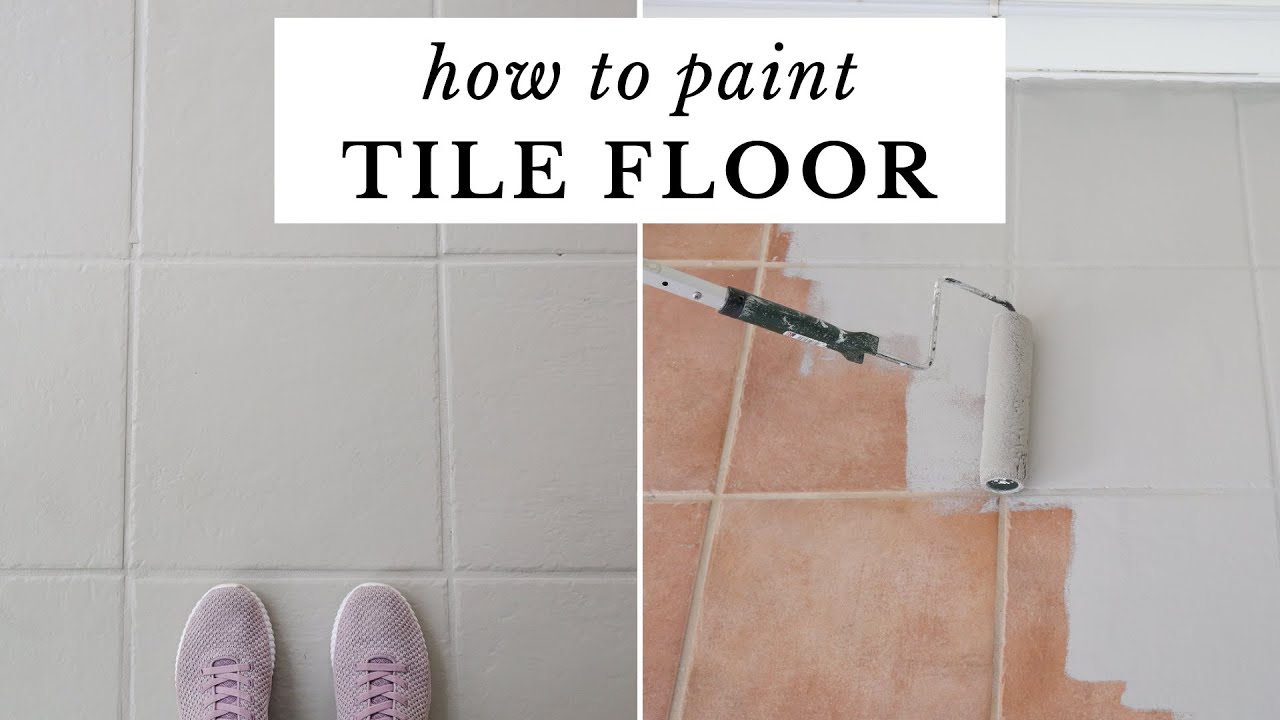
How to Paint Tile Floor Painting Tile Floors Before and After
What ever before you select with the floor tiles makes certain the platform can support the floor tiles you are going to use because floor tiles are heavy especially marble floors. Just like with the slim set, clean off the extra grout and after that allow it to set for at least ten days before you seal the tiles totally. They could be easy to look at but the clean lines of theirs bring a complicated look to a space.
How To Paint Floor Tiles In 6 Steps – realestate.com.au

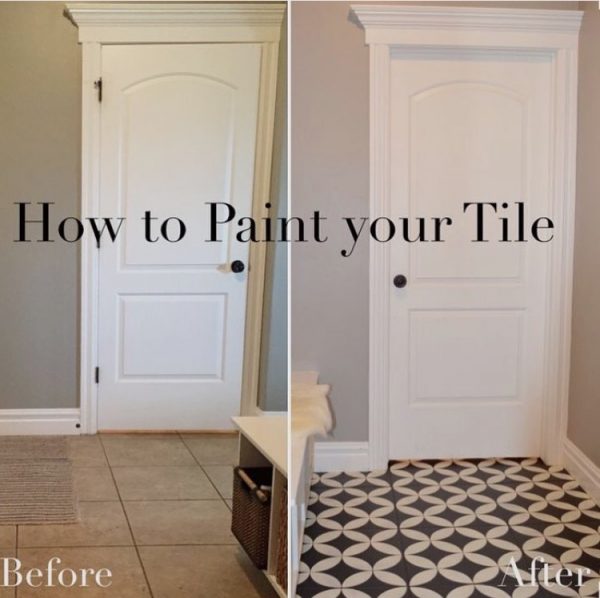
How to paint your ceramic floor tiles – what to do and not to do! –
DIY: How to Paint Ceramic Floor Tile u2014 Farmhouse Living
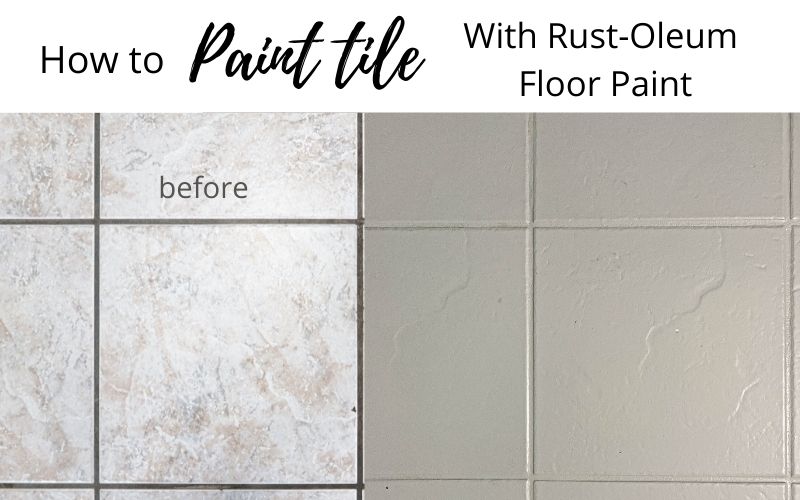
Using Rust-Oleum Home Floor Coating to Paint Outdated Tile Floor
How To Paint Your Ceramic Floor Tile – The Lettered Cottage
How to Paint Tile Floor – Angela Marie Made
How I Painted Our Bathroomu0027s Ceramic Tile Floors: A Simple (and
How To Paint Ceramic Tile
How to Paint a Tile Floor

How to Paint Tile Floor – Angela Marie Made
Faux Cement Tile Painted Floors Tile floor diy, Diy flooring

Painting Tile Floors – A Beginneru0027s Guide – Design Morsels

Related Posts:
- Cambria Tile Flooring
- How To Clean Construction Dust From Tile Floors
- Cleaning Ceramic Tile Floors After Installation
- Best Product To Clean Ceramic Tile Floors
- How To Fix Missing Grout In Tile Floor
- How Do I Clean Tile Floors
- Best Hardwood And Tile Floor Cleaner
- Isolation Membranes For Tile Floors
- Cover Bathroom Tile Floor
- Ceramic Stone Tile Flooring
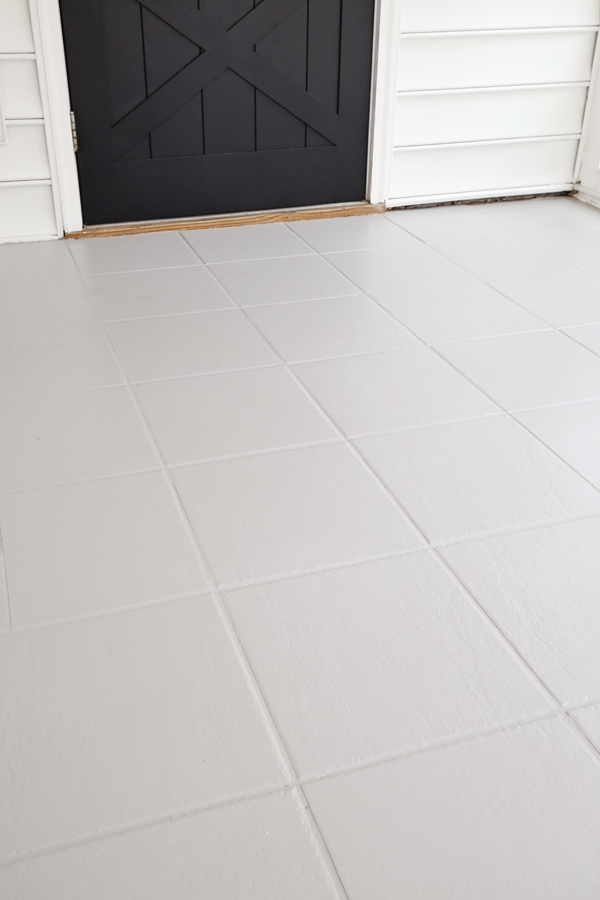
Can I Paint My Ceramic Tile Floor?
Ceramic tile floors are a popular choice for many homeowners due to their durability and aesthetic appeal. However, over time, the color or pattern of your ceramic tile floor may start to look dated or worn out. If you’re considering giving your floor a fresh new look, you may be wondering if it’s possible to paint ceramic tile. The good news is that painting ceramic tile floors is indeed possible and can be a cost-effective way to transform the appearance of your space. In this article, we will explore the process of painting ceramic tile floors, including preparation, materials needed, step-by-step instructions, and frequently asked questions.
I. Preparing Your Ceramic Tile Floor for Painting
Before you begin painting your ceramic tile floor, it is essential to prepare the surface properly. This will ensure better adhesion and longevity of the paint job. Here are the steps to follow when preparing your ceramic tile floor for painting:
1. Clean the tiles: Start by thoroughly cleaning the tiles with a mild detergent and warm water. Remove any dirt, grease, or stains from the surface using a sponge or scrub brush. Rinse the tiles thoroughly and allow them to dry completely before proceeding.
2. Remove any existing sealant: If there is any sealant or wax on your ceramic tile floor, it must be removed before painting. Use a suitable sealant remover or stripper following the manufacturer’s instructions. Ensure that all traces of the previous sealant are gone and that the tiles are clean and dry.
3. Sand the tiles: To promote better adhesion of the paint, lightly sand the surface of the tiles using fine-grit sandpaper. This will create a rougher texture for the paint to grip onto. After sanding, wipe away any dust using a damp cloth.
4. Repair cracks or chips: Inspect your ceramic tiles for any cracks or chips that need repair. Use a ceramic tile filler or epoxy resin to fill in any damaged areas. Follow the product instructions for application and drying times.
5. Tape off edges: Use painter’s tape to protect any surrounding surfaces, such as baseboards or walls, from accidental paint splatters. Ensure that the tape is applied firmly and evenly for clean lines.
FAQs:
Q: Can I skip the sanding step?
A: Sanding the tiles is crucial for paint adhesion. Skipping this step may result in the paint peeling or chipping off over time. It is recommended not to skip this essential preparation step.
Q: Are there any specific cleaning products I should use?
A: It is best to use a mild detergent or a specialized ceramic tile cleaner. Harsh chemicals may damage the surface of the tiles or affect the paint’s adhesion.
II. Materials Needed for Painting Ceramic Tile Floors
Before embarking on your ceramic tile painting project, gather all the necessary materials to ensure a smooth process and professional-looking results. Here is a list of items you will need:
1. Primer: Choose a high-quality primer specifically designed for ceramic surfaces. Look for a product that promotes good adhesion and durability.
2. Paint: Opt for a paint specifically formulated for use on ceramic tile floors. Epoxy-based paints are popular choices due to their durability and resistance to moisture and staining.
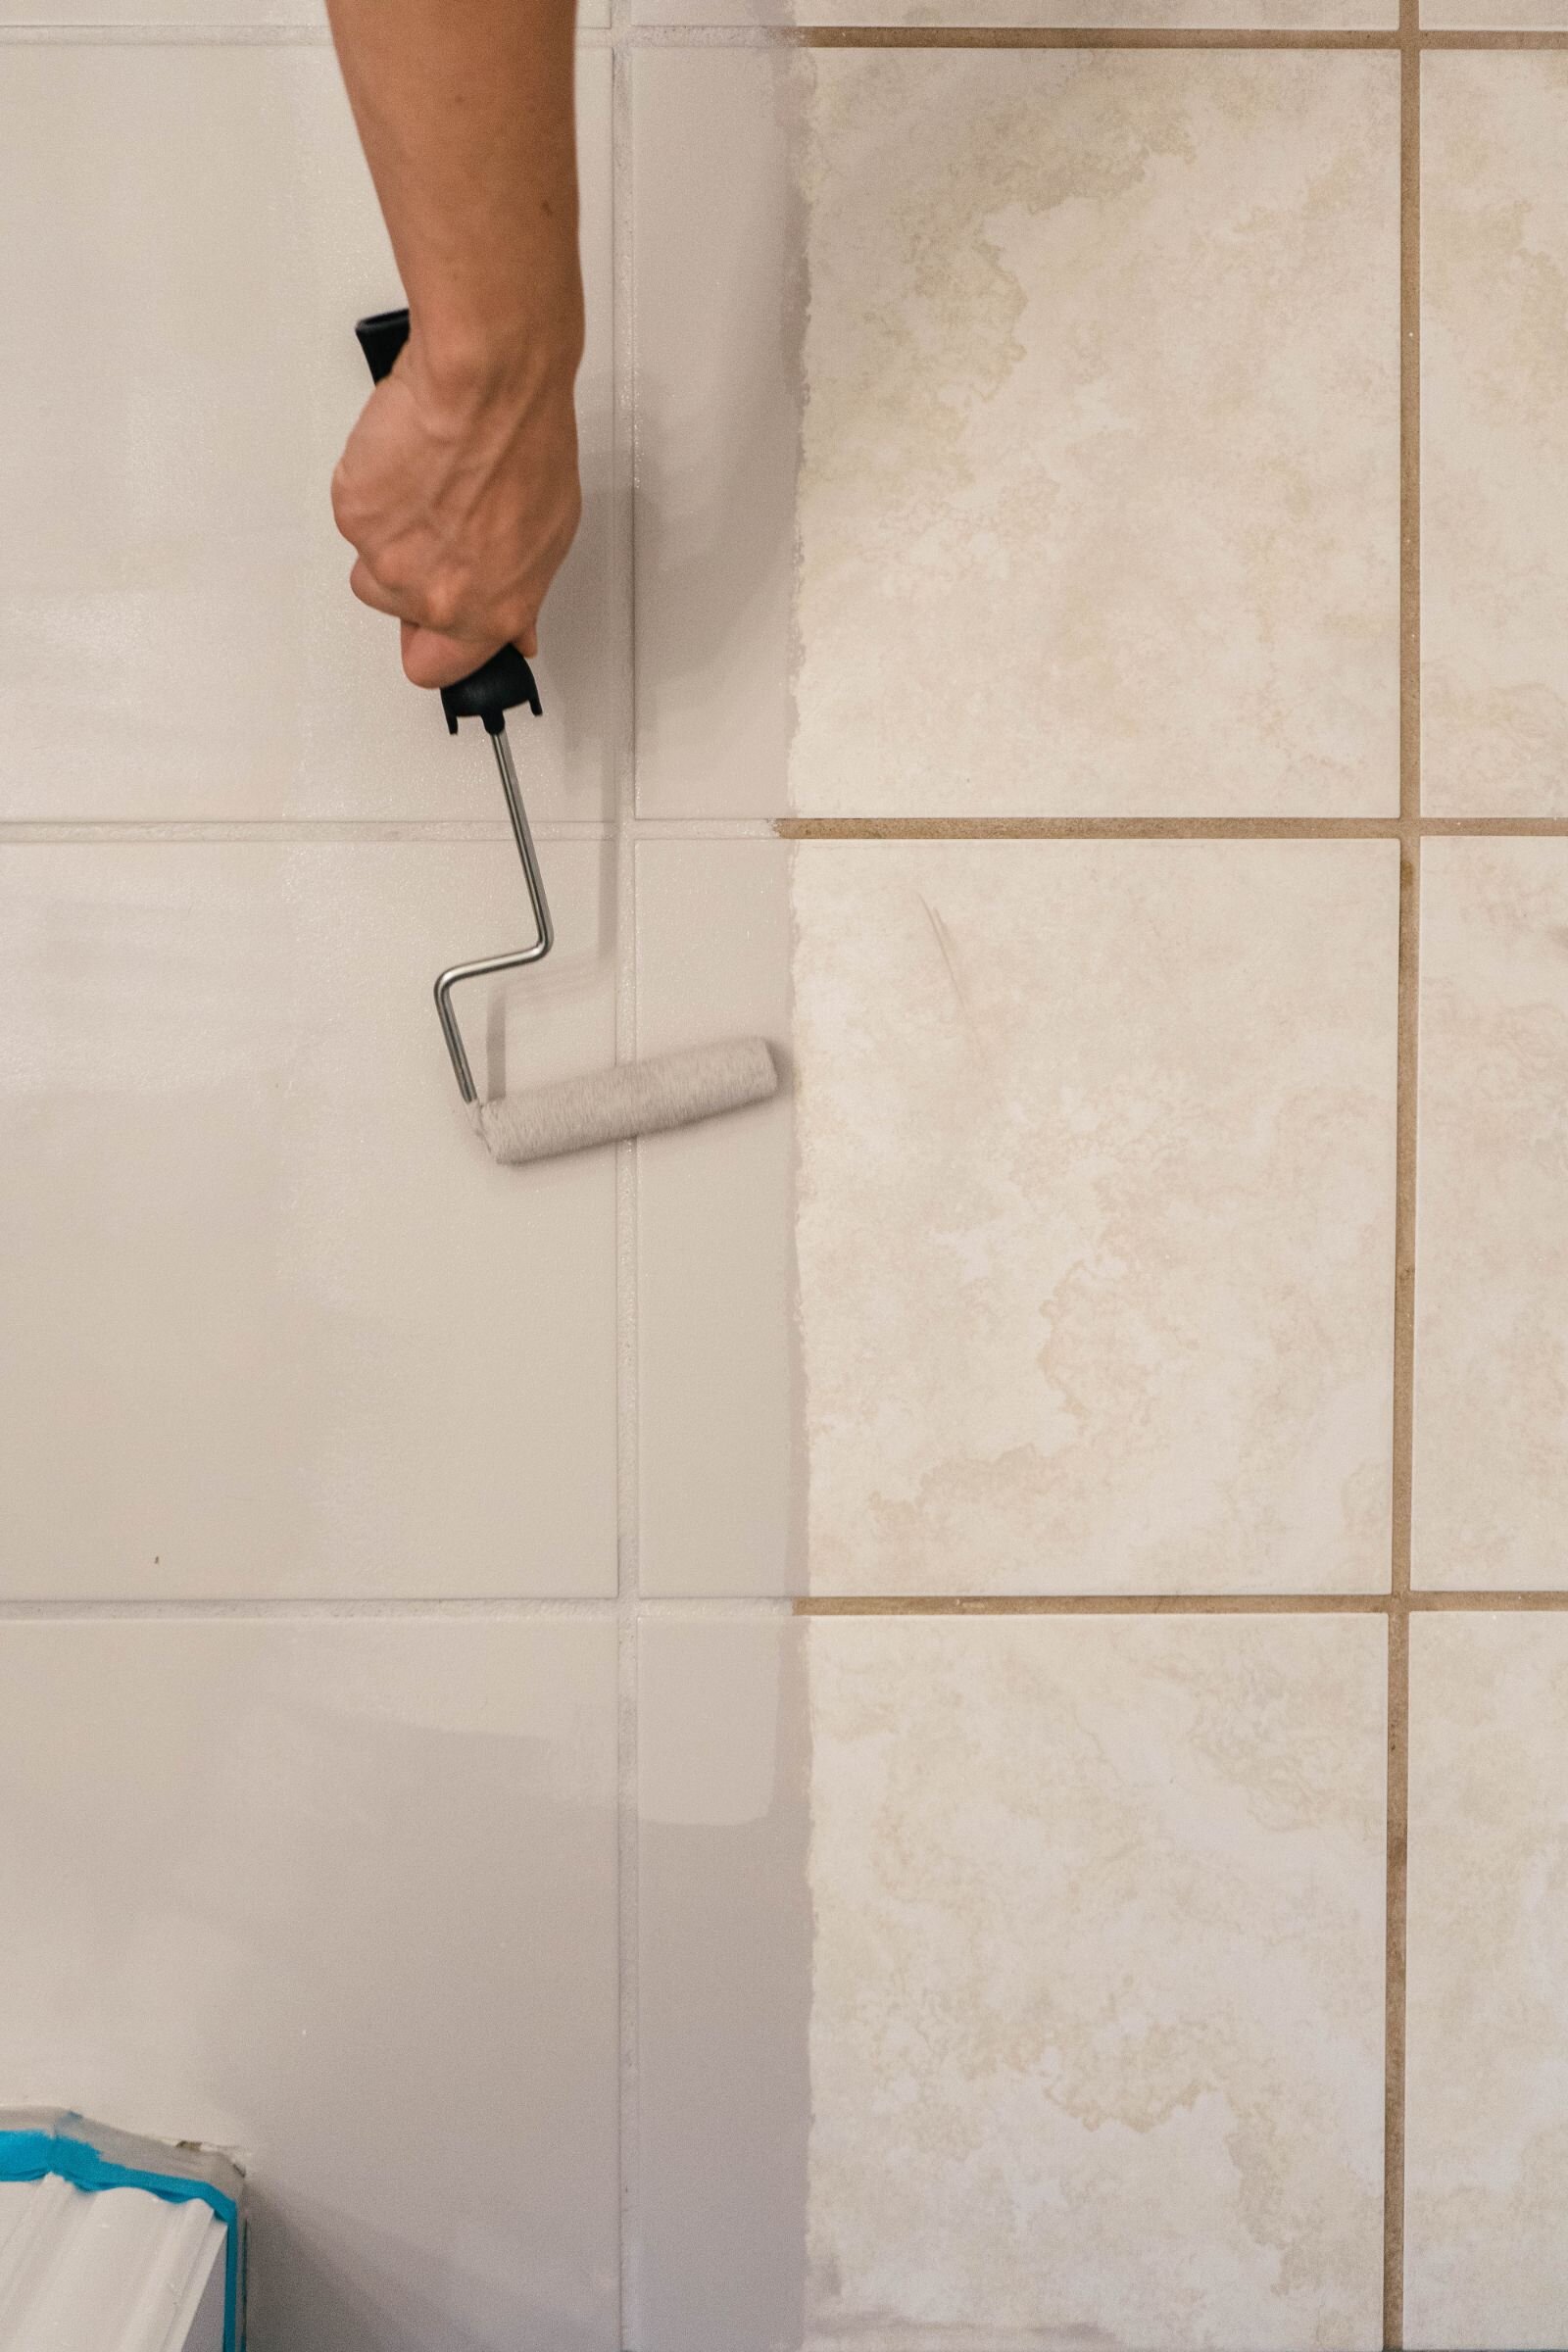
3. Brushes and rollers: Use high-quality brushes and rollers suitable for the type of paint you are using. A combination of brushes and rollers will help achieve even coverage on both flat and textured Surfaces. Consider using a brush for edges and corners and a roller for larger areas.
4. Paint tray: A paint tray will make it easier to load your roller with paint and ensure even distribution.
5. Drop cloths or plastic sheets: Protect your surrounding surfaces from paint splatters by covering them with drop cloths or plastic sheets.
6. Painter’s tape: Use painter’s tape to tape off edges and create clean lines where the tiles meet other surfaces.
7. Sandpaper: Choose fine-grit sandpaper to lightly sand the tiles before painting, promoting better adhesion.
8. Ceramic tile filler or epoxy resin: If you have any cracks or chips in your ceramic tiles, you will need a filler or epoxy resin to repair them before painting.
9. Sealant remover or stripper: If there is any existing sealant or wax on your ceramic tile floor, you will need a suitable remover or stripper to remove it prior to painting.
10. Sponge or scrub brush: Use a sponge or scrub brush to clean the tiles thoroughly before painting, removing any dirt, grease, or stains.
11. Damp cloth: You will need a damp cloth to wipe away dust after sanding the tiles.
12. Safety equipment: Consider wearing safety goggles, gloves, and a mask while working with chemicals and sanding materials for added protection.
III. Steps for Painting Ceramic Tile Floors
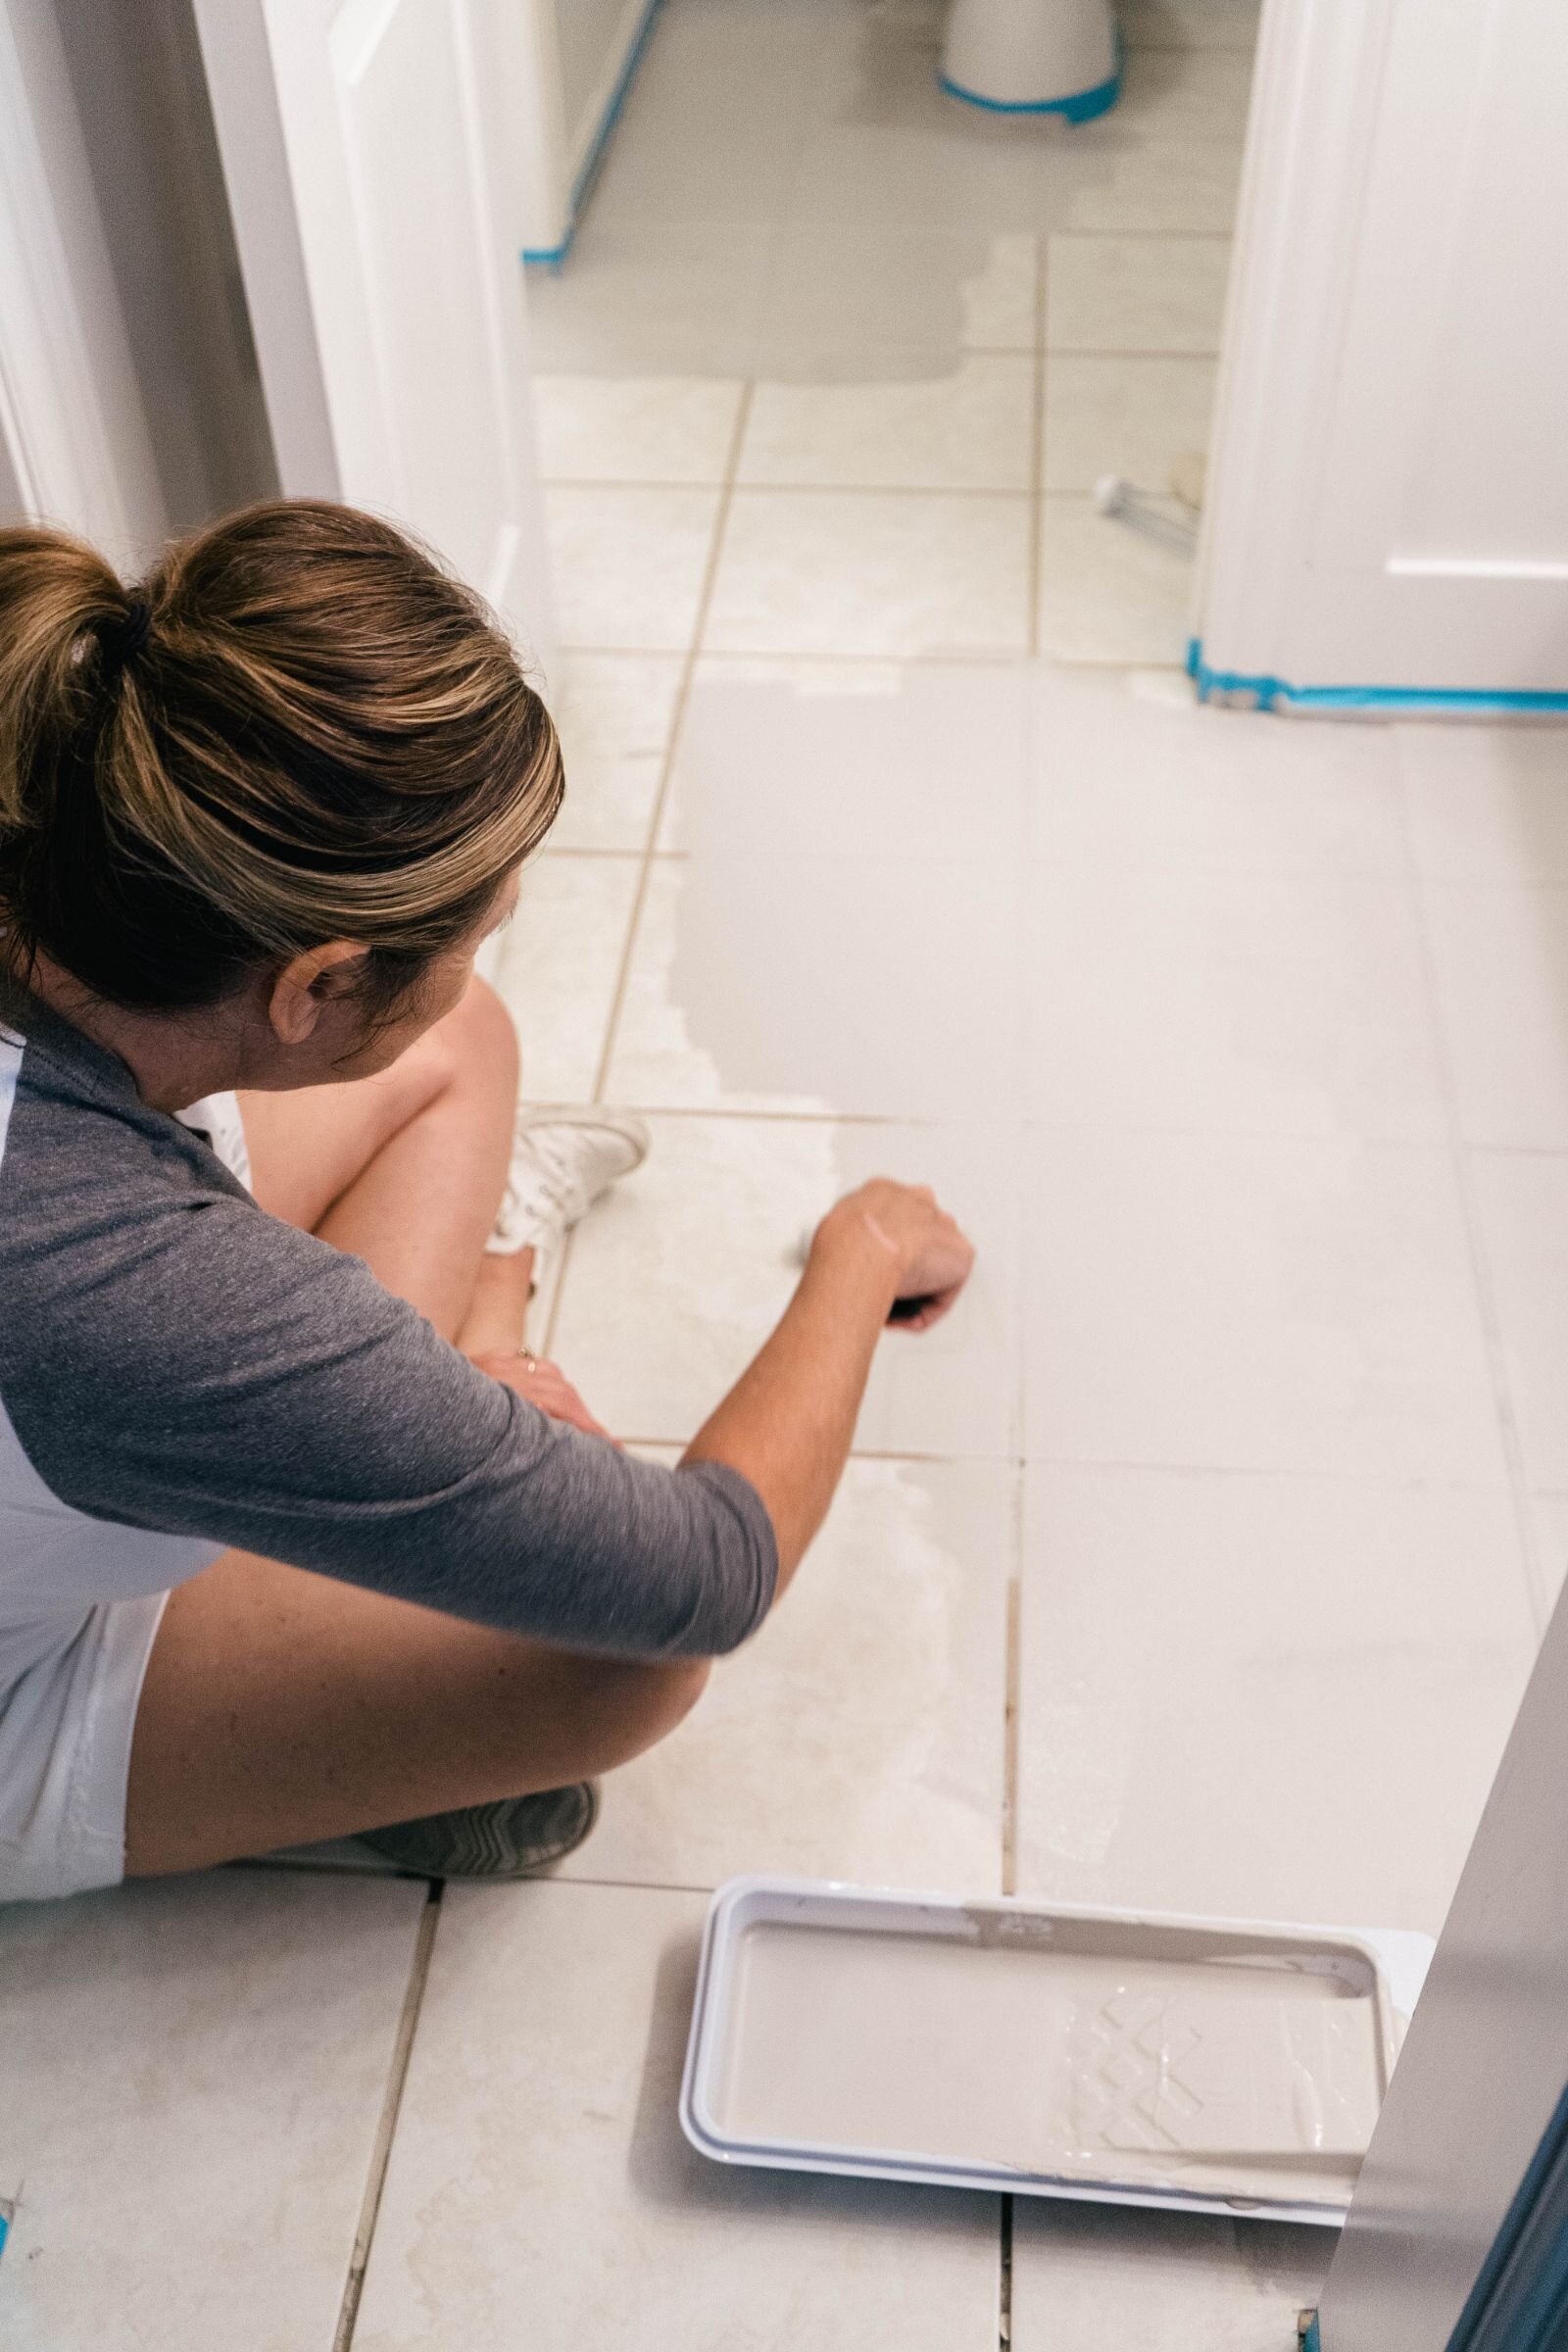
1. Prepare the surface: Start by thoroughly cleaning the ceramic tiles with a mild detergent or specialized ceramic tile cleaner. Remove any dirt, grease, or stains using a sponge or scrub brush. Rinse the tiles with water and let them dry completely.
2. Repair any cracks or chips: If there are any cracks or chips in the ceramic tiles, use a ceramic tile filler or epoxy resin to fill them in. Follow the manufacturer’s instructions for application and drying time.
3. Remove existing sealant or wax: If there is any existing sealant or wax on the ceramic tile floor, use a suitable remover or stripper to remove it. Follow the manufacturer’s instructions for application and removal.
4. Sand the tiles: Lightly sand the tiles using fine-grit sandpaper. This will help create a rough surface for better paint adhesion. After sanding, wipe away any dust with a damp cloth.
5. Tape off edges: Use painter’s tape to tape off edges and create clean lines where the tiles meet other surfaces, such as walls or baseboards.
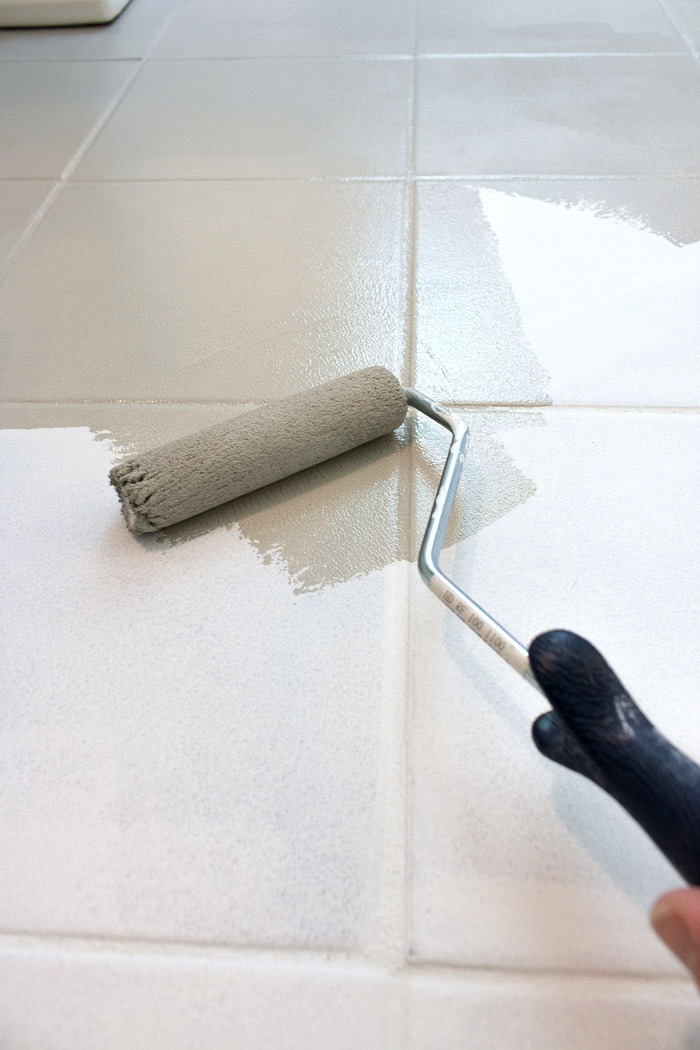
6. Apply primer: Apply a high-quality primer specifically designed for ceramic surfaces using a brush or roller. Follow the manufacturer’s instructions for application and drying time.
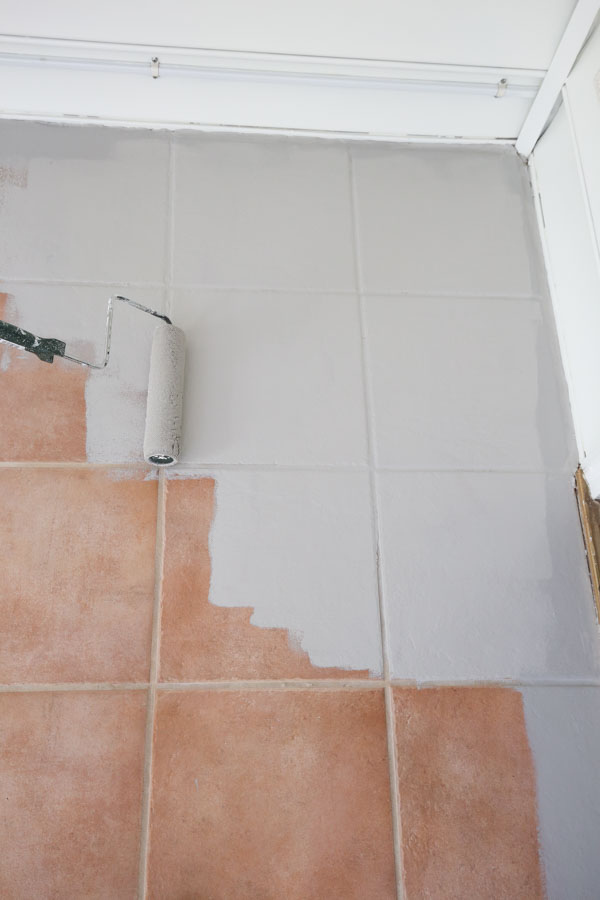
7. Paint the tiles: Once the primer is dry, apply the paint using a brush or roller. Opt for a paint specifically formulated for use on ceramic tile floors, such as an epoxy-based paint. Apply thin, even coats and allow each coat to dry before applying the next one. Follow the manufacturer’s instructions for application and drying time.
8. Apply additional coats (if necessary): Depending on the desired color and coverage, you may need to apply additional coats of paint. Allow each coat to dry before applying the next one.
9. Let it cure: After applying all coats of paint, allow the tiles to cure according to the manufacturer’s instructions. This will ensure that the paint fully adheres and dries properly.
10. Apply a sealant (optional): If desired, apply a sealant specifically designed for ceramic tiles to protect the painted surface and enhance durability. Follow the manufacturer’s instructions for application and drying time.
11. Remove painter’s tape: Once the paint and sealant are dry, carefully remove the painter’s tape to reveal clean lines.
12. Allow for proper drying time: Finally, allow the painted tiles to dry completely before walking on or placing any furniture or objects on them. Follow the manufacturer’s instructions for drying time.
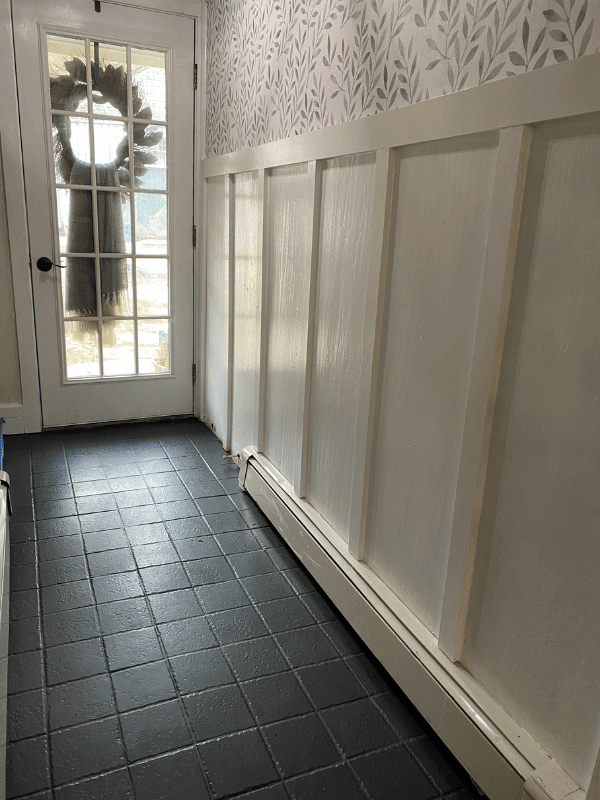
By following these steps and using the recommended materials, you can successfully paint your ceramic tile floors and achieve professional-looking results.