In case you stand on a cork floors with heels, the floor can certainly make a dent or an impression. Cork flooring surfaces are made using cork supplies cork. The tiny air pockets reduce heat loss and also help retain it which is definitely an extremely helpful element in cold environments. Commercial producers of cork just remove a thin stratum with the trunk of this tree, leaving the cork oak tree unchanged.
Images about Cutting Cork Flooring
/cdn.vox-cdn.com/uploads/chorus_asset/file/22873091/H1006HANDBOOK01.jpg)
The process of eliminating the bark (cork) leaves the tree unharmed as well as prepared to re grow and generate more cork in the future. Floor decoration builds up with evolution of flooring concepts. Lots of people in the light green building industry love cork flooring as it uses what the tree is actually producing without harming the tree at all.
Cork Flooring 101: Cost, Types, u0026 Installation – This Old House
/cdn.vox-cdn.com/uploads/chorus_asset/file/23088021/0421_NB_All_About_Cork_Floors_Cork_flooring_iStock_950010876.jpg)
This is actually really self explanatory as well as due to the cellular structure of its. Three of the best selling makes of cork flooring are actually Wicanders, by far the best known brand, Globus, and US Floors. Eco-friendly flooring essentially means its eco-friendly, sustainable and a natural renewable resource. Precisely, cork substance comes out of the bark of this particular tree. This's due to a chemical which naturally occurs within cork called Suberin.
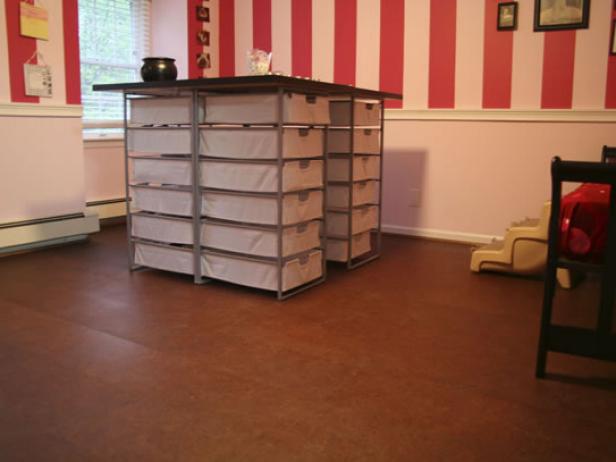
All About Cork Flooring and Why Itu0027s Perfect for the Basement

It's wise to recognise things that's attainable for you and try to figure out in case It is appropriate for your home. This makes it not merely a wonderful choice for use in the kitchen as was talked about earlier but also helps it be a great flooring for entertainment areas, music rooms, as well as sound booths.
How to Install a Cork Floor – This Old House
/cdn.vox-cdn.com/uploads/chorus_image/image/65892042/h1006handbook08.0.jpg)
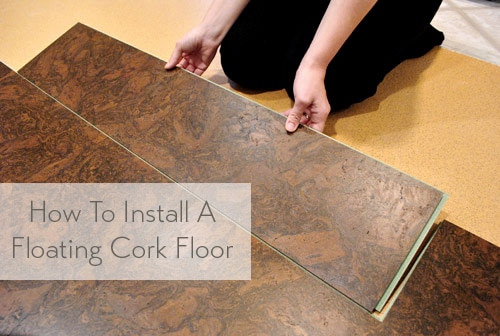
How To Install A Floating Cork Floor Young House Love
How to Install Cork Tile Flooring (DIY) Family Handyman

How to Install Cork Tile Flooring (DIY) Family Handyman

Does Cork Flooring Absorb Sound?

Cork Flooring Installation HGTV
Cork Flooring Installation HGTV
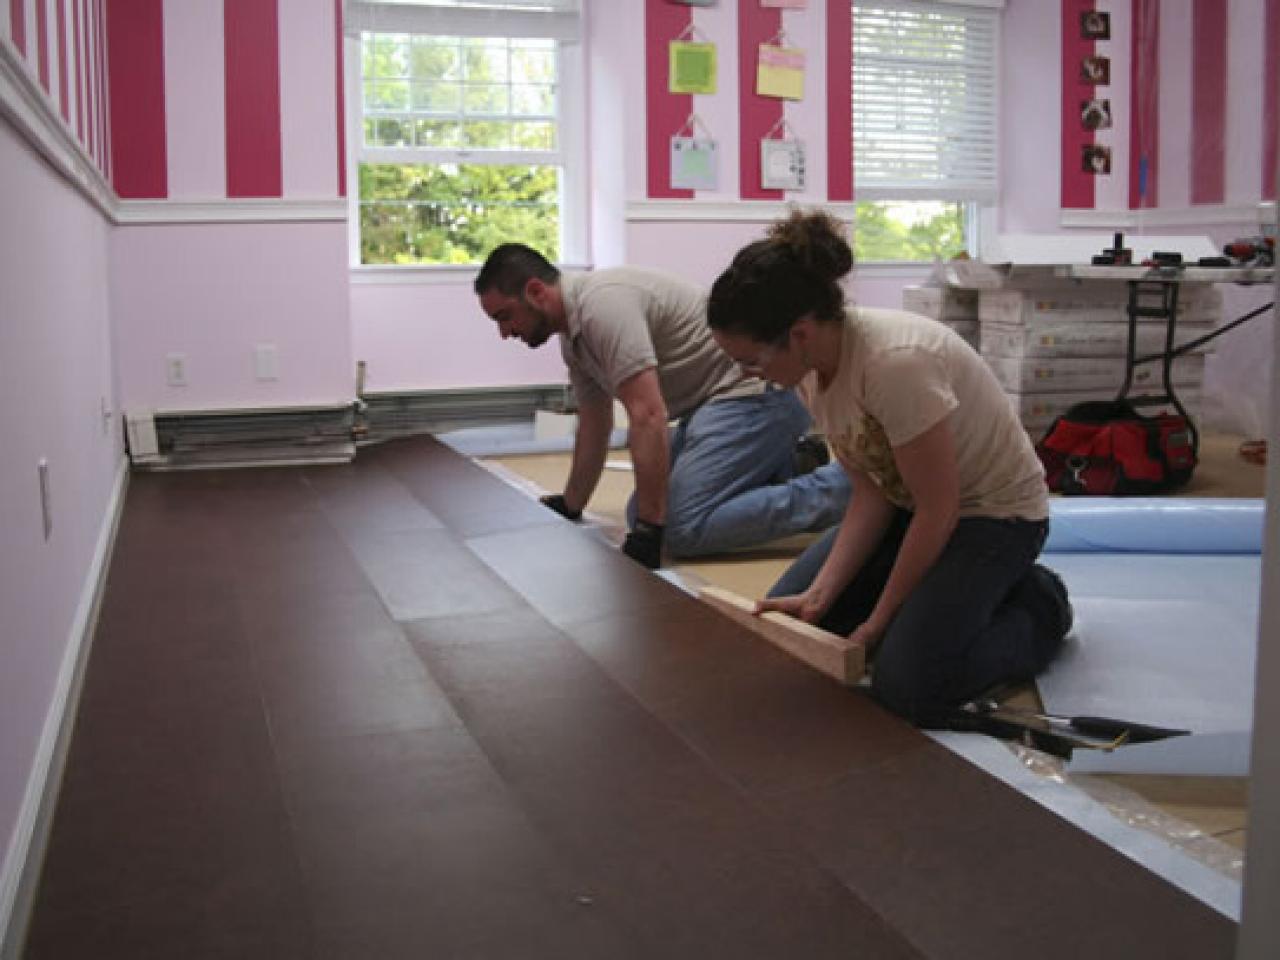
How To Install A Floating Cork Floor Young House Love
How to Cut Cork Flooring Hunker

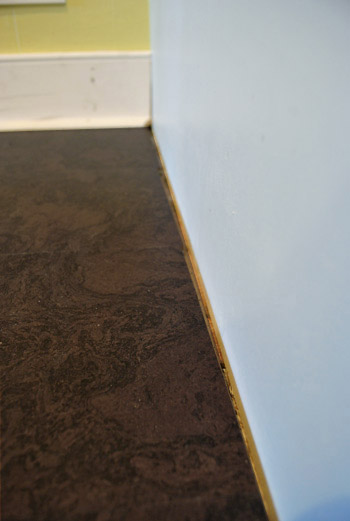
Sealing and Trimming Out Our Kitchenu0027s Cork Floors Young House Love
Pin on Flooring

Related Posts:
- Siesta Cork Flooring
- Corkscrew Flooring
- Cork Flooring Uses
- Floor Corking Machine
- Restoring Cork Floors
- How To Install Cork Floor Tiles
- How Expensive Is Cork Flooring
- Cork Backed Vinyl Plank Flooring Reviews
- Cork Flooring Disadvantages
- Soft Cork Flooring
Cutting Cork Flooring: A Comprehensive Guide
Introduction:
Cork flooring has gained immense popularity in recent years due to its eco-friendly nature, durability, and natural aesthetic appeal. However, when it comes to installing cork flooring, one of the essential steps is cutting the material to fit the desired space accurately. Cutting cork flooring requires precision and careful consideration to ensure a seamless installation. In this comprehensive guide, we will walk you through the process of cutting cork flooring, providing detailed instructions, tips, and answers to frequently asked questions.
I. Preparing for Cutting Cork Flooring:
Before you begin cutting cork flooring, it is crucial to gather all the necessary tools and materials. Here’s a list of items you will need:
1. Measuring Tape: Start by measuring the area where you intend to install the cork flooring accurately. Measure multiple times to ensure accuracy.
2. Pencil or Marker: Use a pencil or marker to mark the measurements on the cork flooring tiles.
3. Straight Edge: A straight edge tool is vital for achieving precise cuts. A T-square or a metal ruler can serve as a straight edge.
4. Utility Knife: A sharp utility knife with a retractable blade is necessary for cutting cork tiles cleanly.
5. Safety Equipment: Don’t forget to wear safety goggles and gloves to protect yourself during the cutting process.
FAQs:
Q1: Can I use any type of utility knife for cutting cork flooring?
A1: It is recommended to use a utility knife with a retractable blade as it allows for more control and safer cuts.
Q2: Is it necessary to wear safety goggles and gloves while cutting cork flooring?
A2: Yes, wearing safety goggles and gloves is crucial to protect yourself from potential injuries while handling sharp tools.
II. Marking and Measuring:
Accurate measurements and markings are essential for achieving seamless cuts in cork flooring. Follow these steps:
1. Measure Twice: Double-check your measurements to ensure accuracy. Measure the length and width of the area where you plan to install cork flooring.
2. Mark the Tiles: Using a pencil or marker, mark the measurements directly onto the cork tiles. Make sure to use a straight edge to create straight lines.
3. Allow for Expansion: It is essential to leave a small gap around the perimeter of the room to allow for natural expansion and contraction of the cork flooring.
FAQs:
Q1: How much gap should I leave around the perimeter of the room?
A1: It is recommended to leave a 1/4-inch gap around the edges of the room to accommodate potential expansion and contraction of the cork flooring.
Q2: Can I use a regular pencil instead of a marker for marking measurements on cork tiles?
A2: Yes, a regular pencil can be used; however, make sure it creates visible marks that won’t easily smudge or fade during the cutting process.
III. Cutting Cork Flooring Tiles:
Now that you have accurately marked your measurements on the cork flooring tiles, it’s time to start cutting. Follow these steps for precise cuts:
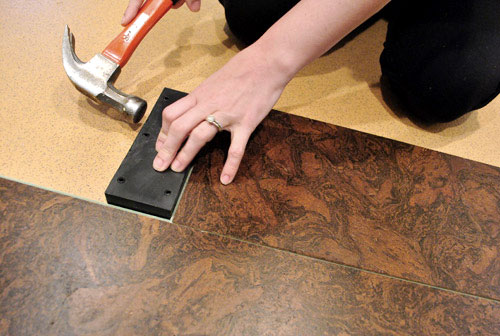
1. Score the Surface: Place the straight edge along the marked line and apply gentle pressure with a utility knife to score the surface of the cork tile. Repeat this process multiple times until you have created a deep groove.
2. Snap Along the Groove: Once you have scored the surface, carefully snap or bend the tile along the groove by applying pressure with your hands. The tile should break cleanly along the scored line. 3. Fine-Tune the Cut: If the tile doesn’t break cleanly or if there are any rough edges, use the utility knife to carefully trim and refine the cut. Make sure to follow the scored line and take your time to achieve a precise cut.
4. Repeat the Process: Continue marking and cutting each tile according to your measurements until you have enough tiles to cover the desired area.
FAQs:
Q1: What should I do if the tile doesn’t break cleanly along the scored line?
A1: If the tile doesn’t break cleanly, use the utility knife to trim and refine the cut. Take your time and make small adjustments until you achieve a precise cut.
Q2: How can I ensure all my cuts are consistent in size?
A2: Double-check your measurements before marking and cutting each tile. Use a straight edge for guidance and take your time to score and snap along the marked lines carefully. Additionally, you can use a square tool to ensure that your cuts are at right angles. This will help maintain consistency in size and shape for each tile. It is also helpful to use a sharp utility knife to make clean and precise cuts. Finally, take your time and be patient with the cutting process to avoid any mistakes or errors. For Expansion: Leaving a small gap around the perimeter of the room is crucial to accommodate the natural expansion and contraction of cork flooring. This is because cork is a natural material that can expand and contract with changes in temperature and humidity. Without a gap, the flooring could buckle or warp.
FAQs:
Q1: How much gap should I leave around the perimeter of the room?
A1: It is recommended to leave a 1/4-inch gap around the edges of the room to allow for potential expansion and contraction of the cork flooring. This should provide enough space for any movement without compromising the stability of the flooring.
Q2: Can I use a regular pencil instead of a marker for marking measurements on cork tiles?
A2: Yes, you can use a regular pencil for marking measurements on cork tiles. However, make sure that the marks are visible and won’t easily smudge or fade during the cutting process. It’s important to have clear markings to ensure accurate cuts.
III. Cutting Cork Flooring Tiles:
Now that you have marked your measurements on the cork flooring tiles, it’s time to cut them. Follow these steps for precise cuts:
1. Score the Surface: Place a straight edge along the marked line and gently score the surface of the cork tile using a utility knife. Repeat this process multiple times until you have created a deep groove. Scoring helps weaken the material and makes it easier to snap along the line.
2. Snap Along the Groove: Once you have scored the surface, carefully snap or bend the tile along the groove by applying pressure with your hands. The tile should break cleanly along the scored line. If it doesn’t break cleanly, proceed to step 3.
3. Fine-Tune the Cut: If there are any rough edges or if the tile didn’t break cleanly, use a utility knife to trim and refine the cut. Follow the scored line and make small adjustments until you achieve a precise cut. Take your time and be patient to avoid any mistakes.
4. Repeat the Process: Continue marking and cutting each tile according to your measurements until you have enough tiles to cover the desired area. Double-check your measurements before each cut to ensure consistency in size and shape.
FAQs:
Q1: What should I do if the tile doesn’t break cleanly along the scored line?
A1: If the tile doesn’t break cleanly, use a utility knife to trim and refine the cut. Take your time and make small adjustments until you achieve a precise cut. It’s important to be patient and cautious during this process to avoid any damage to the tile or uneven cuts.
Q2: How can I ensure all my cuts are consistent in size?
A2: To ensure consistent cuts, double-check your measurements before marking and cutting each tile. Use a straight edge as a guide while scoring and snapping along the marked lines. Additionally, using a square tool can help maintain right angles for each cut. Using a sharp utility knife will also result in clean and precise cuts. Lastly, take your time and be patient with the cutting process to avoid any mistakes or errors.