Planks can be stapled down, glued down or even floated over different types of sub floors. This usually entails sanding the wood surface and then re-staining. Knowing that, it is crucial to learn to take goood care of your new flooring to get it in great condition for the longest possible time. If not been to to, this can actually strip away the finish & leave raw wood exposed.
Images about Engineered Hardwood Flooring Installation Guidelines

The bulk of folks offering hardwood flooring know very little concerning moisture and wood, if they do not even have a moisture meter, that's an indicator that they're not professional and know nothing or even very little about hardwood flooring and should not be selling it. Installation time can be minimized with pre finished hardwood flooring which takes away the application and drying time of the finish as well as sealer.
How to Install an Engineered Hardwood Floor

The most common installations for concrete slabs are actually glue-down and floating, simply because it's not achievable to staple or nail into concrete when putting in engineered hardwood. Some people find that making it into many small parts is much more reasonable than working to fit a large piece of the room. Obviously you are able to buy a hardwood floor if you have a dog.
Installation

How To Lay Engineered Wood Flooring A DIY Guide For Everyone

Engineered Hardwood Floor Installation: Part 1
How To Install Click Lock Engineered Hardwood Flooring

A Hardwood Floor Installation Guide for Both Engineered and Non

engineered-wood-flooring-installation-guide Maintenance

How to Lay Engineered Timber Floor Guide Fantastic Handyman AU
Which Tools Do You Need to Install Engineered Hardwood Floors

How to Install an Engineered Hardwood Floor
Installing Engineered Hardwood on Concrete – Twenty u0026 Oak

Installing Engineered Hardwood Flooring: Your Guide – PurezaWood

Guide To Installing A Wooden Floor JFJ Timber Experts

Related Posts:
- Hardwood Floor Beveled Edges
- Cumaru Hardwood Flooring Pictures
- Hardwood Floor Furniture Gripper Pads
- Engineered Hardwood Flooring On Concrete Slab
- Hardwood Floor Cleaner For Water Based Finish
- Quick Click Engineered Hardwood Flooring
- Electrical Outlet In Hardwood Floor
- Hardwood Floor Brush Attachment
- Hardwood Flooring Liquidation Sale
- Bona Hardwood Floor Cleaner Concentrate Gallon
Engineered Hardwood Flooring Installation Guidelines
Engineered hardwood flooring is a great alternative to solid hardwood flooring. It’s just as beautiful, but it’s more durable and easier to install. If you are looking to install engineered hardwood in your home, here are some guidelines to help ensure you do it correctly.
Preparing the Subfloor
The first step in installing engineered hardwood flooring is preparing the subfloor. The subfloor must be clean, level, and free of any debris. If there are any bumps, dips, or irregularities in the subfloor, they should be filled with a self-leveling compound. You should also check for moisture content in the subfloor and make sure it is not higher than 4%. If the moisture content is higher, it should be treated with a sealant or moisture barrier before installation begins.
Acclimating the Engineered Hardwood
After you have prepared the subfloor, you will need to acclimate your engineered hardwood planks. This means that you should leave them in the room where they will be installed for at least 48 hours prior to installation. This allows them to adjust to the temperature and humidity of the room so they don’t expand or contract after installation.
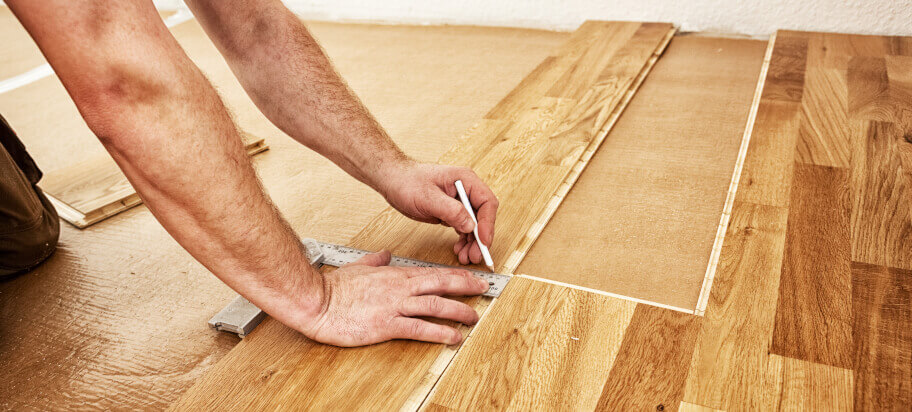
Layout and Measurement
Once the engineered hardwood planks have been acclimated, you can begin laying them out on the subfloor. You should start by measuring and marking where each plank will go and then drawing a square around each plank to make sure it fits correctly. Be sure to leave enough space between boards for expansion during hot weather and contraction during cold weather. You should also make sure that all cuts are made with a saw that is specifically designed for cutting engineered hardwood flooring planks.
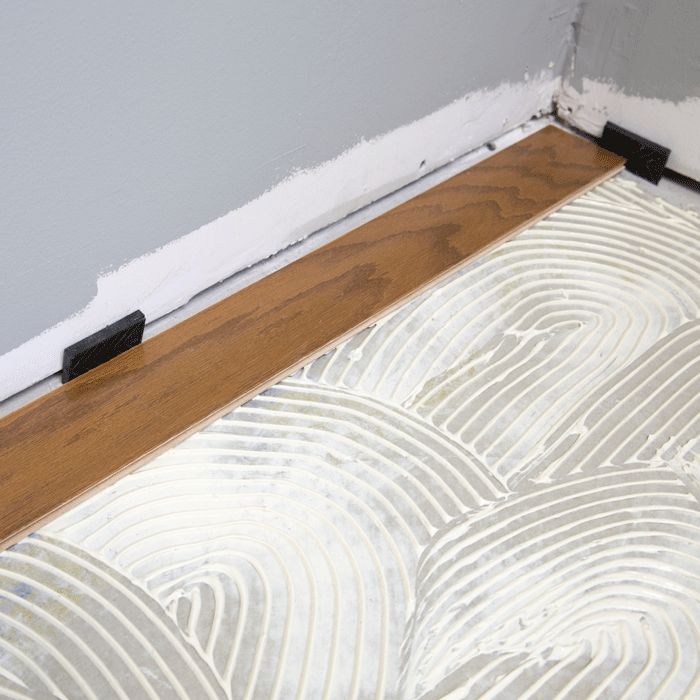
Installing the Planks
Once all of your planks are cut and laid out on the subfloor, you can begin installing them. Start at one corner of the room and work your way out from there. You should use an adhesive specifically designed for engineered hardwood flooring to attach each plank to the subfloor. Be sure not to over-apply adhesive as this can cause damage to the planks when they expand or contract. Use a roller or mallet to tap each plank into place and make sure there are no gaps between planks.
Finishing Touches
Once all of your planks have been installed, you can begin adding finishing touches such as trim pieces around doorways or other areas where planks meet walls or cabinetry. You may also need to add an additional layer of adhesive if any gaps have opened up between planks due to expansion or contraction over time. Finally, you can apply a finish such as polyurethane or varnish to protect your new engineered hardwood flooring from wear and tear over time.
FAQs About Engineered Hardwood Flooring Installation Guidelines:
Q: How long should I acclimate my engineered hardwood?
A: It is recommended that you allow your engineered hardwood planks to acclimate for at least 48 hours prior to installation so that they can adjust to the temperature and humidity of their new environment before they are installed on the sub Floor.