This is like two shorter planks so appears more like solid wood flooring. To sand it all means that the use level needs to be thicker than the level of the nails and have room to sand off the micro bevel between boards; that amounts to a good deal of sanding. Specialized wooden floor restoration companies will have invested in the proper machinery for the job and in addition in the suitable training.
Images about Fitting Wood Flooring Around Doors

The benefits associated with the wood floor of yours oiled is that it will keep for longer and will in addition retard the aging process so you can keep the colour you initially purchased. Engineered wood flooring is built to be stable, and solid wood flooring surfaces could just not participate in this arena. Another advantage is that the factory finishes are often a lot tougher than the polyurethane used in the field.
How to Lay Laminate Flooring Through a Doorway Blog Floorsave
Solid wood flooring will last over 100 years, along with the finish can be easily renewed when needed. Reclaimed wood floors, produced without cutting trees, are a niche industry and are frequently created by small businesses for instance the camera pictured within the slides. Check with people that have had their wood flooring fitted. The internet is additionally a very good source of information for wood flooring.
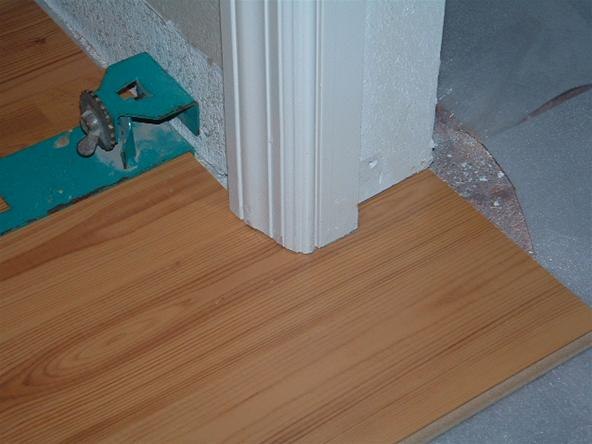
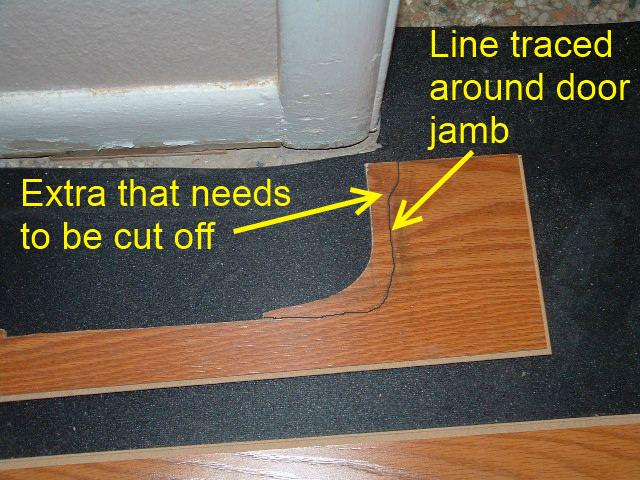
Installing Engineered Flooring Around Door Jambs

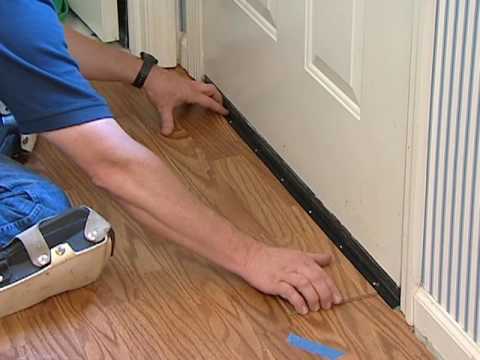
Laminate Flooring Installation –Undercutting Door Frames (Airbase Carpet and Tile)
How to lay laminate in a doorway for perfect flooring transitions
Installing a Laminate Floor around the Door Frame/Door Jamb in Hallway Mryoucandoityourself
How to lay laminate flooring around doors HowToSpecialist – How
How to lay laminate in a doorway for perfect flooring transitions
Awesome How To Put Laminate Flooring Around Door Frame And

Pro Tips and Tricks for Installing Laminate Flooring Family Handyman

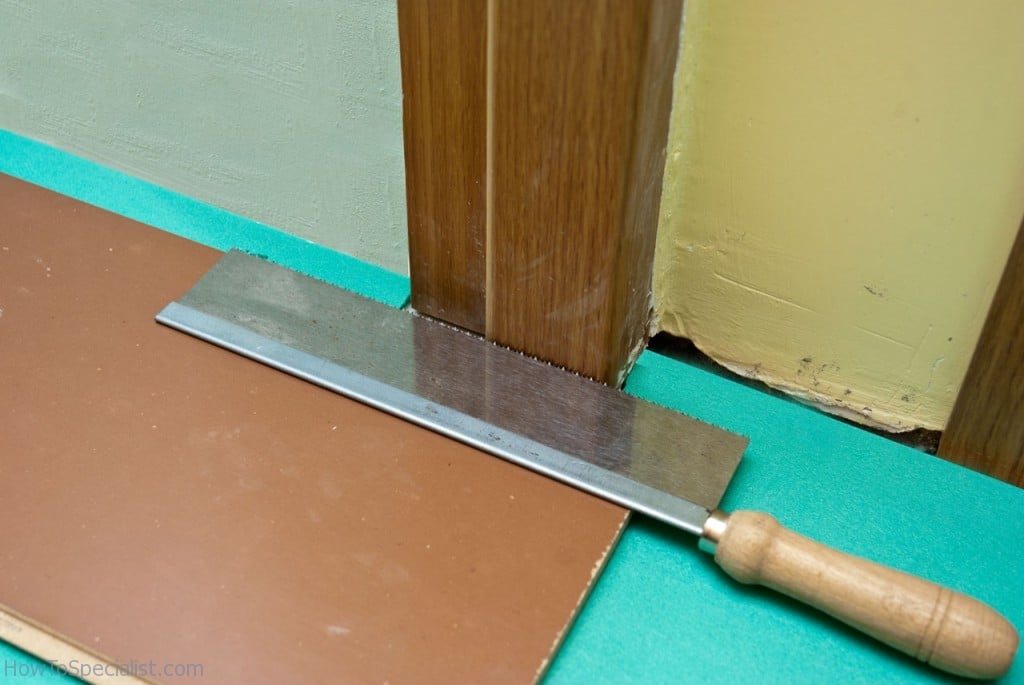
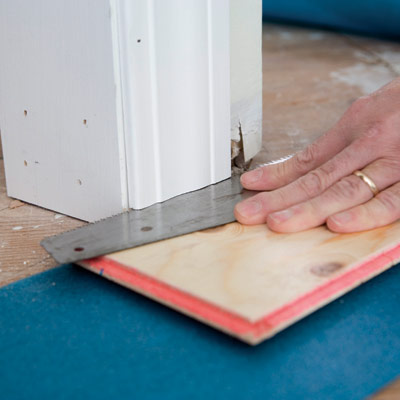
Jamb Saws – Undercut Door Casings
How to lay laminate flooring around doors HowToSpecialist – How

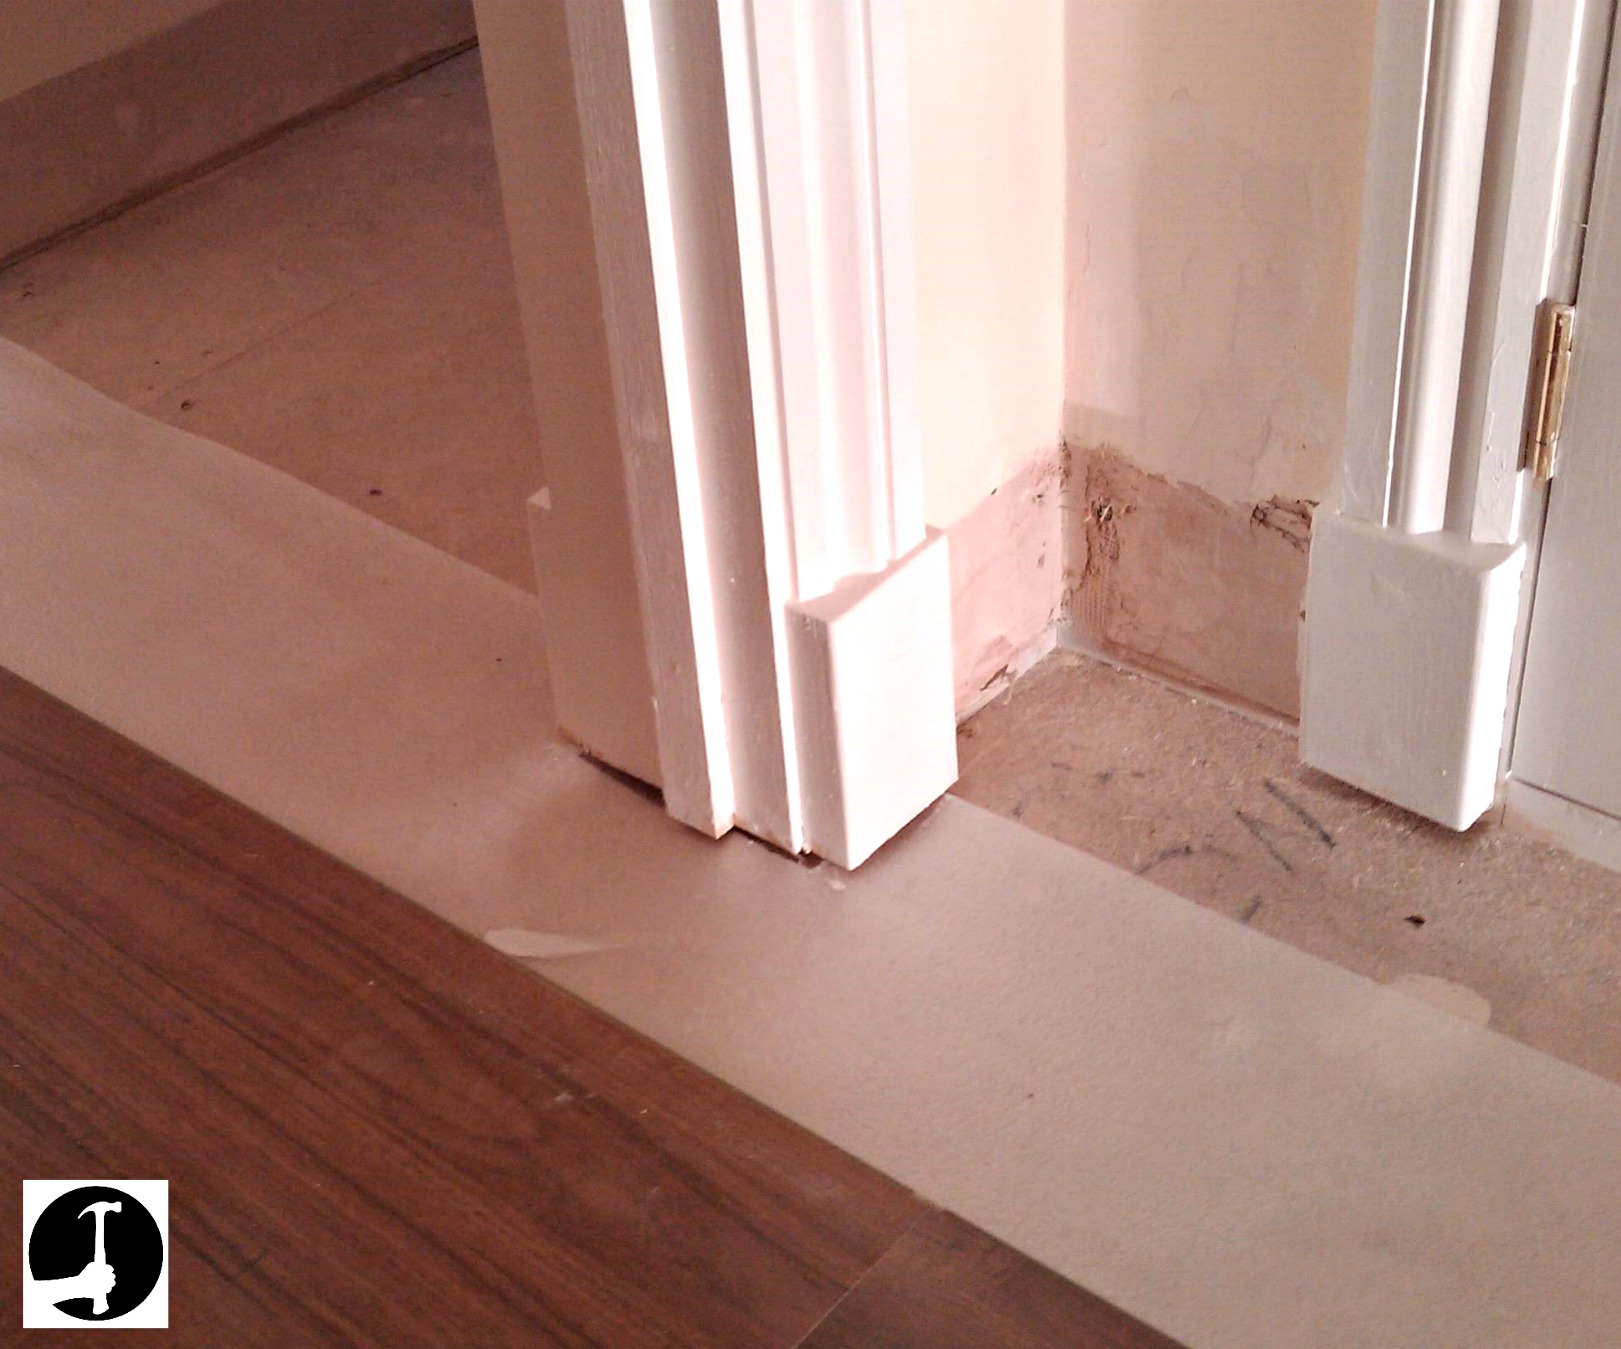
How to Fit Solid Wood Flooring Through Doorway Blog Floorsave
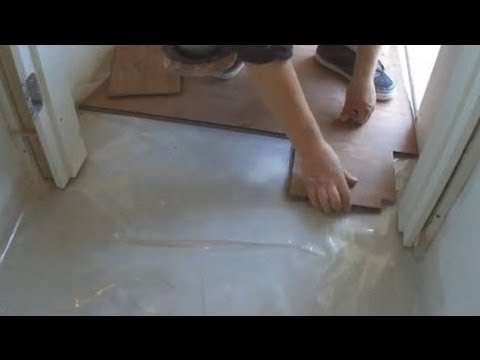
Installing Last Row of Laminate Flooring in Hallways
Related Posts:
- Waterproof Wood Floor Paint
- Wood Floor Cleaner Method
- How To Install Wood Flooring Over Tile
- Wood Flooring On Stairs Safety
- Wood Floor Water Stain
- Walnut Wood Floor Stain
- Wood Floor Sleepers
- Wood Flooring Ideas Patterns
- Honey Maple Wood Flooring
- Light Gray Engineered Wood Flooring
Fitting Wood Flooring Around Doors: A Comprehensive Guide
Wood flooring adds warmth and character to any space, creating a timeless and elegant look. However, when it comes to fitting wood flooring around doors, it can be a challenging task that requires precision and attention to detail. In this comprehensive guide, we will explore the different methods and techniques to seamlessly fit wood flooring around doors, ensuring a professional and flawless finish.
I. Preparing the Door Frame
Before you start fitting wood flooring around doors, it is essential to prepare the door frame properly. This involves removing the existing door trim or architrave and assessing the height of the door frame in relation to the thickness of the new flooring.
1. Removing Door Trim or Architrave
To begin, carefully remove the door trim or architrave using a pry bar or chisel. Take your time during this process to avoid damaging the surrounding walls or the door frame itself. Once removed, set aside the trim for later reinstallation.
2. Assessing Door Frame Height
Measure the height of the door frame from the floor to determine if any adjustments need to be made before fitting the wood flooring. If the new flooring is thicker than the previous one, you may need to trim some of the door frame to maintain a harmonious transition between rooms.
FAQs:
Q: Can I install wood flooring without removing the door trim?
A: While it is technically possible, removing the door trim ensures a neater and more professional finish. It allows for a seamless transition between rooms and prevents potential issues with floor movement or creaking sounds caused by friction between the flooring and trim.
Q: How much should I trim off the door frame if needed?
A: The amount you need to trim off depends on the thickness of your new flooring. Generally, it is recommended to leave a 10mm (0.4 inches) gap between the bottom of the door and the flooring to allow for expansion and contraction. Therefore, if your new flooring is 15mm (0.6 inches) thick, you may need to trim off 5mm (0.2 inches) from the door frame.
II. Installing Underlay
Once the door frame is prepared, the next step is to install underlay. Underlay acts as a cushioning layer between the subfloor and the wood flooring, providing stability and reducing noise transmission.
1. Clearing the Subfloor
Ensure the subfloor is clean and free from any debris or dust that could affect the adhesion of the underlay. If necessary, sweep or vacuum the area thoroughly before proceeding.
2. Cutting and Fitting Underlay
Measure the width of the door frame opening and cut the underlay accordingly, leaving a small gap around 10mm (0.4 inches) from each side to allow for expansion. Lay the underlay across the entire floor, making sure it fits snugly against walls and other obstacles.
3. Securing Underlay in Place
To secure the underlay in place, use adhesive tape or adhesive spray along the edges where it meets walls or other underlays. This will prevent any movement during installation and ensure a seamless transition between rooms.
FAQs:
Q: Can I skip installing underlay?
A: While it is possible to install wood flooring without underlay, it is highly recommended to use it for several reasons. Underlay provides insulation against moisture, reduces noise transmission, and adds cushioning to increase comfort when walking on the Wood flooring. It also helps to level out any imperfections in the subfloor and can extend the lifespan of your wood flooring by protecting it from potential moisture damage.
Q: What type of underlay should I use?
A: The type of underlay you should use depends on various factors such as the type of wood flooring, the subfloor material, and any specific requirements or preferences you may have. Common types of underlay include foam, cork, and rubber. It is best to consult with a flooring professional or refer to the manufacturer’s recommendations for guidance on selecting the appropriate underlay for your specific situation.
III. Installing Wood Flooring
Once the underlay is in place, you can proceed with installing the wood flooring. Here are the steps to follow:
1. Acclimating the Wood Flooring
Before installation, allow the wood flooring to acclimate to the room’s temperature and humidity levels for at least 48 hours. This will help prevent warping or shrinking after installation.
2. Starting in a Corner
Begin installation in one corner of the room, preferably against a wall that is perpendicular to the floor joists. Leave a gap of around 10mm (0.4 inches) between the first row of flooring and the wall to allow for expansion.
3. Interlocking the Planks
Fit each plank together by interlocking their tongues and grooves. Use a tapping block and mallet to ensure a tight fit between planks. Stagger each row so that end joints do not align with adjacent rows, creating a more stable and visually appealing installation.
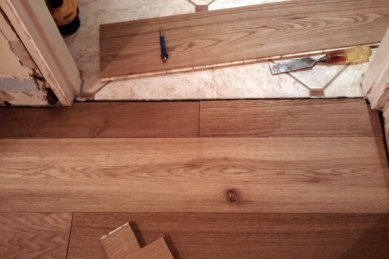
4. Cutting and Trimming Planks
As you reach the end of a row or encounter obstacles such as doorways or vents, measure and cut the planks accordingly to fit. Use a saw or a specialized flooring tool for clean and precise cuts.
5. Securing the Last Row
When installing the last row of flooring, you may need to trim the planks to fit. Use a pry bar and pull bar to secure the planks in place, ensuring they are snug against the previous row.
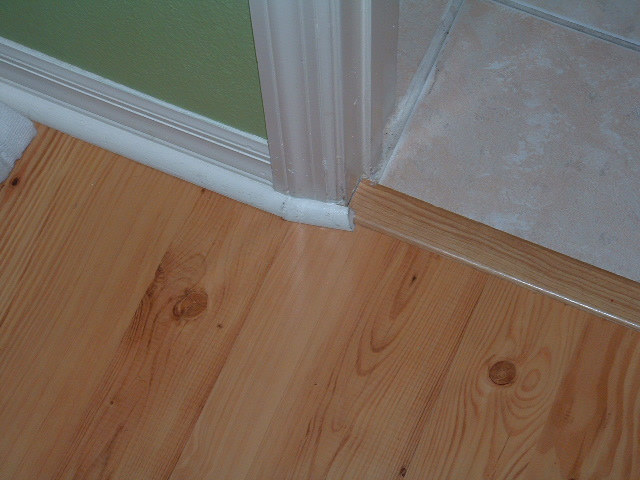
6. Finishing Touches
Once the wood flooring is installed, replace the door trim or install new trim if necessary. Install any transition pieces or thresholds to create a seamless transition between rooms or different types of flooring. Clean up any excess glue or debris from the installation process.