This particular flooring style does not need to be typically cleaned, but if it'll be required next just create a solution using water and vinegar. It's recommended that you split your garage into sections and split the job to make it easier on yourself. But sometimes, people use a mix of both. These can be used as tile flooring tips to make a quality done with look to each room.
Images about How To Put In A Heated Tile Floor

This's needed for you to have the ability to calculate precisely what number of tiles you will need. In the more conventional days, tiles were only used in rooms with a good deal of tumble, rough, traffic, and moisture. There's great independence in the usage of mosaic tiles in addition to most individuals which hire artists to design their house choose to work with these as their medium.
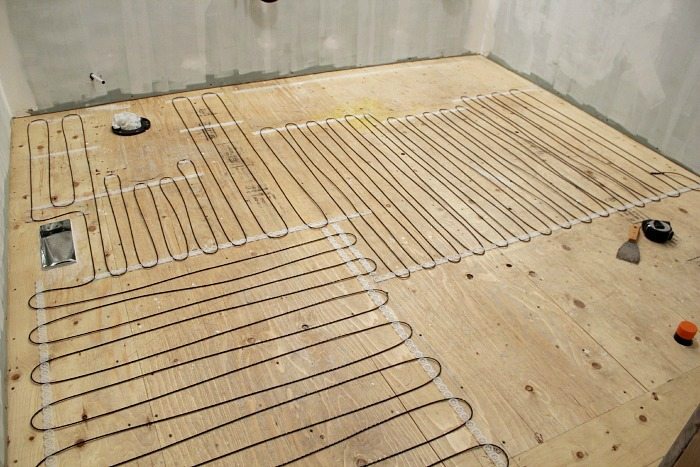
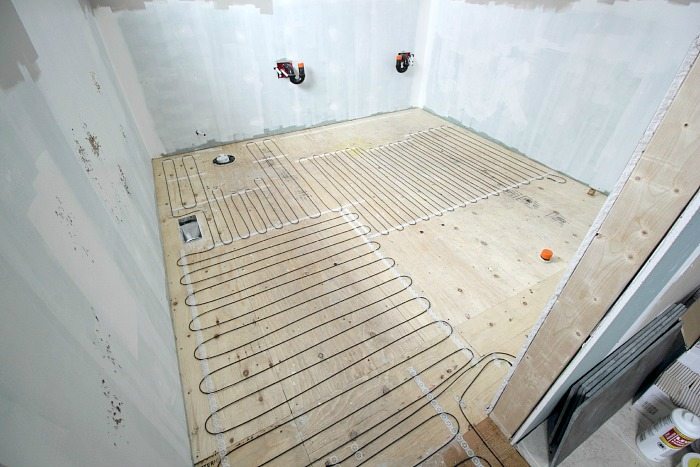
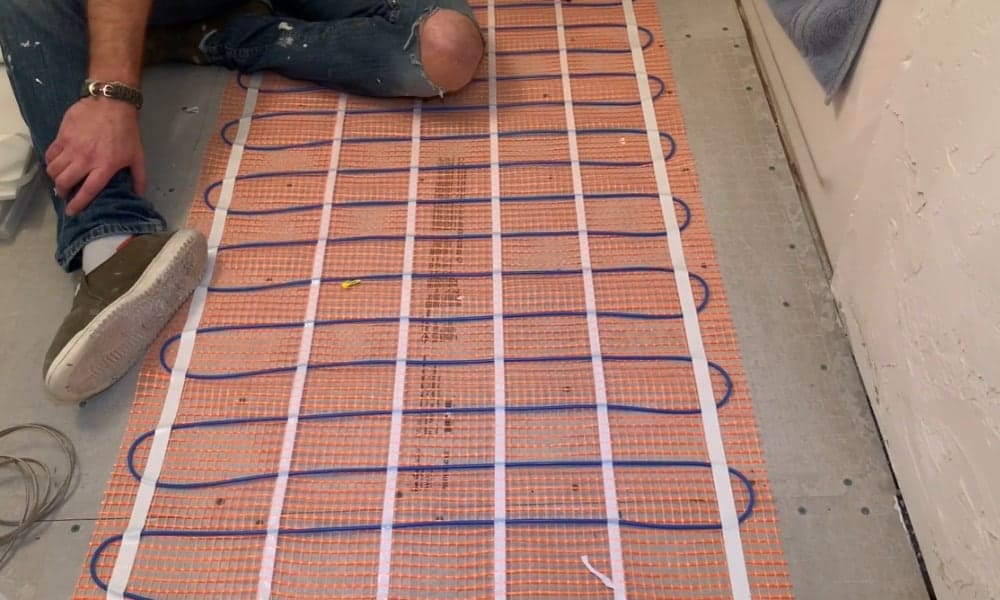
How to install a heated tile floor. and also how NOT to install
Many master installers can get you tile at a fantastic discount, especially when they are putting in the tile flooring. A number of the possible choices are stock items so you will not have to hold out for a specific order to come in. You are able to use a tile cutter or perhaps a glasscutter for modest tasks, but for larger tasks you may possibly need to have a damp saw.
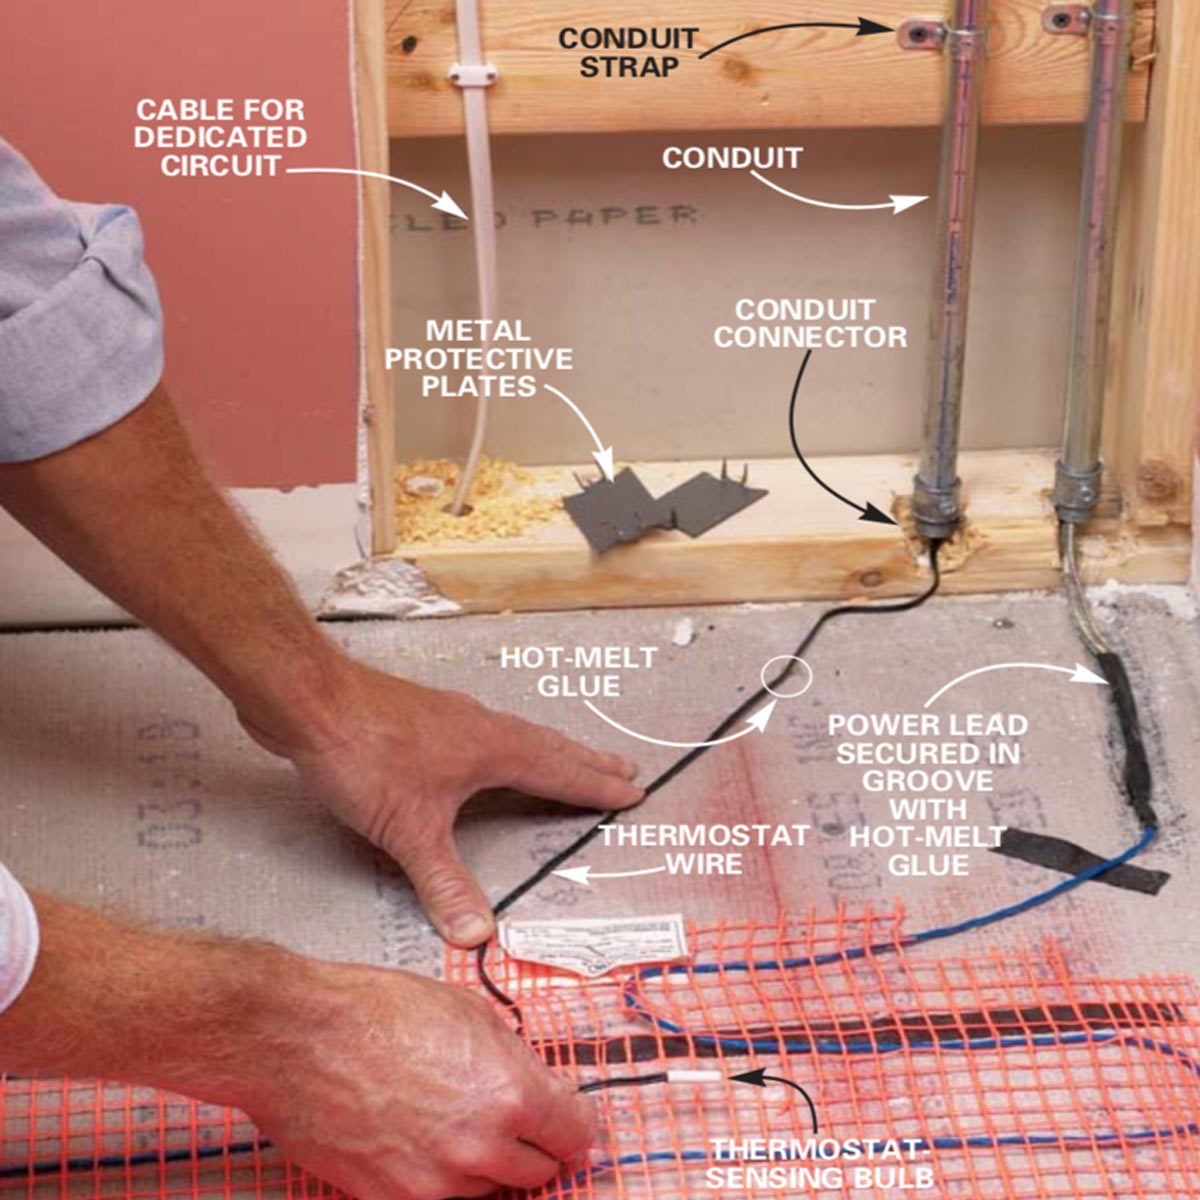
How to Install In-Floor Radiant Heat
Heated Tile Floor on Slab » Rogue Engineer

How to install a heated tile floor. and also how NOT to install
How to Install In-Floor Radiant Heat

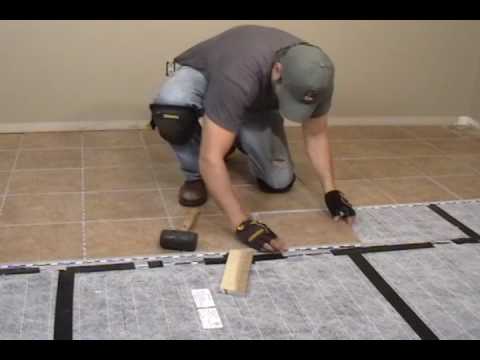
Heated Floor Tile Installation
How to install a heated tile floor. and also how NOT to install

How to Install a Heated Tile Floor u0027How-Tou0027 u0026 DIY Blog – PlumbTile

How to Install In-Floor Heating for your Bathroom? (Step-by-Step
How to Install Heated Floors Under Tile: a Definitive Guide

Some Like It Hot: In-Floor Heating Options – Architessa

Installing Radiant Floor Heat – This Old House
/cdn.vox-cdn.com/uploads/chorus_asset/file/21881007/iStock_980072098.jpg)
Radiant Floor Heating: All About Electric and Hydronic Systems
/cdn.vox-cdn.com/uploads/chorus_asset/file/20789538/K0DFK3.jpg)
Related Posts:
- Toilet Flange Height Tile Floor
- How To Stain Ceramic Tile Floors
- Click Luxury Vinyl Tile Flooring
- What Do You Clean Tile Floors With
- Do I Need Backer Board For Tile Floor
- Faux Tile Flooring For Kitchen
- Ultra Tile Flooring
- Care Of Saltillo Tile Floors
- Dark Bathroom Tile Floors
- How To Drill A Hole In Tile Floor
How To Put In A Heated Tile Floor
Introduction:
A heated tile floor can seamlessly blend functionality and luxury, providing warmth and comfort to any room in your home. Whether you’re considering this project for your bathroom, kitchen, or any other area, installing a heated tile floor is a worthwhile investment that can greatly enhance your living space. In this comprehensive guide, we will walk you through the step-by-step process of how to put in a heated tile floor, from the necessary preparations to the final installation. So let’s dive in and transform your chilly floors into cozy havens.
Preparation:
Before you embark on the installation of a heated tile floor, it’s crucial to ensure that you have all the necessary tools and materials readily available. Here’s a list of items you’ll need for this project:
1. Electric radiant heating system: Choose a reputable brand that offers quality products with warranties. Consider factors such as the size of the room and the voltage requirements when selecting the appropriate system.
2. Insulation boards: These boards help prevent heat loss and improve energy efficiency. They also act as a moisture barrier.
3. Cement backer boards: These sturdy boards provide a stable surface for your tiles to adhere to and help distribute heat evenly.
4. Tile adhesive: Opt for a high-quality adhesive recommended by your tile manufacturer.
5. Tiles: Select tiles that are suitable for use with heated floors, such as ceramic or porcelain tiles.
6. Grout: Choose grout that complements your tile color and is compatible with radiant heat systems.
7. Notched trowel: This tool is used for spreading adhesive evenly on the floor.
8. Tile cutter or wet saw: Depending on the complexity of your project, you may need either a manual tile cutter or an electric wet saw to make precise cuts.
9. Leveling tools: A bubble level or laser level is essential for ensuring an even surface during installation.
10. Safety gear: Don’t forget to equip yourself with safety goggles, gloves, and knee pads to protect yourself during the installation process.
Now that you have gathered all the necessary tools and materials, let’s move on to the next step.
Step 1: Preparing the Subfloor
Ensuring a smooth and even subfloor is essential for a successful heated tile floor installation. Here’s how to do it:
1. Clear the area: Remove any furniture, rugs, or obstructions from the room to create a clean and empty space.
2. Inspect the subfloor: Check for any loose boards or damaged areas. Repair or replace them as needed to create a solid base for your heated tile floor.
3. Clean the subfloor: Remove any debris, dust, or grease from the surface using a broom or vacuum cleaner. A clean subfloor ensures better adhesion of your backer boards.
FAQs:
Q: Can I install a heated tile floor over an existing floor?
A: Yes, you can install a heated tile floor over an existing floor. However, it’s important to ensure that the existing flooring is in good condition and level before proceeding with the installation. If necessary, you may need to remove any high spots or repair damaged areas before moving forward.
Q: Do I need to remove baseboards before installing a heated tile floor?
A: It is not always necessary to remove baseboards before installing a heated tile floor. However, keep in mind that the height of your finished floor will increase with the addition Of backer boards and tiles. If this will interfere with the placement of your baseboards or if you prefer a cleaner look, it may be best to remove them before installation. Q: Can I install a heated tile floor in a bathroom?
A: Yes, you can install a heated tile floor in a bathroom. In fact, it is a popular choice for bathrooms as it provides warmth and comfort underfoot. Just make sure to choose tiles that are suitable for wet areas and follow proper waterproofing procedures to protect the subfloor from moisture. Q: How do I choose the right grout color for my tiles?
A: When choosing grout color, consider the overall look you want to achieve. If you want a seamless and uniform appearance, choose a grout color that matches or closely complements the color of your tiles. If you want to highlight the individual tiles, choose a contrasting grout color. It’s also important to ensure that the grout is compatible with your radiant heat system.
Q: What is the purpose of a notched trowel in tile installation?
A: A notched trowel is used to spread adhesive evenly on the floor. The notches on the trowel create ridges that help improve the adhesion of the tiles to the floor. The size of the notches on the trowel will depend on the size and type of tiles being installed.
Q: What is the difference between a manual tile cutter and an electric wet saw?
A: A manual tile cutter is a handheld tool that is used to score and snap ceramic or porcelain tiles. It is suitable for straight cuts and smaller projects. An electric wet saw, on the other hand, uses a diamond blade and water to make precise cuts on various types of tiles, including larger and more complex cuts. Wet saws are often used for professional installations or larger projects.
Q: How do leveling tools help in tile installation?
A: Leveling tools such as bubble levels or laser levels are essential for ensuring an even surface during tile installation. They help identify any uneven areas or slopes in the subfloor, which can affect the final result of your tile installation. By using these tools, you can make necessary adjustments to ensure that your tiles are laid flat and level.
Q: Why is safety gear important during tile installation?
A: Safety gear such as goggles, gloves, and knee pads protect you from potential hazards during tile installation. Goggles protect your eyes from flying debris or particles, gloves provide grip and protect your hands from sharp edges, and knee pads cushion your knees and prevent discomfort or injury when kneeling on hard surfaces. It’s important to prioritize your safety while working with tools and materials.