There are plenty of different kinds of bathroom flooring available- you can go in for ceramic types, linoleum flooring, vinyl tiles, marble flooring and even hardwood floors. Marble mosaic tiles could have a matte or glossy finish. You are going to have to go over the backing entirely with glue in case you desire to put it with the floor.
Images about Level Bathroom Floor For Tile

At the more expensive end of the cost line there’s granite, marble and some higher end tiles. Blending several types of mosaic tiles are furthermore a great strategy. Glass mosaic tiles are ideal for boarders and accents. Hardwood floors are fabulous as they create a warm and classic appearance in your bathroom. You can pick from marble, granite, limestone as well as other stone flooring choices offered by firms.
Gray floor level shower tiled with gray herringbone pattern tiles

Another concept while trial and error with bathroom ceramic tiles is actually using a single big printed tile as the centerpiece and fence it with plain colored tiles. They can be arranged as swirls, arenas, waves and so on Different colored mosaics will be able to be utilized to piece together a job of art like an underwater theme or a flower. They are available in colors that are different & textures.
How to Tile a Small Bathroom Floor DIY Bath Remodel

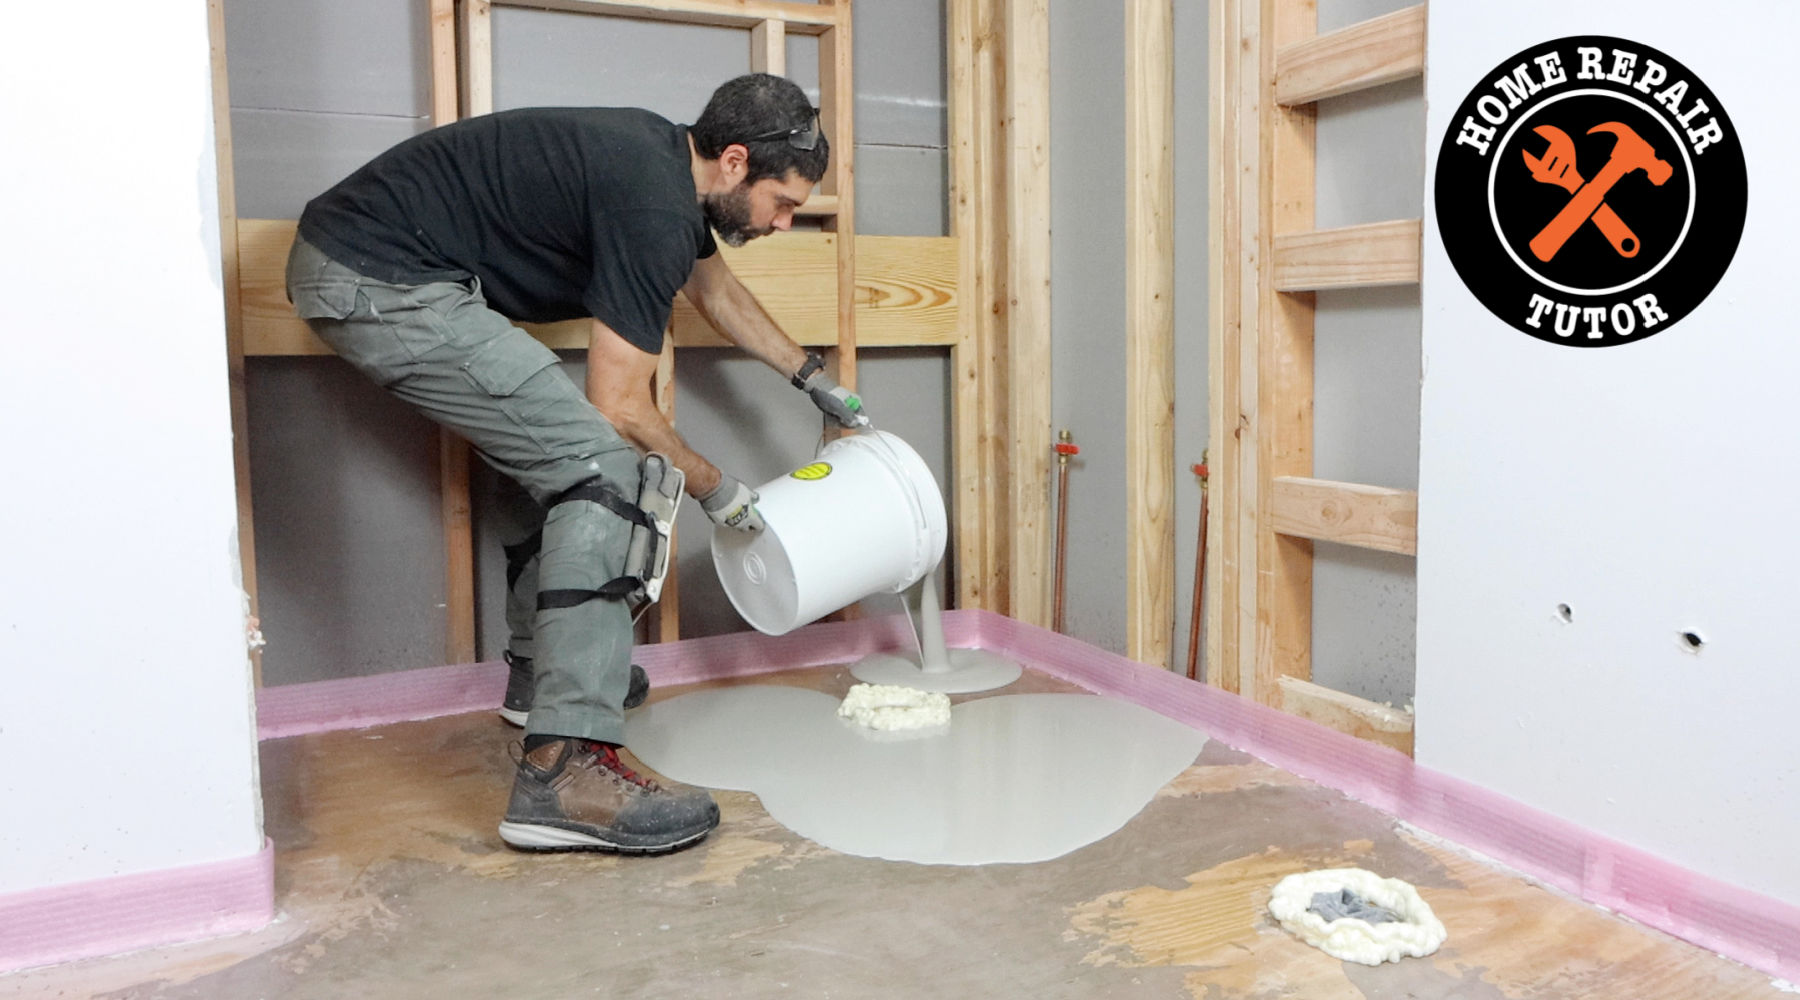
Self Leveling Bathroom Floor Tips – Home Repair Tutor
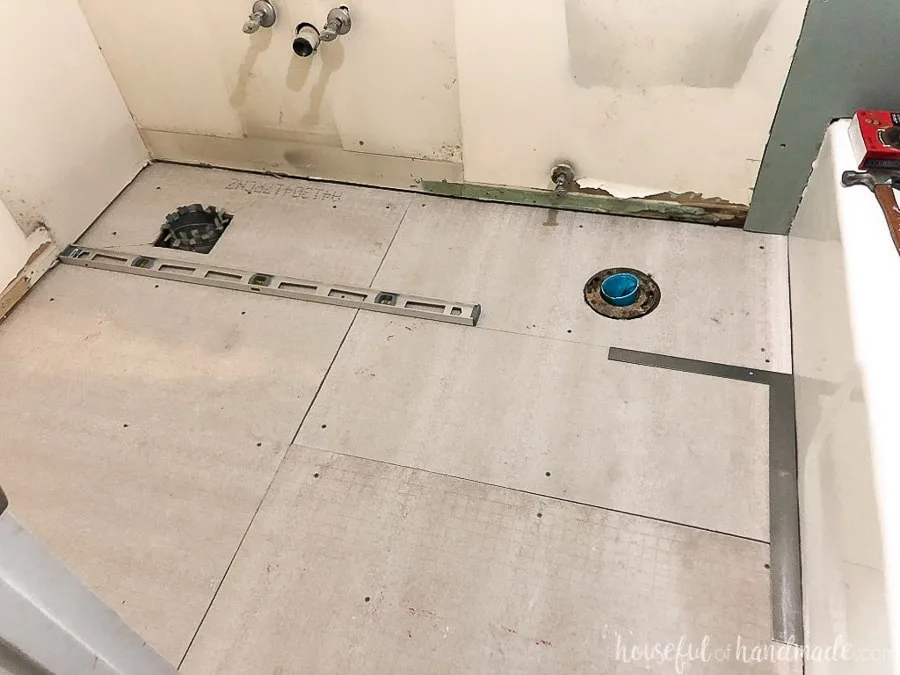
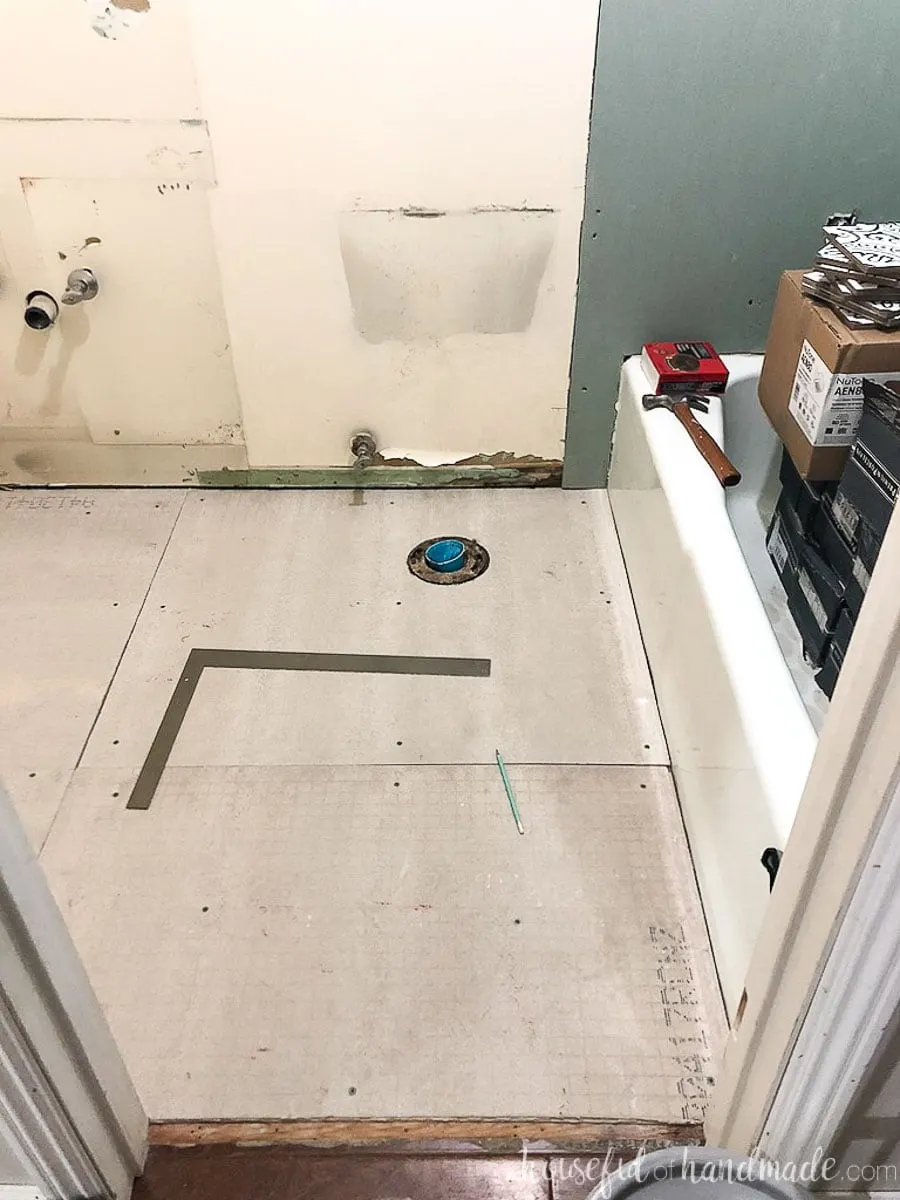
Laying Floor Tiles in a Small Bathroom – Houseful of Handmade
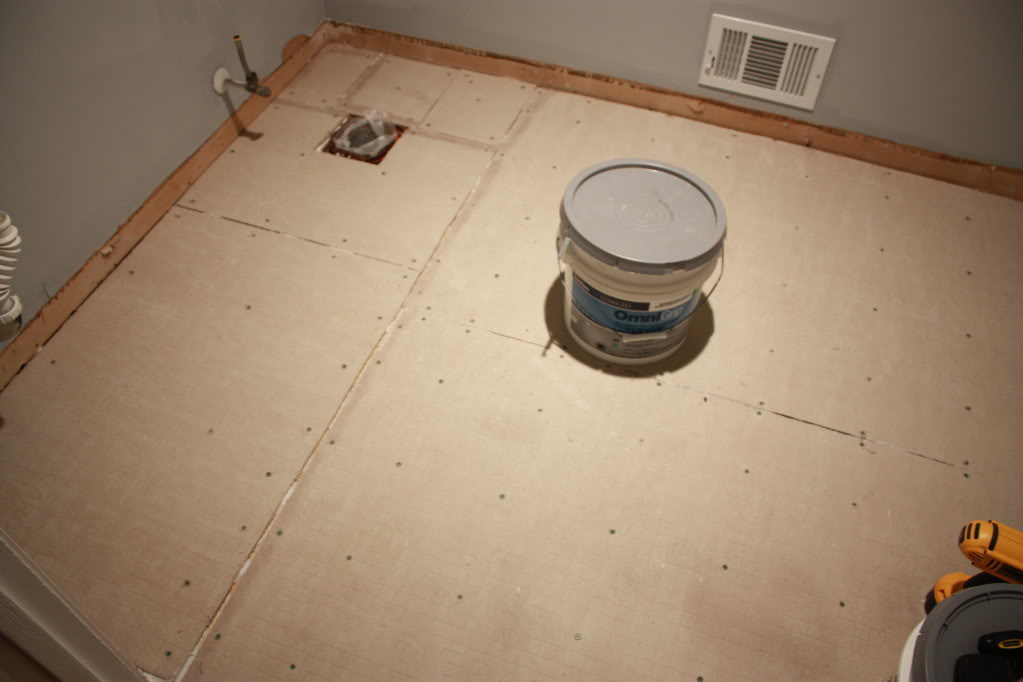
How to Prepare a Subfloor for Tile Installation
How to Tile a Bathroom Floor with Wickes

Tiling Tips for Bathrooms – Bower Power
How to Lay Tile: Install a Ceramic Tile Floor In the Bathroom (DIY)

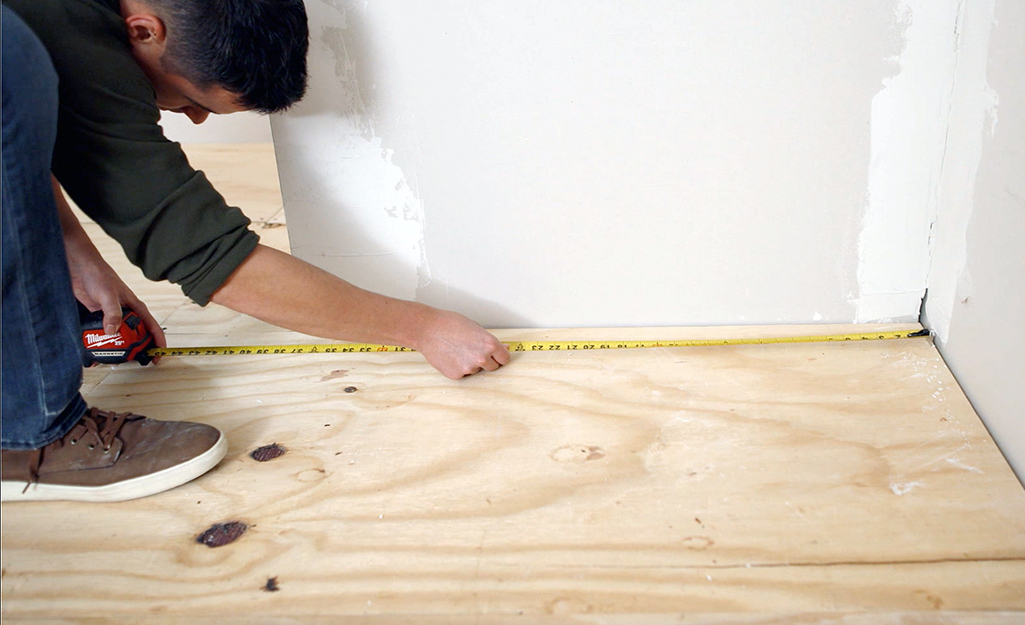
How to Level Old Plywood Floor Before Laying Ditra and Tile DIY
The Best Flooring Options for Bathrooms – This Old House

How to Lay a Tile Floor HGTV

Laying Floor Tiles in a Small Bathroom – Houseful of Handmade
Bathroom Renovation – Floor-Level Shower Install Diy bathroom

Related Posts:
- What Tiles Are Best For Bathroom Floor
- Small Basement Bathroom Floor Plans
- Medium Sized Bathroom Floor Plans
- Can Bamboo Flooring Be Used In A Bathroom
- Ada Compliant Bathroom Floor Plan
- Mid Century Modern Bathroom Flooring
- How To Replace A Bathroom Floor Tile
- Classic Black And White Bathroom Floor Tile
- Blue Mosaic Bathroom Floor Tiles
- Grey Bathroom Floor Tile Ideas
How to Level a Bathroom Floor for Tile Installation
Installing beautiful tile in the bathroom can be a great way to update the look of the space. However, before you can install the tile, you have to ensure that the floor is level. Unlevel floors can cause tiles to crack or pop up over time. Thankfully, leveling a bathroom floor for tile installation is not difficult if you have the right tools and know-how.
Tools Needed for Leveling a Bathroom Floor
The first step in leveling a bathroom floor is to gather the needed tools. You will need:
– A rubber mallet
– A level
– A water level
– Cement board
– Construction screws and screws
– Mortar and trowel
– Grout
– Tile adhesive
– Tiles
Once you have all of these tools, you are ready to begin.
Preparing the Floor for Leveling
The next step is to prepare the floor for leveling. Start by removing any existing floor coverings such as carpet, vinyl, or laminate. Next, check for any areas of unevenness or dips in the floor. If any are found, use a rubber mallet to gently tap down any raised areas until they are even with the rest of the floor. Once this is done, it’s time to start laying down cement board.
Installing Cement Board
Cement board is a type of material that helps provide strength and stability for tiled floors. To install it, measure out enough cement board to cover the entire area where you will be installing tile and then cut it to size with a utility knife or saw. Next, use construction screws and screws to attach the cement board to the subfloor. Make sure that each screw is secure so that it won’t come loose when weight is placed on top of it. Finally, use a level and water level together to ensure that all edges of the cement board are even with each other.
Adding Mortar and Tiles
Once you have finished installing the cement board, it’s time to add mortar and tiles. Start by spreading an even layer of mortar over the cement board using a trowel. Then place your tiles one at a time onto the mortar, making sure that they are evenly spaced apart from each other and that they are level with each other as well. Once all of your tiles are in place, use grout to fill in any gaps between them and then let everything dry overnight before proceeding further. Once everything has dried, add tile adhesive around all edges of your tiles and let that dry as well before adding any weight onto them.
FAQs about Leveling Floor for Tile Installation
Q: How long does it take to level a bathroom floor?
A: The amount of time required will depend on several factors such as how large your bathroom is and what type of subfloor you have but typically it should take around 1–2 days from start to finish if done properly.
Q: What type of materials do I need for leveling my bathroom floor?
A: You will need rubber mallet, level, water level, cement board, construction screws and screws, mortar And trowel, grout, tile adhesive, and tiles.
What tools are needed to level a bathroom floor for tile?
1. Tape measure
2. Pencil or marker
3. Level
4. Trowel
5. Notched trowel
6. Floor grinder/edger (optional)
7. Tile spacers
8. Mortar and grout
9. Sponge
10. Bucket
11. Grout float
12. Caulk gun (optional)
The tools listed above are the standard tools needed to level a bathroom floor for tile installation. Depending on the specific project, additional tools may be needed. For example, if the subfloor needs to be leveled using a self-leveling compound, additional tools may be required.
What type of underlayment is needed for tiling a bathroom floor?
Most experts recommend using a thin foam underlayment specifically designed for tile floors. This type of underlayment will provide cushioning to the floor, help to absorb sound, and provide a moisture barrier. Make sure to follow the manufacturer’s instructions for installation.
What type of underlayment should I use for tiling a shower floor?
The best type of underlayment to use for tiling a shower floor is cement board. Cement board offers superior waterproofing and is the most durable underlayment option. It also provides a level surface for the tiles to adhere to, providing a longer-lasting installation.
What type of waterproof membrane should I use for tiling a shower floor?
The best type of waterproof membrane for tiling a shower floor is a liquid applied membrane, such as RedGard® or Hydro Ban®. These membranes are designed to be applied directly to the substrate before tiling, and provide a waterproof barrier that will protect your shower floor from water damage.
What is the difference between a waterproof membrane and a vapor barrier for tiling a shower floor?
A waterproof membrane is a thin layer of material designed to protect the underlying substrate from water damage. It is typically made from a flexible material such as plastic or rubber and can come in the form of tiles, sheets, or even paint. Waterproof membranes are used to protect the underlying substrate in wet areas such as showers, kitchens, and other areas prone to water damage.
A vapor barrier is a thicker layer of material designed to prevent moisture from passing through it. It is usually made from a plastic film or sheet and is installed between the substrate and the tile. Vapor barriers are most commonly used in bathrooms, basements, and crawl spaces where there is a risk of moisture buildup. They help reduce the risk of mold and mildew growth due to high humidity levels.