Among the most important types is the stone flooring utilized in other buildings and castles. Frequently they actually do the setting up, unpolluted up, and also removal of all the old flooring as well as debris for a reduced price. You are able to also discover tile flooring on patios as well as barbeque parts. And then, bring up the wood top floor and present the subfloor.
Images about Putting Down Tile Floor
:no_upscale()/cdn.vox-cdn.com/uploads/chorus_asset/file/19496978/howto_tile_01.jpg)
For tile to be successful, it requires rigid support, with very little tolerance for motion. You likewise need to be mindful about not working with specific products. On the other hand, it's difficult to remove allergens out of the carpet pad. They totally transform a space into one that is spacious and modern. You are able to arrange them to form a picture or maybe you can count on the colors to create a figure.
How to Install Ceramic Tile Flooring in 9 Steps – This Old House
:no_upscale()/cdn.vox-cdn.com/uploads/chorus_asset/file/19496947/color_gutters_illo_web_1.jpg)
Easy maintenance and the durability of this particular flooring makes it a preferred choice of many individuals. The peel and stick variety will not adhere securely to a less than clean floor; we all know that finding a cleaner than unpolluted garage flooring is a near impossibility. When tiles are harmed, replace the entire tile with a new one that seems identical to your old tile, using the identical process you used to put in the tile.
10 Most Common Mistakes When Installing Tile Floor
How to Install Ceramic Tile Flooring in 9 Steps – This Old House
/cdn.vox-cdn.com/uploads/chorus_asset/file/19497110/howto_tile_07.jpg)
10 Most Common Mistakes When Installing Tile Floor
How to Install a Tile Floor
How to Lay a Vinyl Tile Floor – This Old House
/cdn.vox-cdn.com/uploads/chorus_image/image/65891755/howto_vinylfloor_05.0.jpg)
DIY Guide: How to Install Tile Flooring u2013 The Good Guys
How to Install Ceramic Tile Flooring in 9 Steps – This Old House
/cdn.vox-cdn.com/uploads/chorus_asset/file/19497064/howto_tile_12.jpg)
Installing Tile Floor for the First Time // How To Lay Tile Floor
How To Lay Floor Tiles RONA

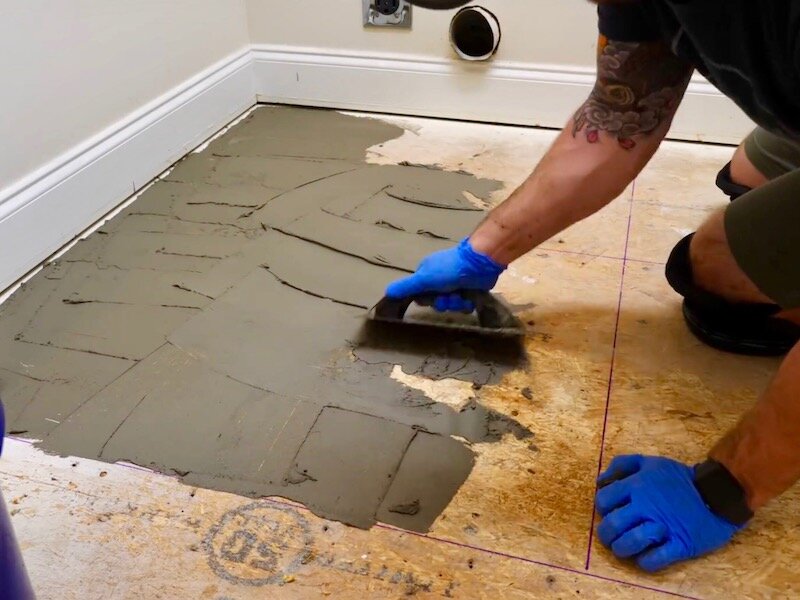
Subfloors and Underlayment for Ceramic Tile Floors
/best-subfloors-to-use-for-laying-tile-1822586-hero-efcfac9422ab457da5d2cbc7f7361df7.jpg)
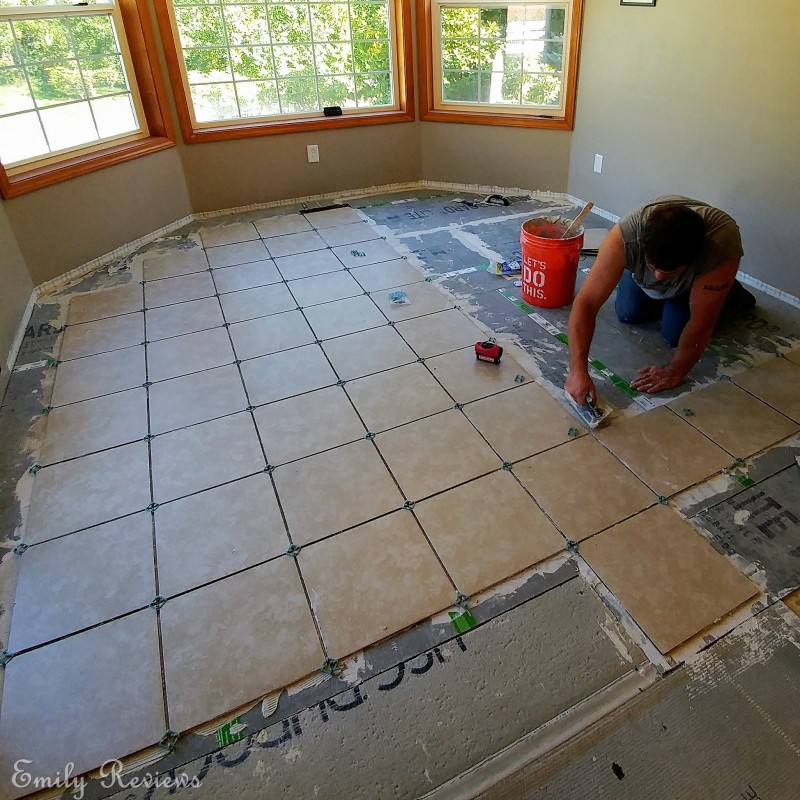
DIY ~ 8 Steps To Laying A New Tile Floor Emily Reviews
How to Install Floor Tile (with Pictures) – wikiHow
Related Posts:
- Cleaning Dirty Tile Floors
- Wood Look Ceramic Tile Flooring Reviews
- Cool Tile Floors
- Ceramic Tile Floor Care And Maintenance
- Floating Luxury Vinyl Tile Flooring
- Waterproof Laminate Tile Flooring
- Tile Floors Fort Worth
- Aqua Tile Flooring
- Backer Board Thickness For Tile Floor
- Gray Laminate Tile Flooring
Putting Down Tile Floor: A Comprehensive Guide to Achieving a Stunning and Durable Flooring Solution
Introduction:
When it comes to flooring options, tile floors are a popular choice for their durability, versatility, and aesthetic appeal. Whether you’re renovating your home or building from scratch, installing a tile floor can elevate the overall look and feel of any space. However, the process of putting down tile floor requires careful planning, precision, and attention to detail. In this comprehensive guide, we will walk you through each step of the installation process, provide helpful tips and tricks, address common FAQs, and ensure that you are well-equipped to successfully complete your tile flooring project.
I. Planning Your Tile Floor Project:
Before diving into the installation process, it is crucial to plan your tile floor project meticulously. This includes considering factors such as the type of tile you want to use, the layout of the room, and gathering the necessary tools and materials. By taking the time to plan ahead, you can ensure a smooth installation process and achieve impeccable results.
1. Choosing the Right Tile:
Selecting the appropriate tile for your project is paramount in achieving both functionality and aesthetics. Consider factors such as durability, slip resistance, maintenance requirements, and style when choosing your tile. Popular options include ceramic, porcelain, natural stone (such as marble or granite), and glass tiles.
FAQs:
Q: How do I determine if a particular type of tile is suitable for my project?
A: It is essential to consider factors such as the level of foot traffic in the area where the tile will be installed, moisture levels (for areas like bathrooms or kitchens), and personal preferences in terms of appearance.
Q: Are natural stone tiles more durable than ceramic or porcelain tiles?
A: Natural stone tiles can vary in durability depending on their composition. While materials like marble are more prone to scratching or staining compared to ceramic or porcelain tiles, they can still offer a stunning and unique aesthetic.
2. Assessing the Room and Preparing the Subfloor:
Before installing tile, it is crucial to assess the room where the flooring will be placed and ensure that the subfloor is in good condition. This involves checking for any structural issues, ensuring proper ventilation, and addressing any moisture problems.
FAQs:
Q: How do I know if my subfloor needs repair or replacement?
A: Look out for signs of water damage, rotting wood, or uneven surfaces. If you notice any of these issues, it is advisable to consult a professional to assess and address the problem before proceeding with tile installation.
Q: Do I need to install an underlayment before laying tiles?
A: In some cases, an underlayment may be necessary to provide additional stability or moisture protection. This is especially important when installing tiles over concrete slabs or in areas prone to moisture, such as basements or bathrooms.
II. Gathering Tools and Materials:
To ensure a successful tile floor installation, it is essential to gather all the necessary tools and materials beforehand. Having everything readily available will streamline the process and prevent unnecessary delays or interruptions during installation.
1. Essential Tools:
– Tile cutter or wet saw
– Trowel for spreading adhesive
– Grout float for applying grout
– Notched trowel for creating even adhesive ridges
– Rubber mallet for tapping tiles into place
– Level for checking evenness
2. Required Materials:
– Tiles of your choice
– Tile adhesive or thin-set mortar
– Grout for filling in gaps between tiles
– Tile spacers for maintaining consistent spacing between tiles
– Backer board or underlayment, if necessary
– Waterproofing membrane, if needed
– Sealant or grout sealer for protecting the tiles and grout
– Cleaning supplies for removing excess adhesive and grout
III. Installing the Tile:
Once you have gathered all the necessary tools and materials, you can begin the tile installation process. Follow these steps for a successful installation:
1. Prepare the surface: Clean and level the subfloor, ensuring it is free of any debris or obstructions. If necessary, install an underlayment or backer board.
2. Plan the layout: Measure the room and plan the tile layout to ensure a balanced and aesthetically pleasing look. Use tile spacers to maintain consistent spacing during installation.
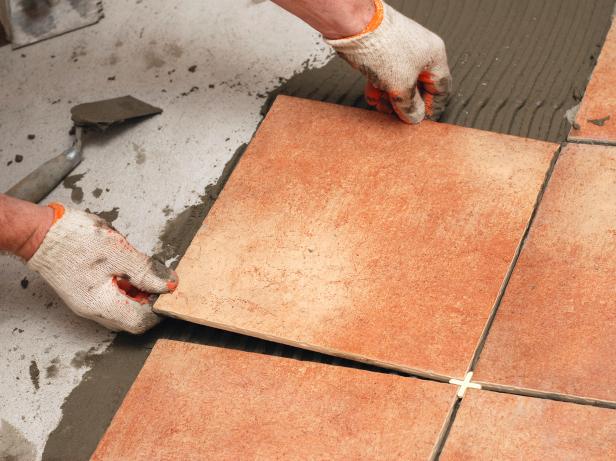
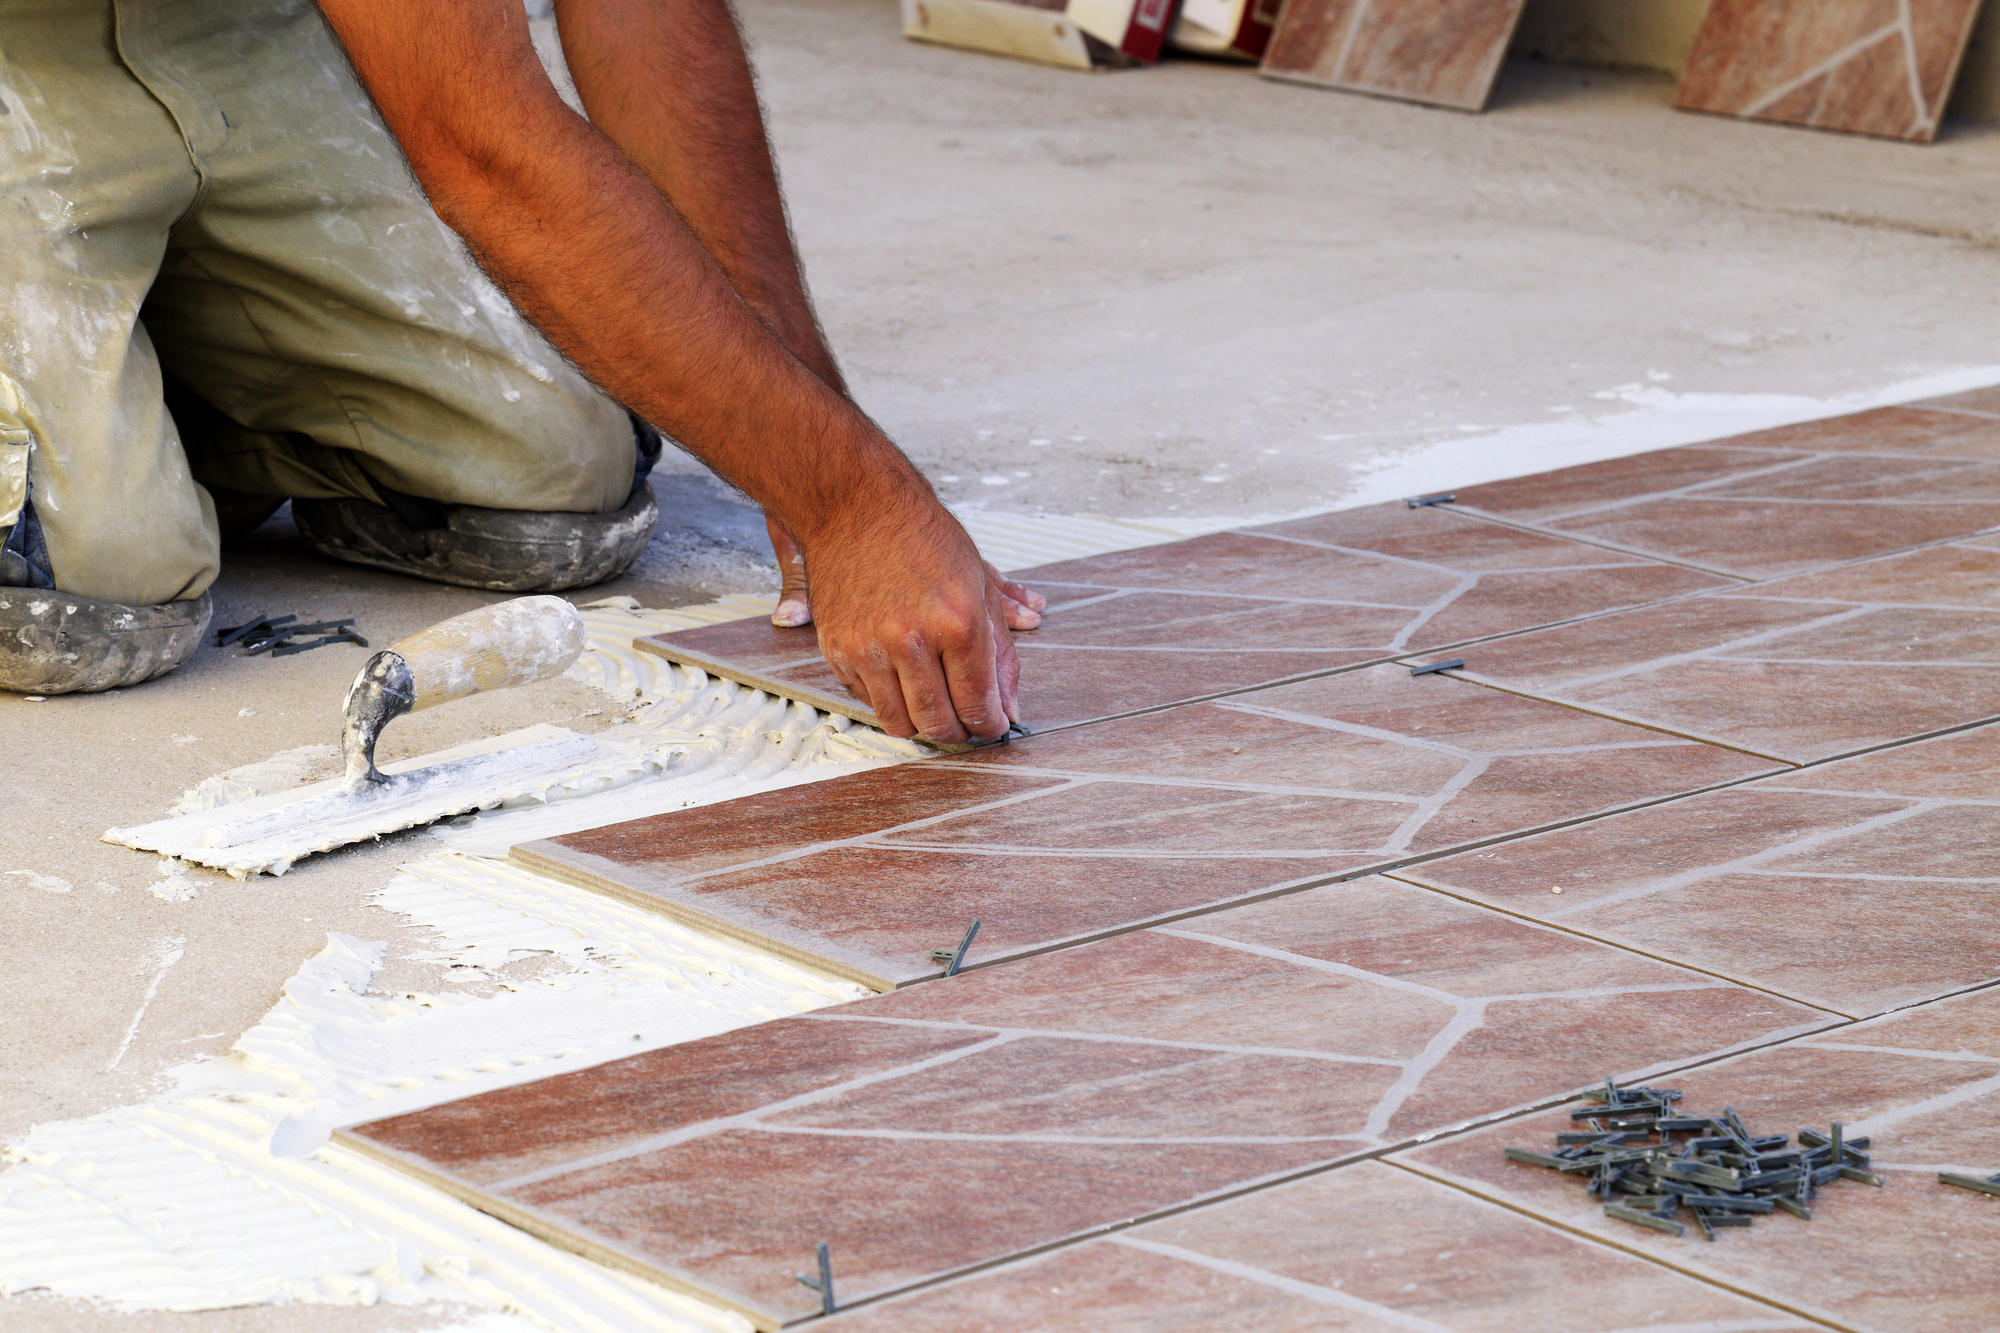
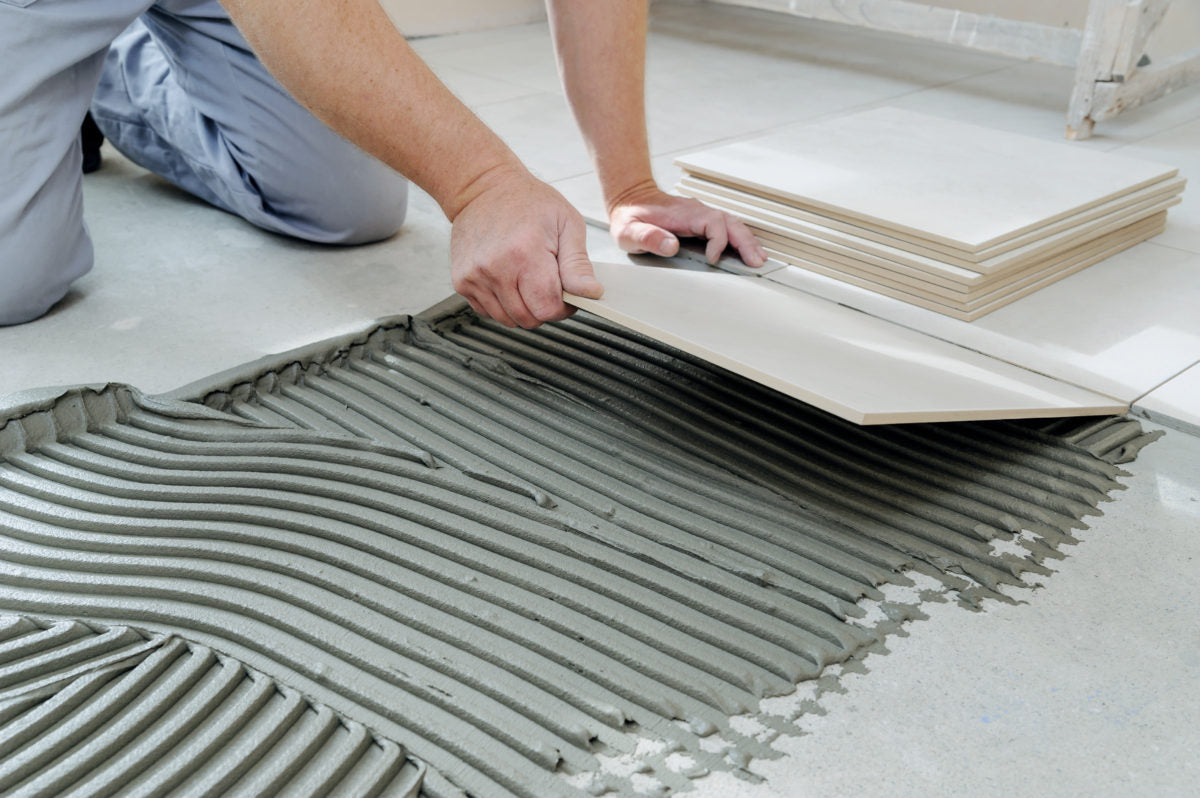
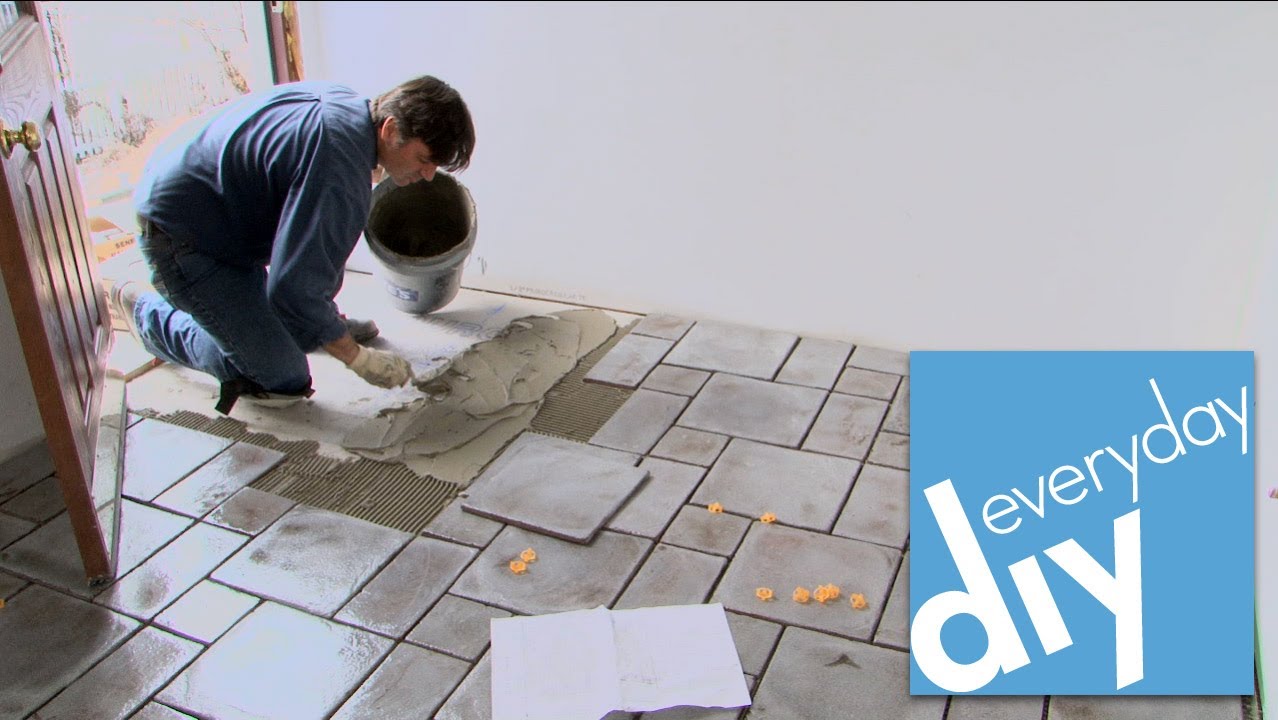
3. Apply adhesive: Use a trowel to spread adhesive or thin-set mortar onto the subfloor in small sections. Create even ridges with a notched trowel for proper adhesion.
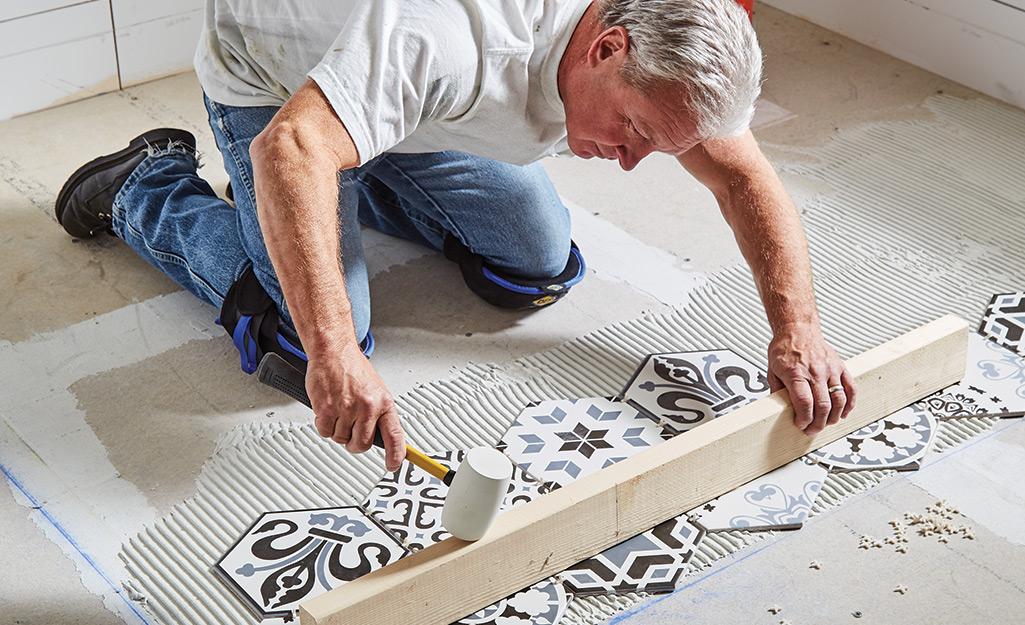
4. Place the tiles: Press each tile firmly into the adhesive, using a rubber mallet to ensure they are evenly set. Check for levelness as you go.
5. Cut tiles as needed: Use a tile cutter or wet saw to cut tiles as necessary to fit around edges, corners, or fixtures.
6. Allow adhesive to dry: Follow the manufacturer’s instructions for drying time. Avoid walking on or disturbing the tiles until the adhesive has fully cured.
7. Apply grout: Once the adhesive is dry, use a grout float to apply grout into the gaps between the tiles. Remove excess grout with a damp sponge.
8. Seal the tiles: After the grout has dried, apply a sealant or grout sealer to protect the tiles and grout from stains and moisture.
9. Clean up: Use cleaning supplies to remove any remaining adhesive or grout residue from the tiles.
IV. Maintenance and Care:
To maintain the beauty and functionality of your tile floor, it is important to follow proper maintenance and care guidelines:
– Regularly sweep or vacuum the floor to remove dirt and debris that can scratch the tiles.
– Clean up spills immediately to prevent staining.
– Use a pH-neutral cleaner specifically designed for tile floors when mopping.
– Avoid using harsh chemicals or abrasive cleaners that can damage the tiles or grout.
– Periodically reseal the grout to maintain its appearance and prevent moisture penetration.
– Avoid dragging heavy furniture or sharp objects across the tiles to prevent scratching.
– Consider using rugs or mats in high-traffic areas or entryways to protect the tiles from excessive wear and tear.
By following these steps and guidelines, you can successfully install and maintain a beautiful tile floor that combines both functionality and aesthetics. Remember to choose the right type of tile for your project, assess the room and prepare the subfloor properly, gather all necessary tools and materials, install the tiles correctly, and follow proper maintenance practices. Enjoy your new tile floor!