You will find four distinct styles which resemble the planks you would ordinarily find on genuine wood flooring. When Starting off always start on the longest squarest wall installing three rows together to provide you with a foundation, utilizing wedges to provide you with the 10mm needed development gap. You will find plenty of distinct choices such as oak, birch, maple, steamed beech, hornbeam, walnut, acacia, alder, cherry, elm, beech and also ash.
Images about Refinish Engineered Wood Flooring Yourself

It takes extra time to render the top timber as well as keep waste to a minimal. Standing water should be wiped up immediately, and the wood floors should be kept in a climate controlled environment. Since the laminate isn’t joined on the sub flooring, levelling is very important to making certain a premium quality surface. Depending on the elements earlier mentioned, the price will range between $3.50 and $7.00 psf for the content.
Can You Refinish Engineered Hardwood Floors – Pinteresting Plans
You likewise need to ensure that you clean your sub floor totally to get rid of any dirt and small particles that could cause issue every time you come to set the wood flooring. Many people do not understand that wood flooring has some special characteristics which make it not the perfect option for everyone. They’re also eco-friendly, inexpensive and also the best part is, there’s a good deal of variety available.
Can You Refinish Engineered Hardwood Floors? – Life On Virginia Street
Beginneru0027s Guide To Refinishing Hardwood Flooring u2014 Inner Space
Can you Refinish Engineered Hardwood Floors? – Plank and Pillow

2022 Hardwood Floor Refinishing Cost Sand, Stain, u0026 Redo

The Cost to Refinish Hardwood Floors

Refinish Engineered Hardwood Floors Hallmark Floors
Refinish Hardwood Floors – Should You DIY? BuildDirectLearning

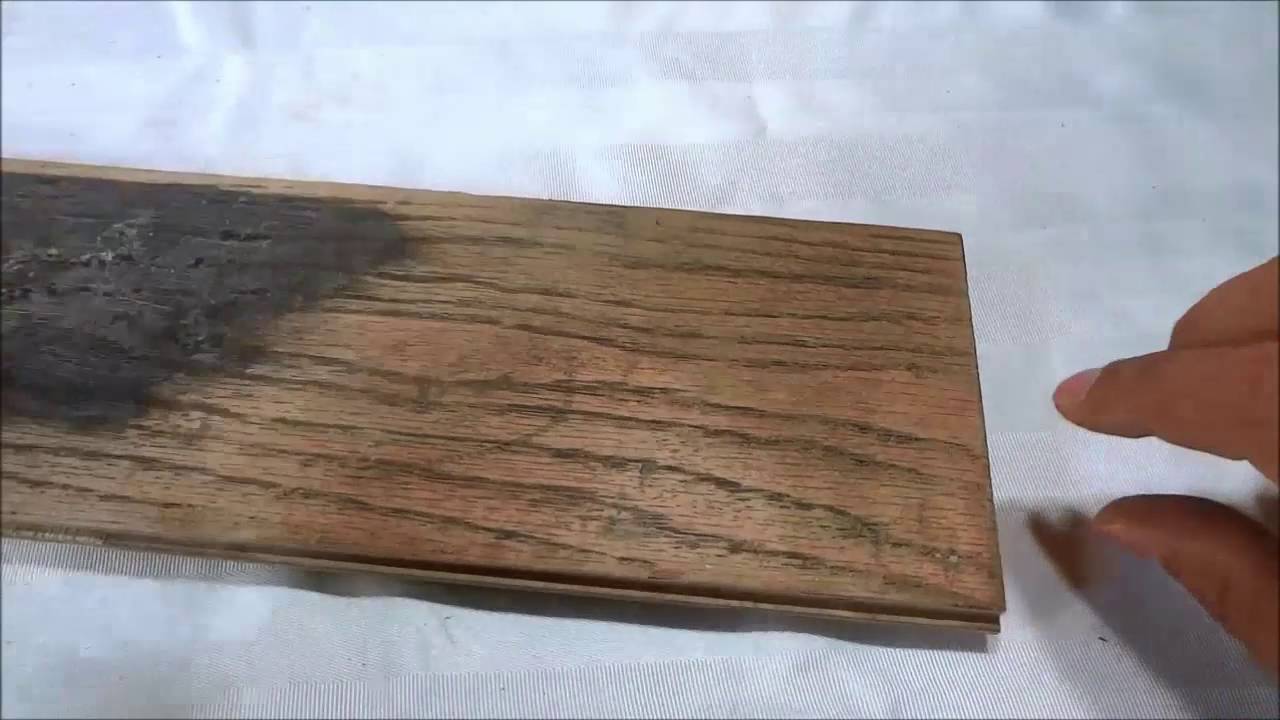
Can you sand and refinish engineered hard wood flooring?

Can You Refinish Engineered Hardwood Floors – Pinteresting Plans

Refinishing Engineered Hardwood Flooring-Can You Sand And Stain It
How to Refinish Hardwood Floors The Good Guys

Engineered Hardwood Flooring Installation Contractors VA KK Floor

Related Posts:
- How To Put Down Snap Together Wood Flooring
- Wood Flooring Care Cleaning
- Monarch Plank Wood Flooring
- Black Locust Wood Flooring
- What Are The Best Wood Floor Protectors For Furniture
- Cif Wood Floor Cleaner Safety Data Sheet
- Kitchen Engineered Wood Flooring
- Extra Wide Plank Wood Flooring
- Unfinished Wood Flooring Vs Prefinished
- Eucalyptus Wood Flooring Reviews
Refinishing Engineered Wood Flooring Yourself: A Comprehensive Guide
Introduction
Engineered wood flooring offers homeowners a durable and attractive alternative to solid hardwood floors. However, over time, even the toughest engineered wood can become worn, scratched, or faded. While many people opt to hire professionals for refinishing their engineered wood floors, it is entirely possible to undertake this project yourself with the right tools and knowledge. In this comprehensive guide, we will walk you through the step-by-step process of refinishing engineered wood flooring, providing detailed instructions and answering frequently asked questions along the way.
I. Preparing for Refinishing
Before diving into the refinishing process, proper preparation is essential to ensure a successful outcome.
1. Clearing the Space
Start by removing all furniture and rugs from the room where you plan to refinish the engineered wood flooring. This will provide you with an unobstructed working area and prevent any potential damage to your belongings.
2. Inspecting the Floor
Thoroughly inspect the floor for any loose boards, nails, or staples that may need attention before proceeding with refinishing. If you come across any loose boards, secure them using appropriate screws or nails.
3. Cleaning the Surface
To achieve optimal results during refinishing, it is crucial to clean the surface of your engineered wood flooring thoroughly. Begin by vacuuming or sweeping the floor to remove any dirt, dust, or debris. Next, use a damp mop or cloth with a gentle floor cleaner designed specifically for engineered wood floors.
FAQs:
Q1: Can I use regular hardwood floor cleaners on engineered wood flooring?
A1: No, it is recommended to use specially formulated cleaners for engineered wood floors as they are designed to be gentle on the surface and won’t cause damage.
Q2: Should I use water when cleaning my engineered wood flooring?
A2: Yes, but make sure to wring out excess water from the mop or cloth to prevent excessive moisture from seeping into the wood, which can cause swelling or warping.
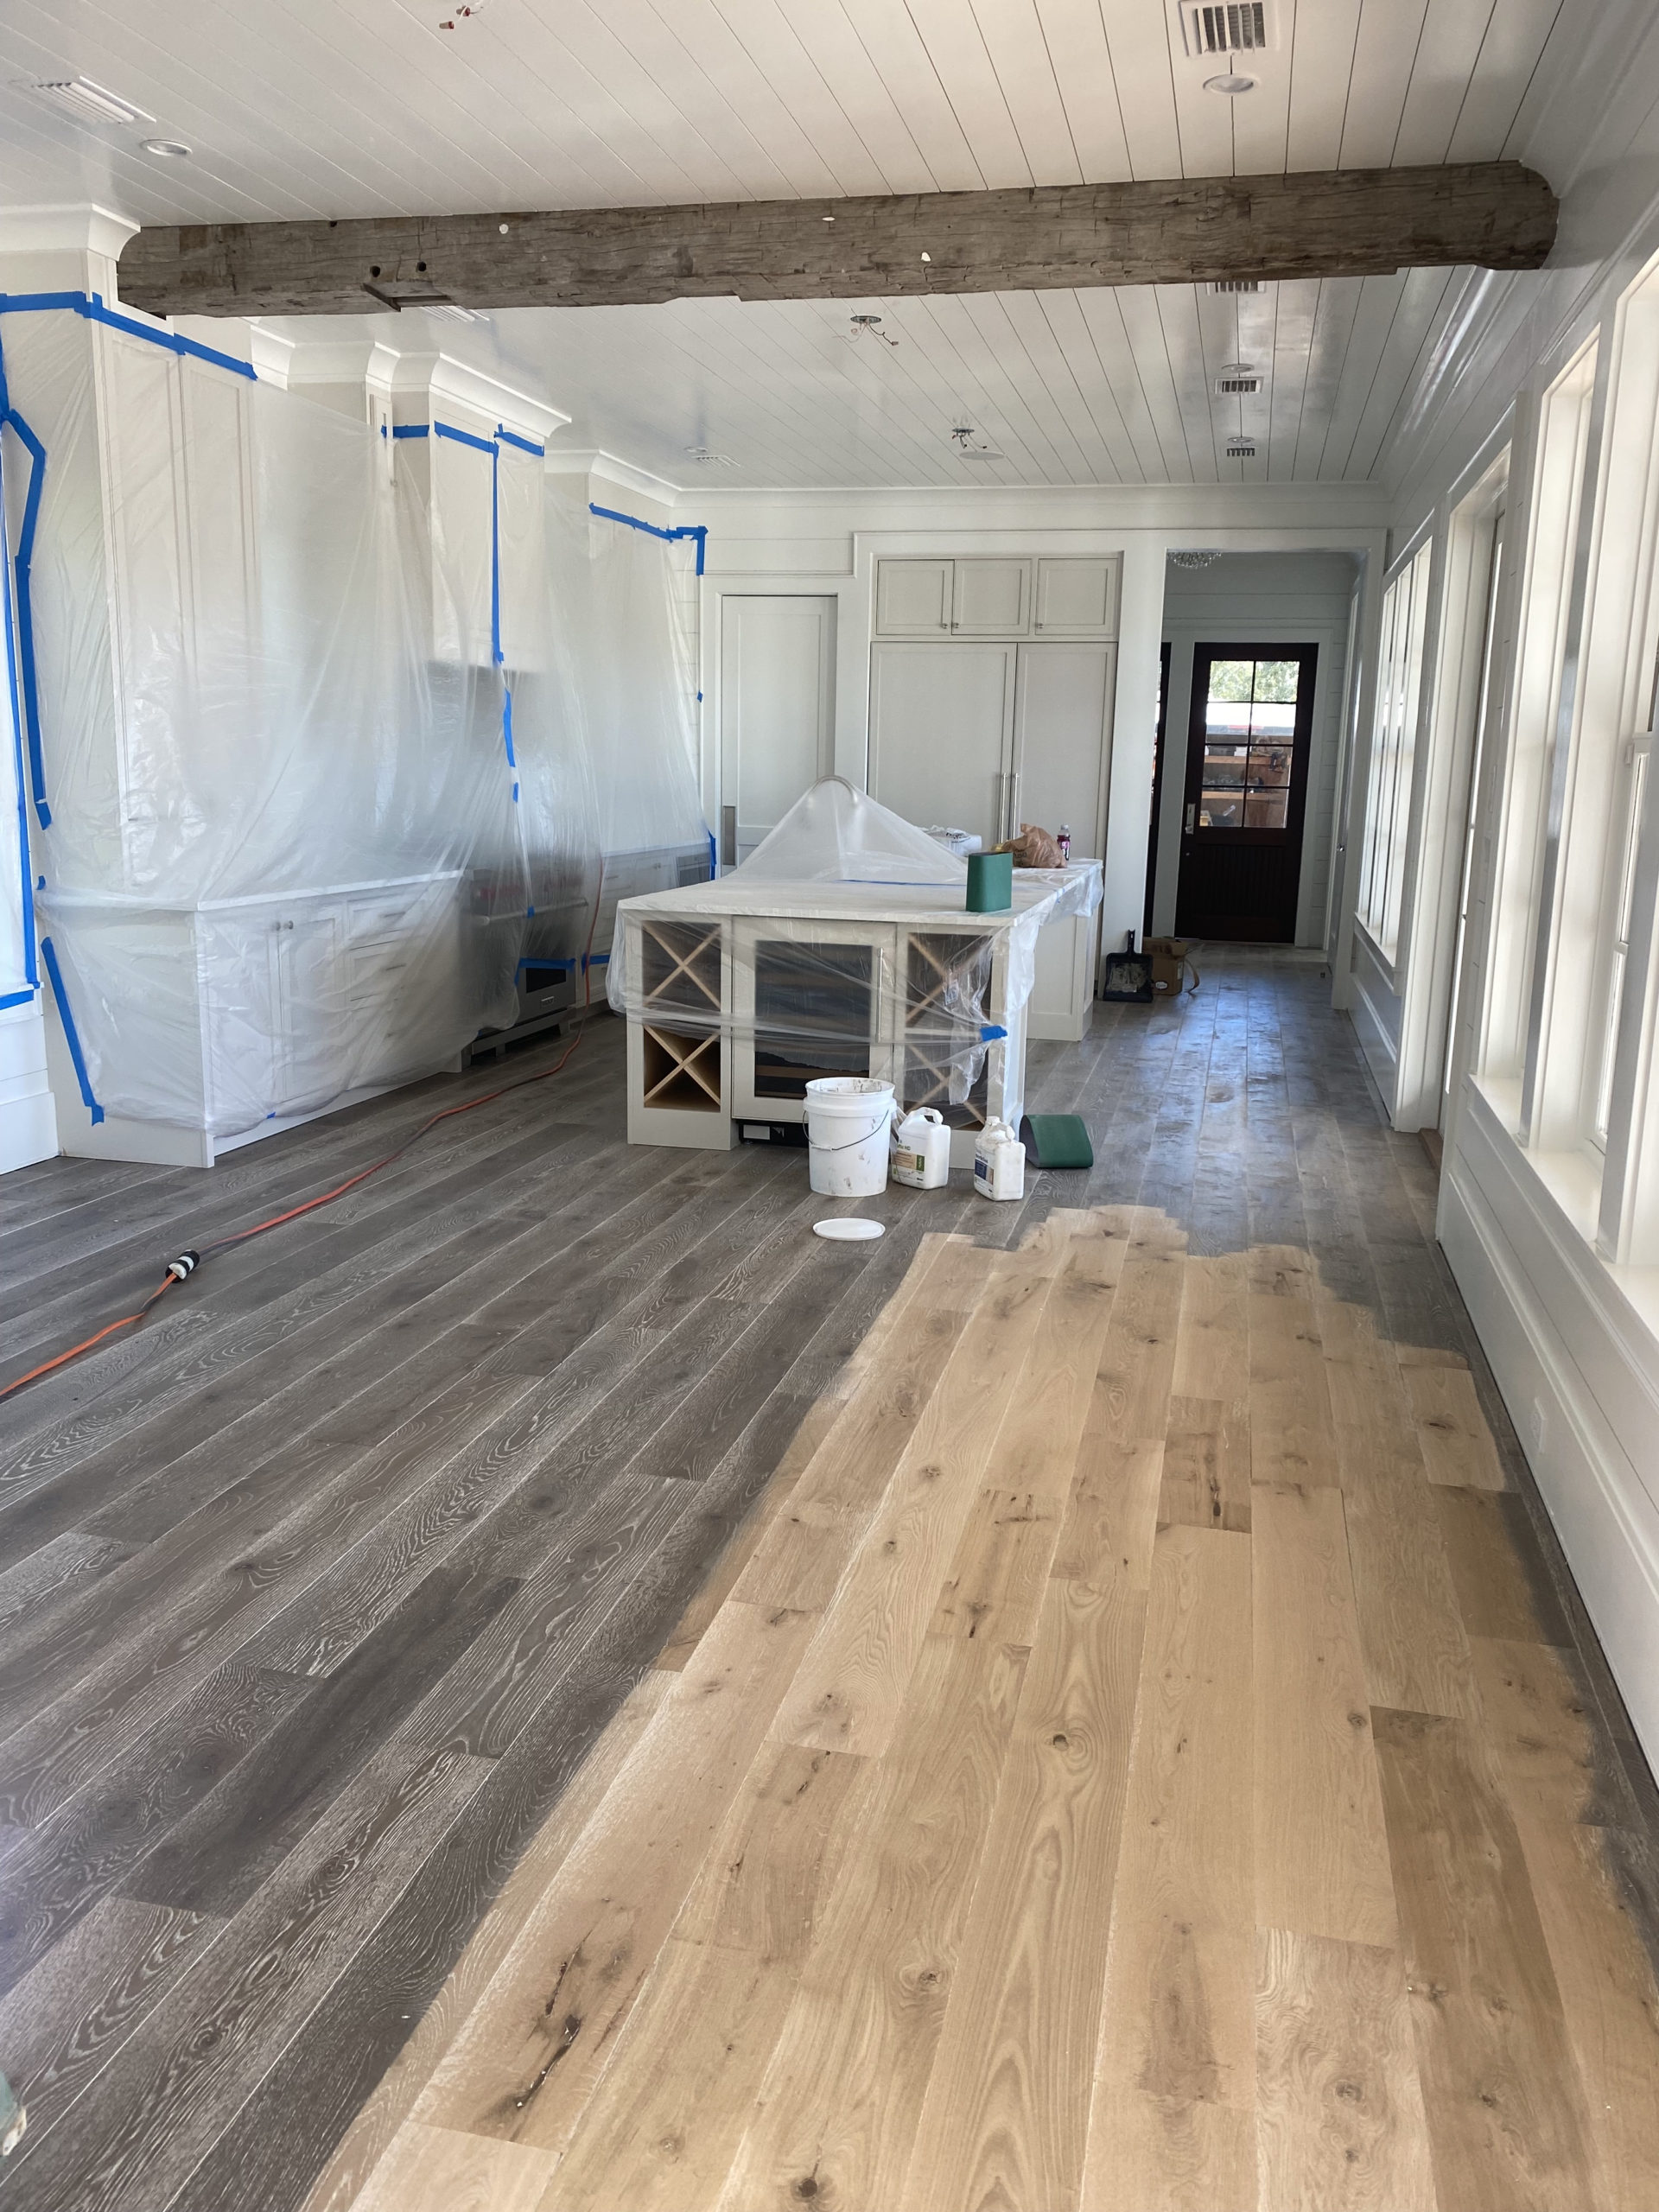
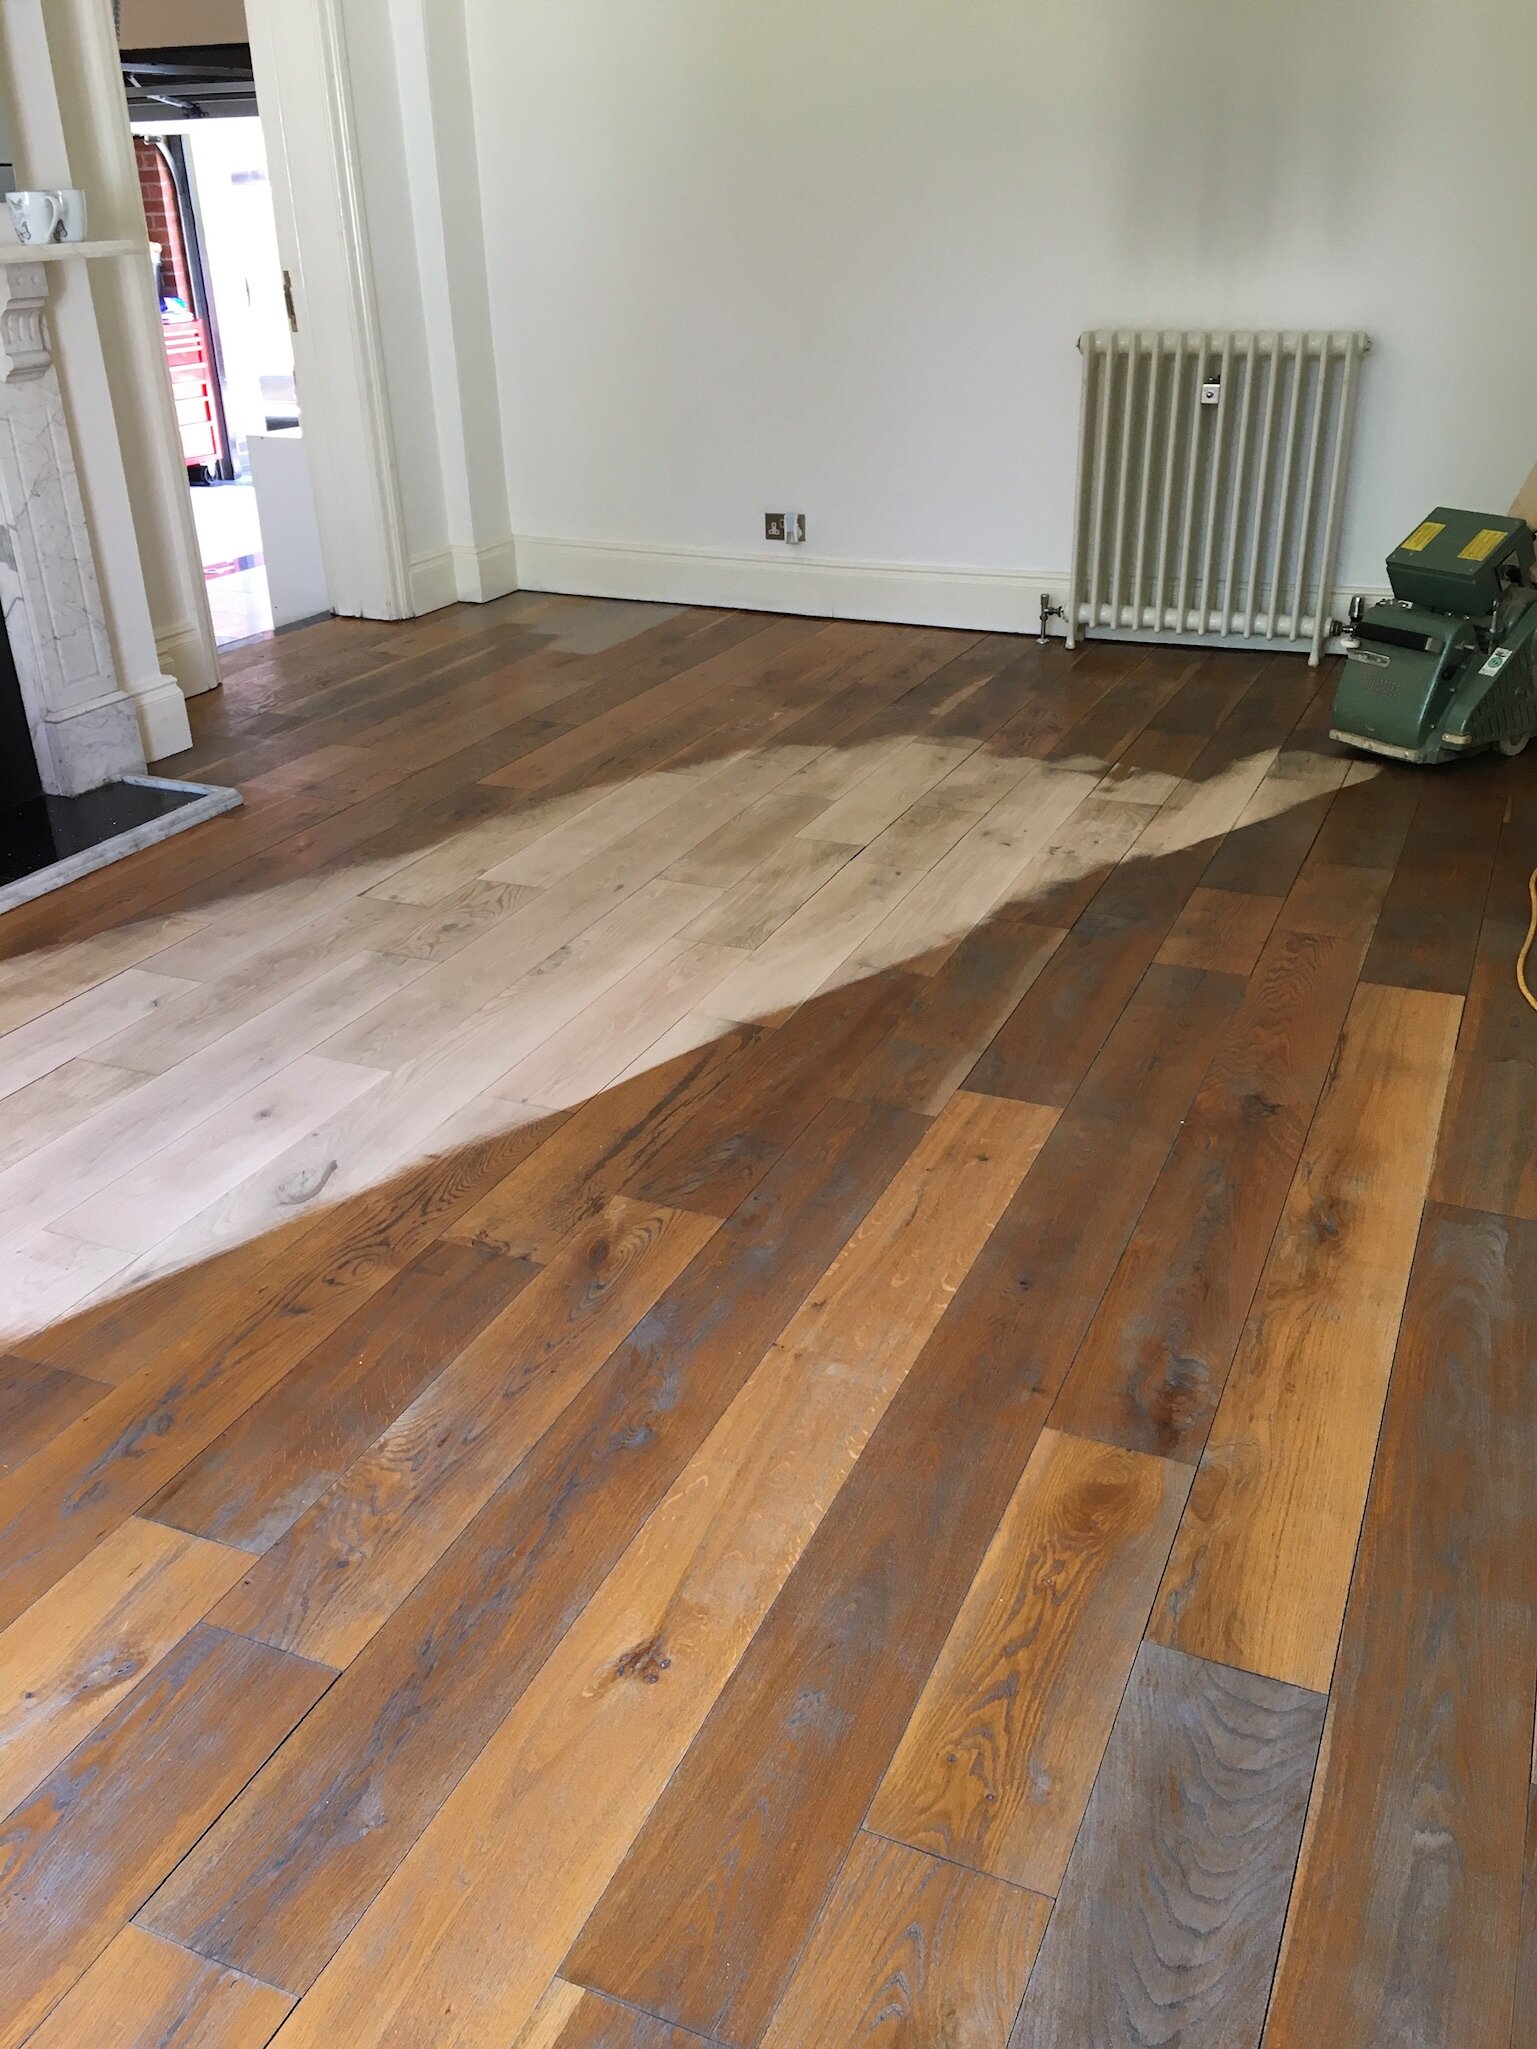
II. Sanding the Surface
Sanding is a crucial step in refinishing engineered wood flooring as it removes the existing finish and levels the surface for a fresh application.
1. Choosing the Right Sandpaper
For engineered wood flooring, it is recommended to use a sandpaper with a grit between 120 and 220. Start with a coarser grit to remove the existing finish, and then progress to finer grits for a smoother result.
2. Sanding Technique
Attach the sandpaper securely to a floor sander or handheld orbital sander, following the manufacturer’s instructions. Begin sanding at one corner of the room, moving in the direction of the wood grain. Apply even pressure and make multiple passes over each section until all traces of the previous finish are removed.
3. Edges and Corners
For edges and corners where a floor sander cannot reach, use a hand-held sanding block or detail sander. Be careful not to apply too much pressure, as it may result in uneven sanding.
FAQs:
Q1: Can I skip sanding if my engineered wood flooring appears to be in good condition?
A1: While it may be tempting to skip sanding if your flooring looks relatively intact, it is still advisable to go through the process to ensure proper adhesion of the new finish and achieve an even appearance.
Q2: How do I know when I have sanded enough?
A2: You will know you have sanded enough when the previous finish is completely removed and the surface is smooth and even. Be sure to inspect the floor closely and feel for any rough spots or uneven areas. If you come across any rough spots or uneven areas, continue sanding until the surface is smooth and even. Q3: What should I do if I accidentally sand through the top layer of my engineered wood flooring?
A3: If you accidentally sand through the top layer of your engineered wood flooring, you may need to hire a professional to repair or replace the damaged area. It is important to be careful and take your time when sanding to avoid damaging the surface. Q3: Can I stain my engineered wood flooring after sanding?
A3: Yes, you can stain your engineered wood flooring after sanding. However, make sure to follow the manufacturer’s instructions and use a stain specifically designed for engineered wood floors. It is also recommended to test the stain on a small, inconspicuous area first to ensure the desired color is achieved. Q4: How long does it usually take to sand an engineered wood floor?
A4: The time it takes to sand an engineered wood floor can vary depending on the size of the room and the condition of the flooring. On average, it may take several hours to a full day to complete the sanding process for a standard-sized room.
Q5: Do I need to wear protective gear while sanding?
A5: Yes, it is important to wear protective gear while sanding, including safety goggles, a dust mask, and ear protection. This will help protect you from dust particles and potential harm from loud noises.
Q6: Can I rent a floor sander for sanding my engineered wood flooring?
A6: Yes, many home improvement stores offer floor sanders for rent. It is advisable to consult with the store staff to ensure you choose the right type of sander for your specific flooring and receive proper instructions on how to use it.
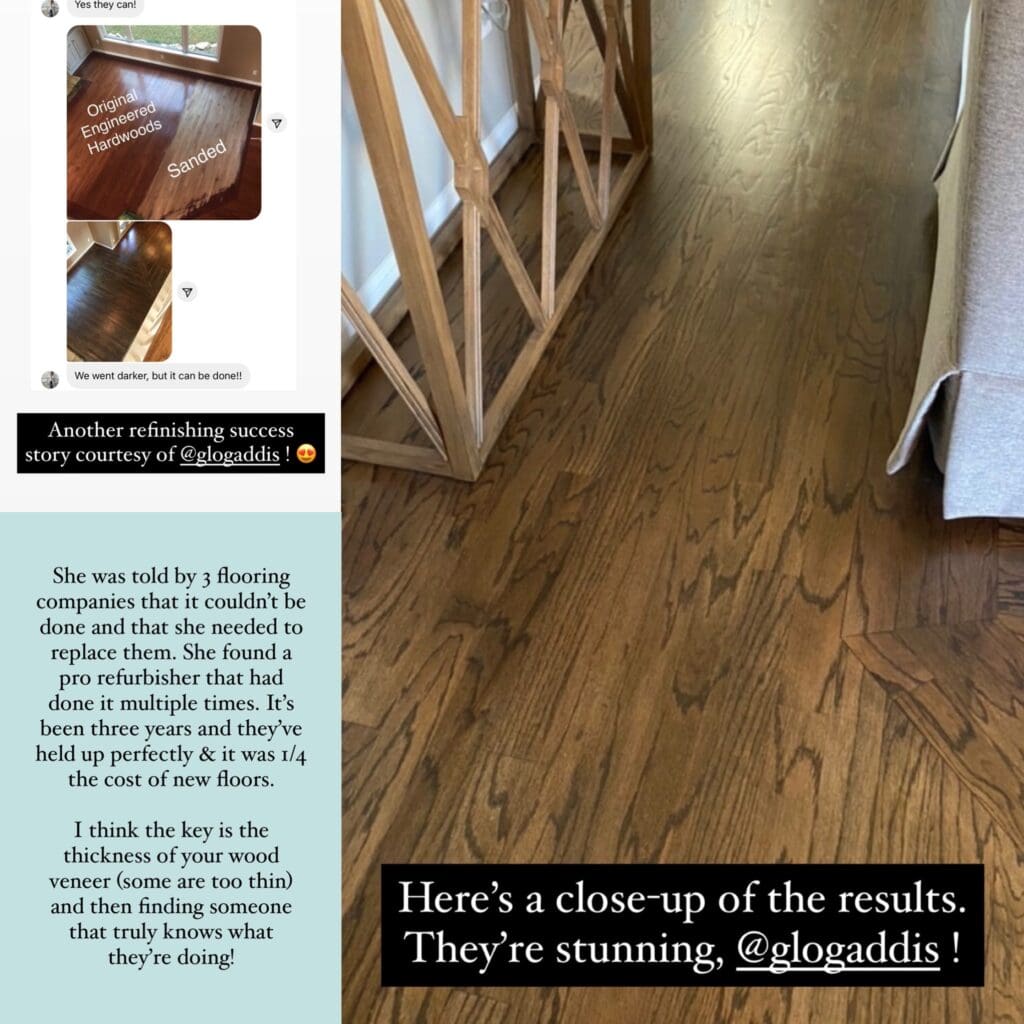
Q7: Can I refinish my engineered wood flooring multiple times?
A7: The number of times you can refinish your engineered wood flooring depends on the thickness of the top layer or veneer. Thicker veneers can typically be refinished multiple times, while thinner veneers have a limited number of refinishing options. It is best to consult with a professional or the manufacturer for specific guidelines regarding your flooring.
Q8: How long does it take for the new finish to dry after refinishing?
A8: Drying times for the new finish can vary depending on several factors such as temperature, humidity, and type of finish used. In general, it may take anywhere from 24 hours to several days for the finish to fully dry and cure. It is important to follow the manufacturer’s instructions regarding drying times and avoid walking on or placing furniture on the newly finished floor until it has completely dried.