And that means you do not have to get worried about where you get it. Cork comes out of the bark of the cork oak, a native of southern Europe. Cork is in fact made of bark and stated bark is gotten from the cork oak tree. A thin layer of bark is taken off the tree. This chemical make cork resistant to dander, mold, moisture, bacteria and mildew. If you do we suggest visiting the links listed below.
Images about Cork Floor Tile Installation
/cdn.vox-cdn.com/uploads/chorus_asset/file/23088021/0421_NB_All_About_Cork_Floors_Cork_flooring_iStock_950010876.jpg)
Cork oak tree forests are also the frequent habitat of an endangered lynx species. Have you been considering installing cork flooring in your business or home but not completely sure if it's appropriate for you? This specific short article is created to reply to by far the most common and regularly asked questions about cork flooring.
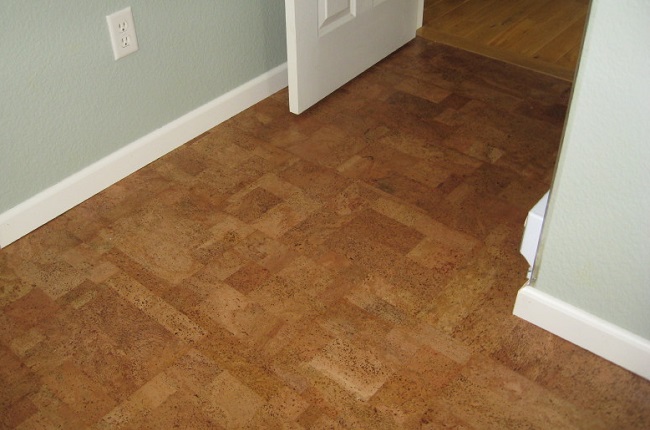
Using Cork Floor Tiles in Your Kitchen
/cork-flooring-in-unfurnished-new-home-647206431-57e7c0c95f9b586c3504ca07.jpg)
Just because cork is resist to water and moisture you'll still wish to wash up all spills and standing water to keep it from getting underneath the tiles. This baked mold is then used for flooring. It is able to in addition be a low price venture in case you use a floating cork floor program and put in it yourself. For many customers one of the greatest benefits of cork flooring is it is earth friendly product.
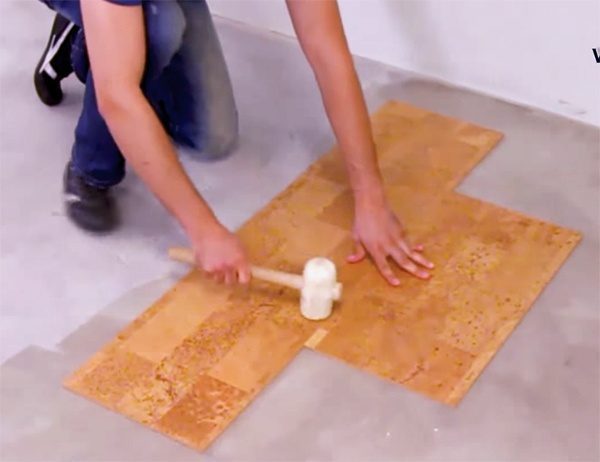
Cork Floor Install – How to install a cork glue down floor.

Installation costs differ from $3-1dolar1 four per square foot for a large space, with smaller rooms costing more depending on location of residence. To begin with, its beauty matches practically any other hardwood floor; with a huge selection of pattern variations, colors and natural shades. In case you would still love to know more feel free to stay within the links at the end of this article.
How to Seal Cork Flooring – A DIY Guide BuildDirectLearning Center

Install u0026 Maintenance Guides u2014 Jelinek Cork Group®
Cork Flooring Pros and Cons
/cork-flooring-pros-and-cons-1314688_hero_0032-9ed702033d384a5aad92329dc679a300.jpg)
How to Install Cork Flooring – (Tips and Guidelines For Your DIY

Advantages Of A Cork Floating Floor Over Glue-Down Cork Tiles

Cork Flooring: What Are the Pros u0026 Cons?

Cork Flooring Pros and Cons
:max_bytes(150000):strip_icc()/cork-flooring-pros-and-cons-1314688_cleaning_0040-d62159c2ce18440a9f2f035e64a9ac25.jpg)
Installing Glue Down Cork Tiles Installation Lay How – Cancork
Cork Flooring 101: Cost, Types, u0026 Installation – This Old House
/cdn.vox-cdn.com/uploads/chorus_asset/file/23098655/Web_0421_NB_All_About_Cork_Floors_CorkFloors_08202021MR_0022.jpg)
Cork Flooring Installation: PRO or DIY?Learning Center

How To Install A Floating Cork Floor Young House Love Cork

Related Posts:
- Cali Cork Flooring
- Cork Flooring Designs
- Cork Flooring Boulder
- What Paint To Use On Cork Floor
- Installing Glue Down Cork Flooring
- Cork Flooring Commercial
- Pictures Of Cork Flooring In Bedrooms
- How To Remove Cork Tiles From Floor
- Cork Flooring Formaldehyde
- Millstead Cork Flooring
Title: Ultimate Guide to Cork Floor Tile Installation
Introduction:
Cork floor tiles have gained popularity as an eco-friendly and stylish flooring option for both residential and commercial spaces. Their unique properties, such as durability, comfort, and sound absorption, make them a preferred choice among homeowners. If you’re considering installing cork floor tiles, this comprehensive guide will walk you through the process step-by-step, ensuring a successful and professional-looking installation.
I. Preparation:
Before diving into the installation process, proper preparation is crucial to ensure a smooth and long-lasting result.
1. Acclimate the Tiles:
To prevent any issues later on, it’s essential to acclimate the cork floor tiles to the room’s temperature and humidity for at least 48 hours before installation. This allows them to adjust and minimize the risk of expansion or contraction.
2. Subfloor Inspection:
Inspecting the subfloor is critical to ensure its suitability for cork tile installation. Ensure that it is dry, clean, level, and free from any imperfections or irregularities that could affect the final result.
3. Moisture Testing:
Conduct moisture testing on concrete subfloors using a moisture meter to avoid trapping moisture beneath the cork tiles. Ideally, the readings should be below 3 pounds per square foot over 24 hours.
FAQs:
Q: Can cork floor tiles be installed over existing flooring?
A: Cork tiles can be installed over various types of existing flooring, including vinyl, laminate, and hardwood, as long as they are in good condition with no visible damage or unevenness.
Q: Is it necessary to remove baseboards before installing cork floor tiles?
A: While removing baseboards is not mandatory for cork tile installation, it is recommended for a cleaner finish. However, if you choose not to remove them, quarter-round moldings can be used to cover the expansion gaps around the perimeter of the room.
II. Installation Process:
1. Gather the Required Tools and Materials:
Before starting the installation, gather all the necessary tools and materials. These may include:
– Cork floor tiles
– Adhesive (water-based or solvent-free)
– Trowel or roller for applying adhesive
– Tape measure
– Utility knife
– Chalk line
– Spacers
– Rubber mallet
– Saw or jigsaw for cutting tiles
2. Plan the Layout:
Take time to plan the layout of the cork floor tiles to ensure an aesthetically pleasing result. Start by finding the center of the room and use a chalk line to create reference lines. Dry-fit the tiles along these lines without adhesive to see how they will look.
3. Apply Adhesive and Install Tiles:
Following the manufacturer’s instructions, apply adhesive evenly on a small section of the subfloor using a trowel or roller. Begin installing the cork tiles, aligning them with the reference lines. Use spacers to maintain even gaps between tiles.
4. Cutting and Fitting Tiles:
As you reach the edges of the room or encounter obstacles such as door frames, you’ll need to cut and fit tiles accordingly. Accurately measure and mark each tile before cutting with a sharp utility knife or saw, ensuring a precise fit.
FAQs:
Q: Can cork floor tiles be installed in wet areas like bathrooms?
A: Cork is naturally resistant to moisture but not waterproof. While it can withstand occasional splashes, it’s not recommended for areas prone to excessive moisture or standing water. Applying a waterproof sealer can help Increase its moisture resistance, but it’s still best to avoid installing cork floor tiles in wet areas like bathrooms. Q: How long does it take for the adhesive to dry before walking on the cork floor tiles?
A: The drying time for the adhesive can vary depending on the manufacturer’s instructions. It is recommended to allow at least 24 hours before walking on the newly installed cork floor tiles to ensure proper bonding. Q: How do you clean and maintain cork floor tiles?
A: To clean cork floor tiles, sweep or vacuum regularly to remove dirt and debris. Avoid using harsh chemicals or abrasive cleaners that can damage the surface. Instead, use a damp mop with a mild soap or cork-specific cleaner. Wipe up spills immediately to prevent staining. Periodically reapply a protective sealant to maintain the durability and appearance of the cork tiles.
Q: Can cork floor tiles be refinished?
A: Yes, cork floor tiles can be refinished to remove scratches and restore their appearance. The process involves sanding the surface lightly to remove the old finish, applying a new coat of finish, and allowing it to dry completely. However, keep in mind that cork is a relatively soft material, so refinishing should be done sparingly to avoid damaging or thinning the tiles.
Q: Are cork floor tiles environmentally friendly?
A: Yes, cork floor tiles are considered environmentally friendly due to several reasons. Cork is harvested from the bark of cork oak trees without causing harm to the tree itself, making it a renewable resource. Additionally, cork has natural properties that make it energy-efficient and insulating, reducing heating and cooling costs. It is also free from harmful chemicals and emissions, making it a healthier choice for indoor air quality.
Q: How long do cork floor tiles last?
A: With proper care and maintenance, cork floor tiles can last for many years. On average, they have a lifespan of 20-30 years or more. However, heavy foot traffic or improper maintenance can shorten their lifespan. Regular cleaning, avoiding excessive moisture exposure, and reapplying protective sealant when needed can help prolong the life of cork floor tiles.