In order to take the longevity of the floor, people skin pores must be sealed. Those with allergies or even asthma will like experiencing polished concrete. An excellent bristle push broom or maybe street broom is strong adequate to stand as much as the difficult concrete floor, but powerful enough to supply a great cleaning.
Images about Heated Concrete Floor Tubing
more and More homeowners as well as designers are creating basements and warehouses with concrete because of the look, the organic beauty, the simplicity in attention and the warmth it brings to a place. The process is very simple to apply with state-of-the-art technology. In case you walk into a put that has polished concrete floors, you are going to realize right away that the place is somewhat similar to marble.
The Slab on Grade Installation DIY Radiant Floor Heating

This particular kind of program works to avoid long lasting degeneration of finished concrete floors. Whatever may leak on it or perhaps be pulled across it, concrete floors is almost indestructible. If you’re thinking that you want to have more choices than simply a lustrous surface as well as color to work into the design ambitions of yours, subsequently polished concrete is still the technique to go.
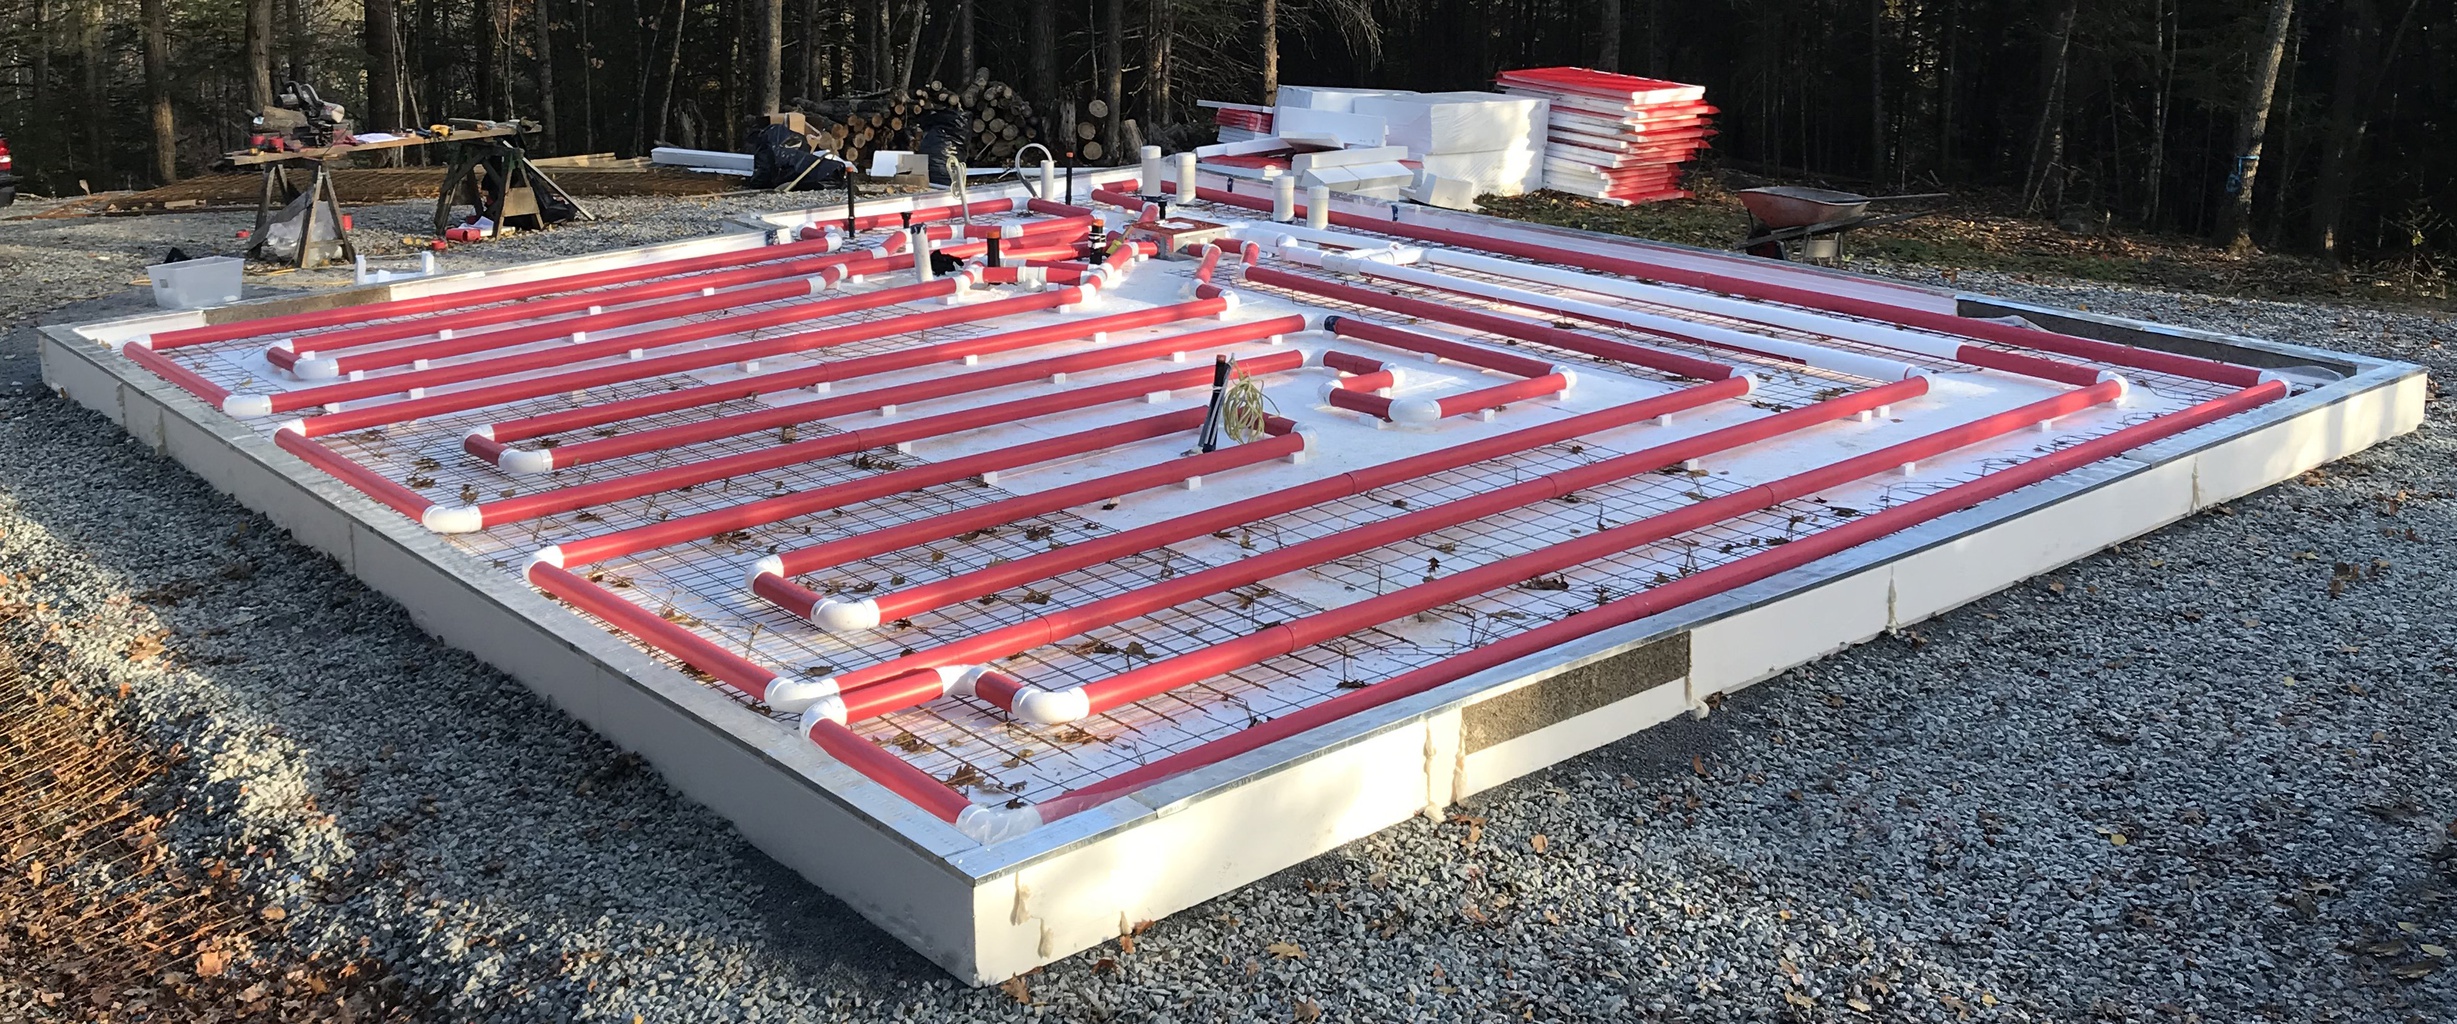
Solar Radiant Heated Floor Kit – Slab on Grade for LEED, Passive
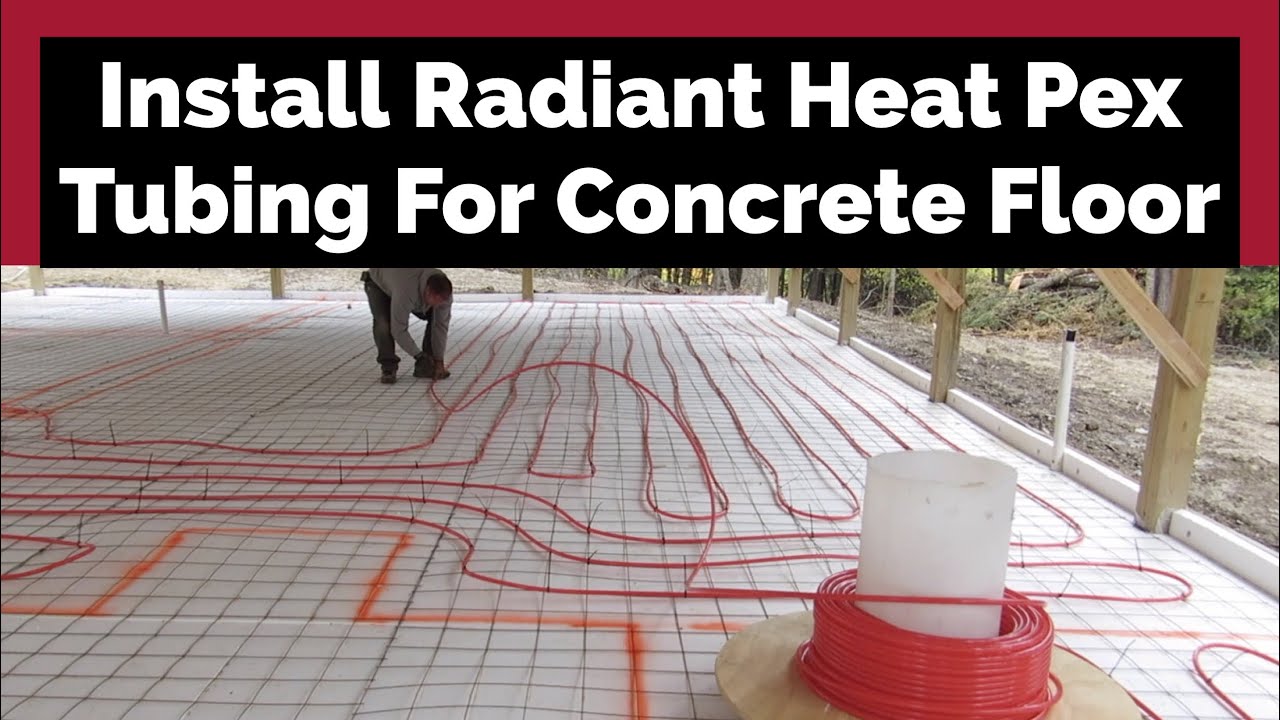
DIY Concrete Slab Radiant Heat by Radiantec – YouTube
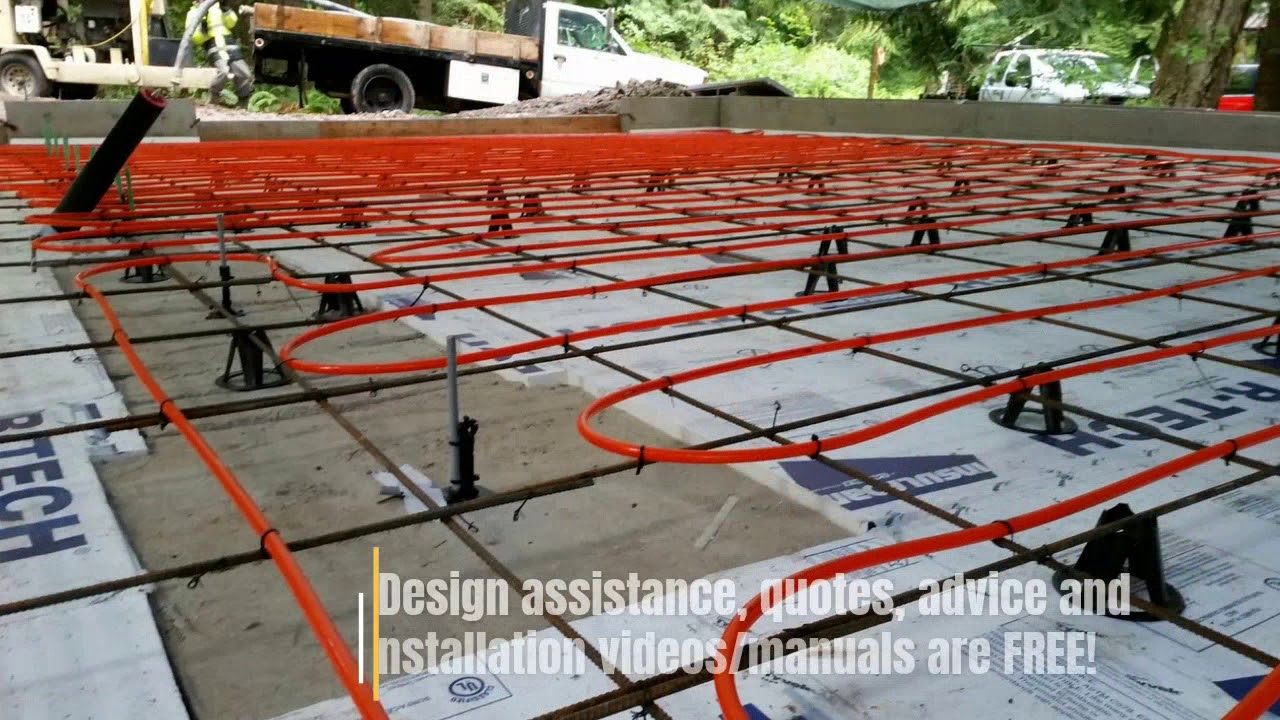
Radiant Floor Heating- Tubing Installation Methods – Radiantec
Radiant Floor Heating Green Building Winsome Construction
The Slab on Grade Installation DIY Radiant Floor Heating
Janes Radiant – Install Radiant Floor Heating Yourself
Insulated Radiant Floor ICF Foam Forms Heated with Air – Ecohome

Radiant Heating Systems, Residential, Commercial, Greenhouse
Concrete Floor Heating – Learn the truth about Radiant Heat
Radiant Floor Heating – Mikeu0027s Heating
Radiant Heat for Concrete Slab on Grade u2013 High Card Heating
How Much Does Radiant Floor Heating Cost? – Bob Vila

Related Posts:
- Concrete Floor Looks Like Marble
- Colors Of Concrete Floor Paint
- Internal Concrete Floor Finishes
- How To Test Concrete Floor For Moisture
- Acid Wash Concrete Floor Colors
- Laying Concrete Floor Slab
- Installing Concrete Floors In Homes
- DIY Concrete Floor Finishes
- Werkmaster Concrete Floor Grinder Rental
- Concrete Floor Washer
Heated Concrete Floor Tubing: Enhancing Comfort and Efficiency in Homes
Introduction:
In recent years, there has been a growing demand for energy-efficient and environmentally friendly heating solutions. One such innovation that has gained popularity is heated concrete floor tubing. This revolutionary system not only provides warmth to the entire space but also offers numerous benefits in terms of comfort, energy efficiency, and design flexibility. In this article, we will delve into the details of heated concrete floor tubing, exploring its functionality, advantages, installation process, and frequently asked questions.
I. Understanding Heated Concrete Floor Tubing:
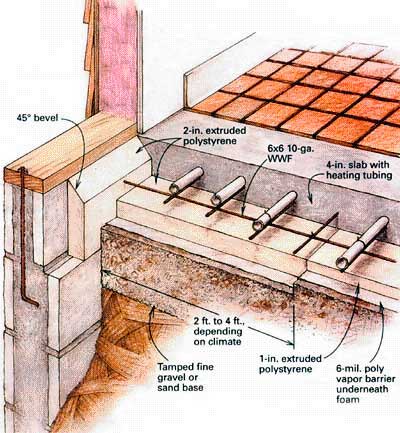
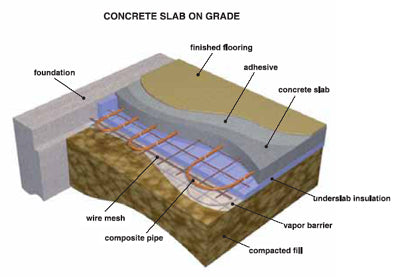
Heated concrete floor tubing refers to a network of pipes or tubes embedded within the concrete slab of a building. These tubes are designed to carry warm water or a specialized fluid, allowing for even heat distribution throughout the floor surface. The concept of radiant floor heating dates back centuries, but modern advancements have made it more efficient and accessible.
1. How does heated concrete floor tubing work?
The system operates by circulating warm water through the tubes embedded in the concrete slab. The water is heated using a boiler or a heat pump system and then pumped through the network of tubes. As the heated water flows within the pipes, it transfers its warmth to the concrete slab, which subsequently radiates heat into the room above. This radiant heat warms all objects in direct contact with the floor, creating a comfortable and cozy environment.
2. What are the advantages of heated concrete floor tubing?
– Enhanced Comfort: Unlike traditional heating systems that rely on forced air circulation, heated concrete floor tubing provides consistent warmth from the ground up. This eliminates cold spots and drafts commonly experienced with other heating methods.
– Energy Efficiency: Radiant floor heating minimizes heat loss by directly warming objects in the room rather than wasting energy on heating air that rises and escapes through windows or ceilings.
– Design Flexibility: With no need for bulky radiators or vents, heated concrete floor tubing offers greater design freedom. It allows homeowners to optimize their interior space by eliminating the constraints posed by traditional heating systems.
– Noise Reduction: Unlike forced-air heating systems that can produce noise, heated concrete floor tubing operates silently, enhancing the overall tranquility of the living space.
II. Installation Process of Heated Concrete Floor Tubing:
Installing heated concrete floor tubing involves a systematic process that requires professional expertise. Below, we outline the key steps involved in the installation:
1. Planning and Design:
The first step is to develop a comprehensive plan and design for the radiant floor heating system. This includes determining the layout of the tubing network, calculating heat load requirements, and selecting an appropriate heat source such as a boiler or a heat pump.
2. Preparing the Subfloor:
Before installing the tubing, it is essential to prepare the subfloor properly. This involves ensuring that the concrete slab is level, clean, and free from any debris or moisture. Any necessary repairs or adjustments should be made to guarantee a stable and suitable base for the installation.
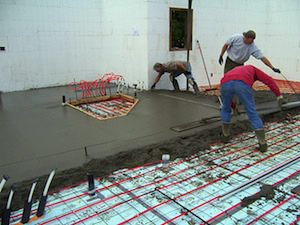
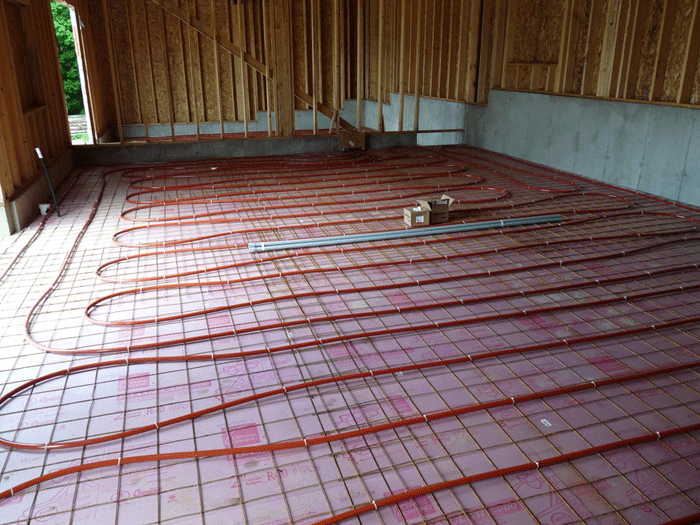
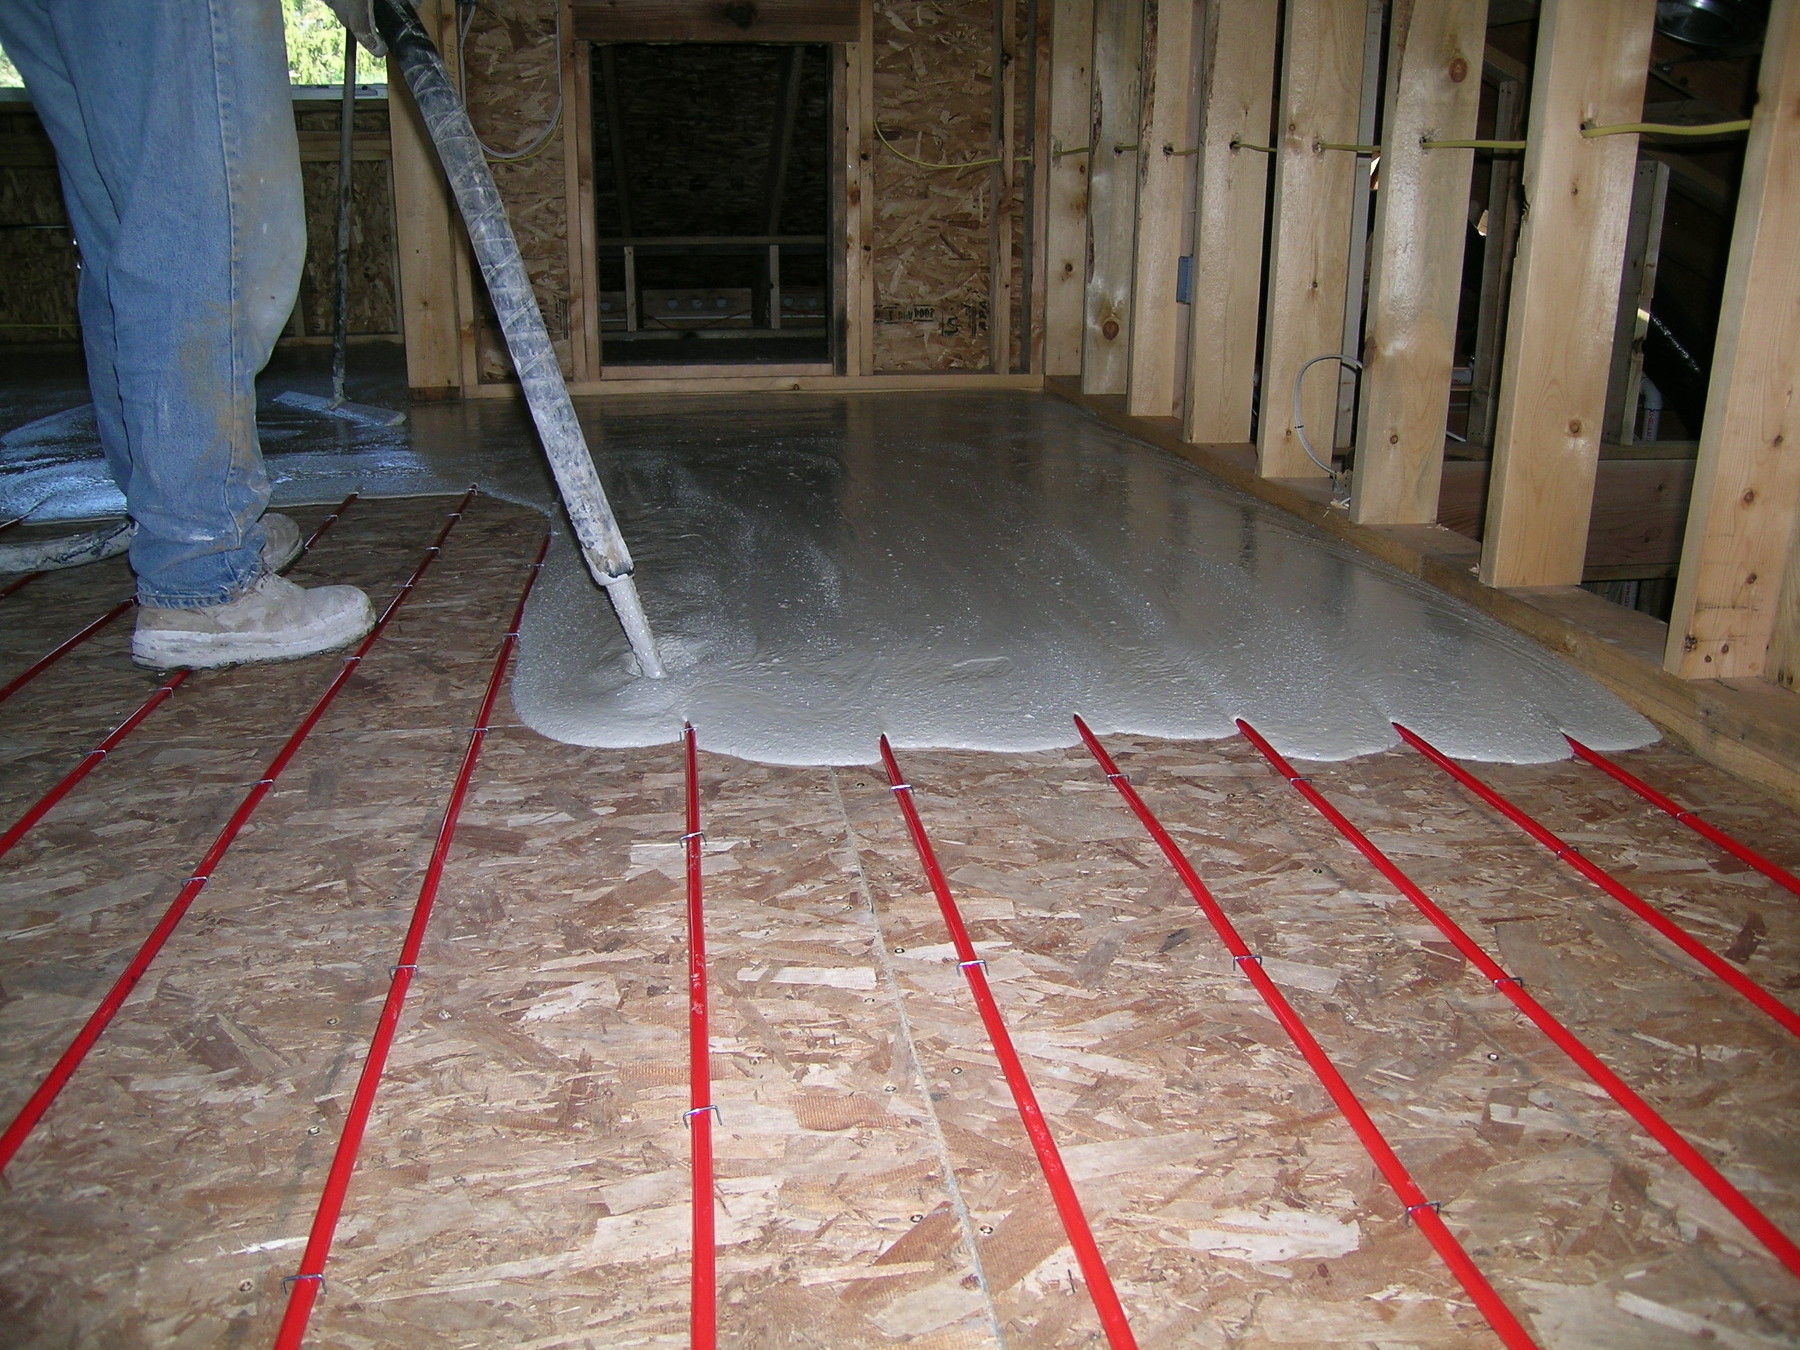
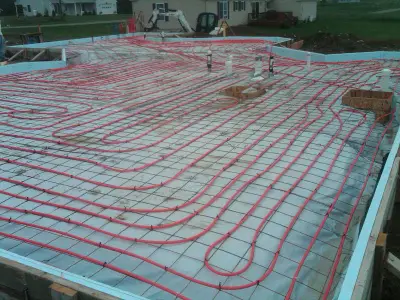
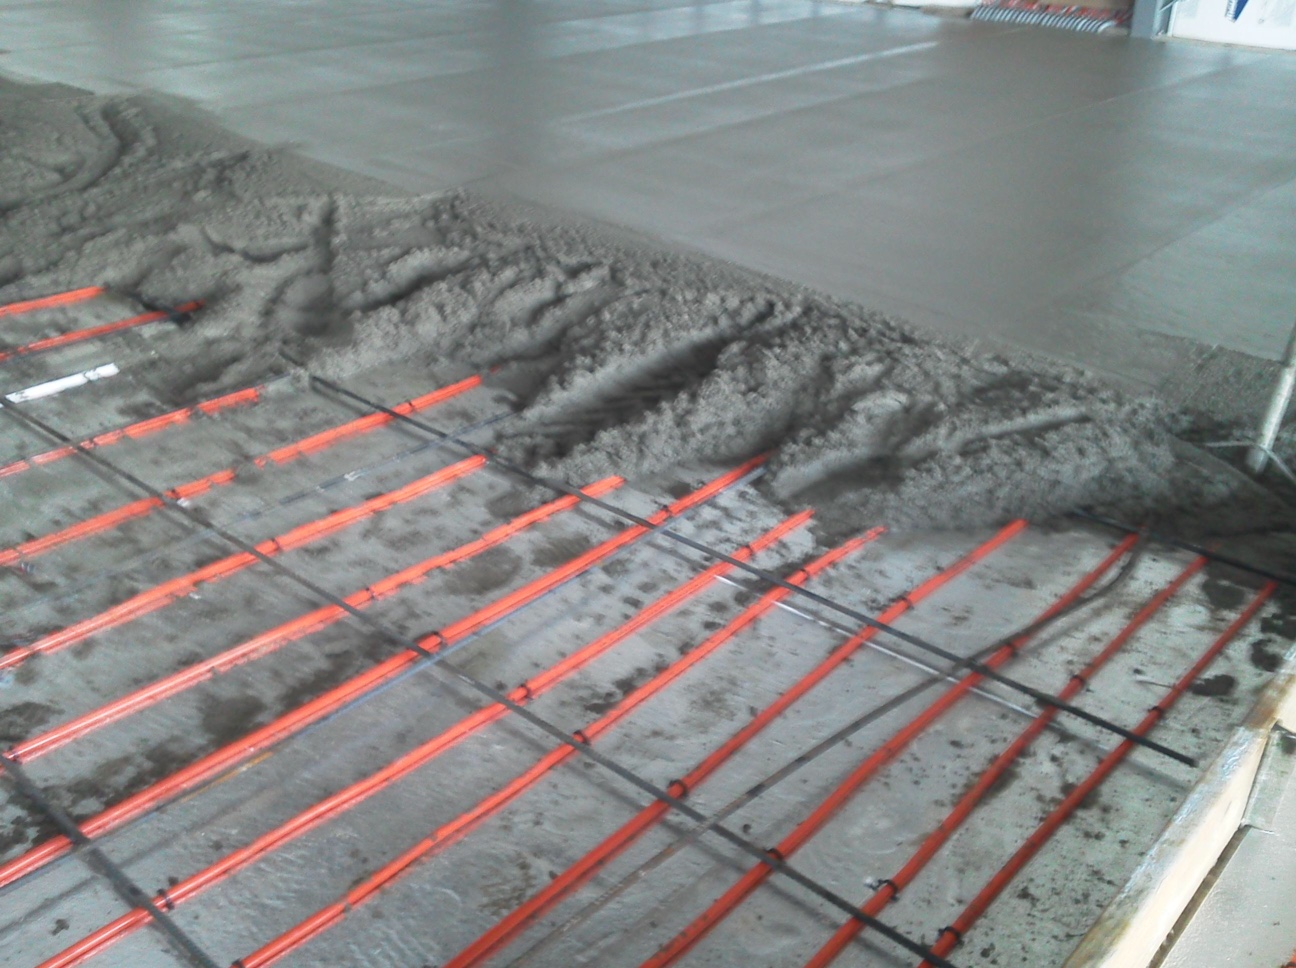
3. Tubing Installation:
Once the subfloor preparation is complete, the next step is to install the tubing system. The tubes are typically made of cross-linked polyethylene (PEX) or other flexible materials that can withstand high temperatures and pressure. They are secured to a wire mesh or a specialized mat designed to hold them in place during concrete pouring.
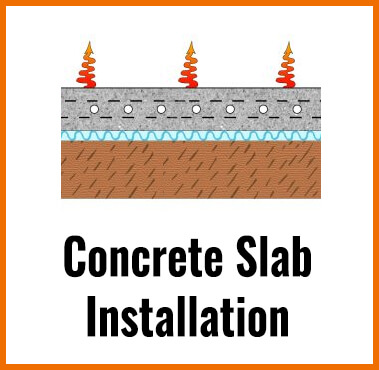
4. Concrete Pouring:
After securing the tubing, a layer of concrete is poured over it, encapsulating it within the slab. The thickness of the concrete layer Can vary depending on the specific requirements of the heating system and the desired heat transfer efficiency. It is important to ensure that the concrete is poured evenly and smoothly to create a level surface for the flooring above.
5. Testing and Commissioning:
Once the concrete has cured, the system is tested to ensure proper functioning. This involves checking for any leaks or malfunctions in the tubing network, as well as verifying the performance of the heat source. Adjustments may be made to achieve optimal heat distribution and comfort.
6. Flooring Installation:
After testing and commissioning, the final step is to install the flooring material of choice over the concrete slab. This can include tiles, hardwood, laminate, or any other suitable material. It is essential to follow proper installation guidelines to avoid compromising the integrity of the radiant floor heating system.
In conclusion, heated concrete floor tubing offers numerous advantages including enhanced comfort, energy efficiency, design flexibility, and noise reduction. The installation process involves planning and design, preparing the subfloor, tubing installation, concrete pouring, testing and commissioning, and flooring installation. It is important to consult professionals for a successful and efficient installation.