There are a lot of advantages to natural cork flooring and this article will look at the many rewards to make it easier to figure out whether this particular flooring item is right for you. Feel free to also find a vendor with a showroom so that you can get a genuine life feel because of this amazing flooring product.
Images about Installing Cork Flooring Tiles

Quite a few consumers wonder exactly how a wood based floor may be both comfortable and durable at the very same time. Cork is harvested by removing a layer of bark from the cork oak tree. This enables the cork oak to thrive and regenerate while hardly ever being cut down. Well, you can thank cork material’s cellular construction. This’s with the cellular building of cork.
Cork Floor Install – How to install a cork glue down floor.
This’s actually really self explanatory plus due to its cellular structure. Three of the best selling models of cork flooring are Wicanders, by far the best-known brand, Globus, as well as US Floors. Eco-friendly flooring essentially means its eco-friendly, sustainable and a natural renewable resource. Specifically, cork material comes out of the bark of this tree. This is due to a chemical which normally occurs within cork called Suberin.
How to Install a Cork Floor – This Old House
Sometimes if you reclaim hardwood floors they originally required the deforestation of how to live trees. If you think cork flooring might be right from you than you need to do a lot more researching into this flooring solution. When finishing a correctly installed un-finished floor, the use of sealers supplies a more uniform finish keeping possible water retention to a minimum.
How to Install Cork Flooring- Cork Flooring Installation Made Easy

How to Install Cork Tile Flooring (DIY) Family Handyman

Advantages Of A Cork Floating Floor Over Glue-Down Cork Tiles
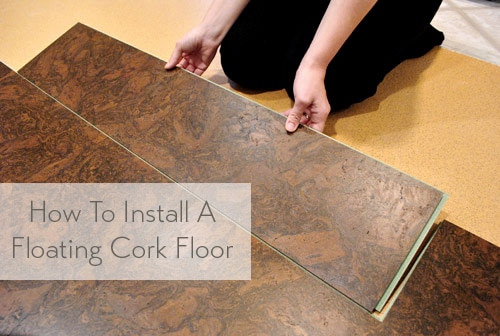
How To Install A Floating Cork Floor Young House Love Cork

How to Install Cork Tile Flooring (DIY) Family Handyman
Cork Flooring: What Are the Pros u0026 Cons?

How To Install A Floating Cork Floor Young House Love
Cork Glue Down Floors u2014 Jelinek Cork Group®
How to Install Cork Tile Flooring (DIY) Family Handyman

Related Posts:
- How To Install Cork Floor Tiles In Bathroom
- Gray Cork Floor Tiles
- Cork Flooring Tiles Reviews
- Laying Cork Flooring Over Tile
- Cork Flooring Floating Vs Glued
- Cork Flooring Pros Cons
- How To Install Cork Floor Tiles
- Cork Flooring Durability Kitchen
- Cork Flooring Brands
- Cork Vi Plank Flooring Reviews
Installing Cork Flooring Tiles: The Complete Guide
Cork flooring tiles are an ideal option for a variety of home design styles. They offer a unique and attractive look, they are durable, easy to maintain, and are relatively simple to install. This guide will walk you through the steps of correctly installing cork flooring tiles in your home.
Tools and Materials Needed
Before you begin installing your cork flooring tiles, it is important to make sure you have all the necessary tools and materials on hand. You will need a tape measure, utility knife, putty knife, level, hammer, adhesive trowel, and a mallet. Additionally, you will need to purchase the appropriate adhesive for the type of cork tiles you have chosen as well as a vapor barrier and any trim pieces you may want to use.
Measuring and Planning
When measuring your space for cork flooring tiles, it is important to account for any cuts or trim pieces that will need to be made in order to fit the tiles properly. Using your tape measure and a pencil or chalk line, mark out the area where your cork tiles will be placed. If there are any large objects that need to be moved before installation, do so now. Also take into consideration the direction in which the pattern of your cork tile should flow – this will help you determine which way to lay the tiles later on.
Preparing the Subfloor
Before laying down any cork flooring tiles, it is important to ensure that your subfloor is properly prepared for installation. If there are any loose boards or nails sticking up from the subfloor they should be removed first. Then using a damp mop or rag wipe down the surface in order to remove any dust or dirt particles that may interfere with adhesion later on. Make sure that your subfloor is completely dry before moving on to the next step.
Laying Down Vapor Barrier
In order to protect your subfloor against moisture damage it is important to lay down a vapor barrier before laying down any cork flooring tiles. This can be done by unrolling a sheet of plastic sheeting across the entire area where the cork tiles will be installed and then securing it in place with duct tape along all edges. Make sure that any seams between sheets are overlapped by at least six inches in order to create an effective seal against moisture seepage.
Applying Adhesive
Once the vapor barrier has been laid down it’s time to apply adhesive in preparation for laying down your cork flooring tiles. Depending on what type of adhesive you have chosen (water-based or solvent-based) apply it evenly across your subfloor using an adhesive trowel according to manufacturer instructions. Make sure that each section is covered completely with adhesive before moving on to the next one – this will help ensure proper adhesion of your cork flooring tiles later on.
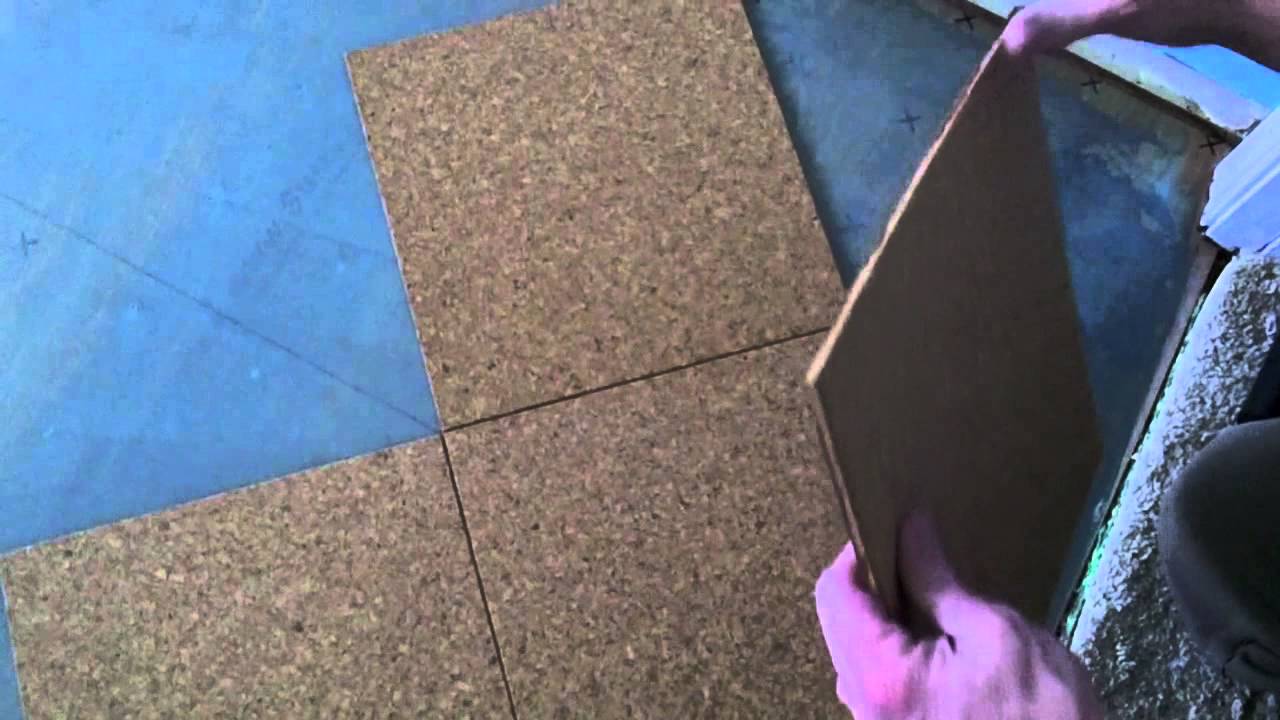
Laying Down Cork Tiles
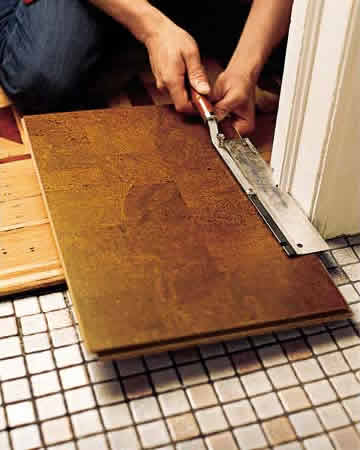
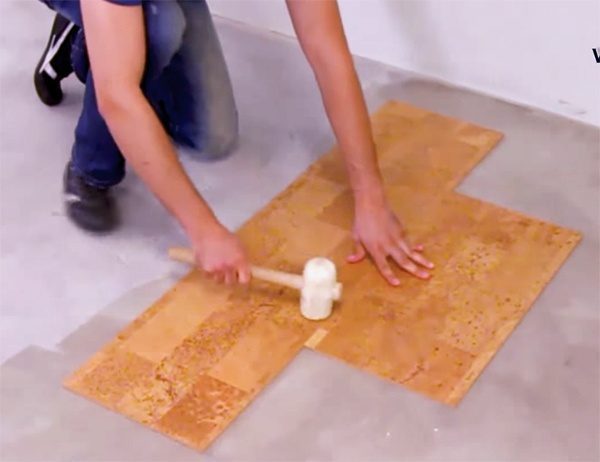
Now comes the fun part – laying down your cork flooring tiles! Begin at one corner of the room and begin laying down each tile one by one according to your pre-measured plan making sure that each tile is as close together as possible without overlapping them or leaving Any gaps. If you need to make any cuts to fit the tiles into place, use a utility knife or putty knife to do so. Once all the tiles are in place, use a mallet or rubber mallet to tap down each one and ensure that it is properly adhered to the subfloor.
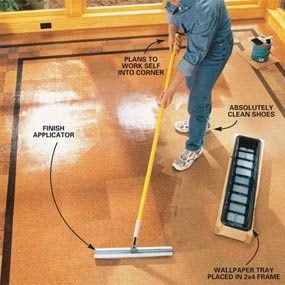
Finishing Touches
After your cork flooring tiles have been laid down it is important to allow them to set for at least 24 hours before walking on them. Additionally, if you are planning on adding any trim pieces (like baseboards or thresholds) it should be done now before the adhesive has completely dried. Once everything is installed and dry you can enjoy your new cork flooring!
What tools are needed for installing cork flooring tiles?
Tools needed for installing cork flooring tiles include:
– Utility knife
– Tape measure
– Straight edge
– Marker
– Hammer
– Nails or staples
– Flooring adhesive
– Notched trowel
– Padding adhesive
– Cork underlayment
– Spacers
– Mallet or rubber mallet
– Vacuum cleaner
– Soft cloths or mop
What type of adhesive should I use for installing cork flooring tiles?
The most common type of adhesive used for installing cork flooring tiles is a high-quality, water-based adhesive. Make sure to use an adhesive that is specifically designed for cork flooring. Solvent-based adhesives should be avoided as they can cause damage to the cork tiles.
What is the difference between glue and adhesive for cork flooring tiles?
Glue is typically a liquid adhesive used to bond two surfaces together. Adhesive for cork flooring tiles is typically a pressure-sensitive adhesive that comes in sheets and is applied to the back of the tile. Glue can be used as an adhesive, but it is not recommended for cork flooring tiles, as it tends to be too aggressive and may damage the tile over time.