Garage flooring coatings get the important and essential floor coatings for the people. First floor must be totally cleaned and then roughed up a bit for the epoxy to bind to the concrete floor coating. They could have a great deal plumbed therefore dirty clothes and the noise can certainly be kept in an additional area of the house. You are going to want to make certain you clean your garage flooring surface properly prior to applying any new surface.
Images about DIY Garage Floor Leveling

The fastest way to determine if the garage floor of yours is able to have this particular paint applied to it's by carry out a really simple test. Among the most popular designs of all the time is the checkered blackish and white colored look. In addition, it can provide for a far more eye appealing flooring in the progression.
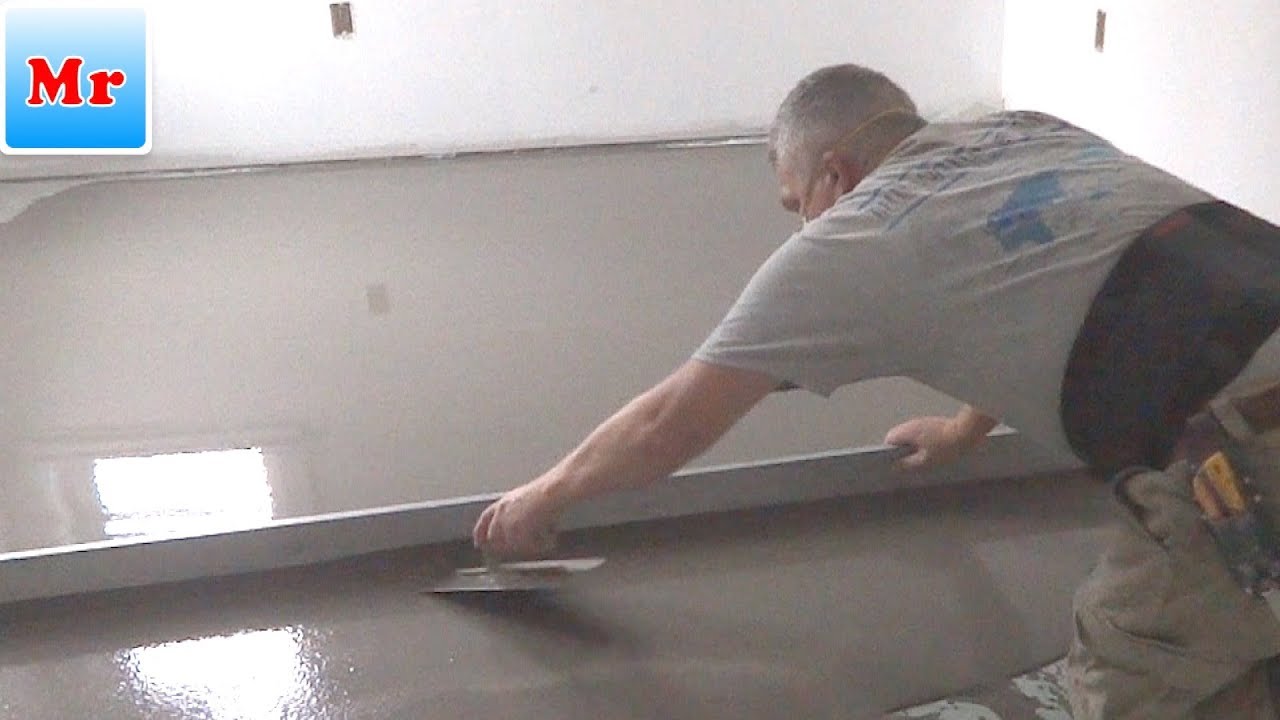
How to Make a Floor Leveling with Concrete Self Leveling Compound MrYoucandoityourself
At one time sealants and also epoxy coverings were the sole choices for protecting commercial and residential garage space. But possibly the best reason behind covering your garage floor with a special flooring coverage is the fact that it is going to help the floor to last longer. Giving your garage floor a thorough and deep cleaning will help prepare it for its new paint job.
DIY self leveling concrete Honey Built Home

Tips u0026 Tricks to Self-Level a Floor at Millieu0027s Remodel – Pretty
18 Tips for working with Self-Leveling Underlayment
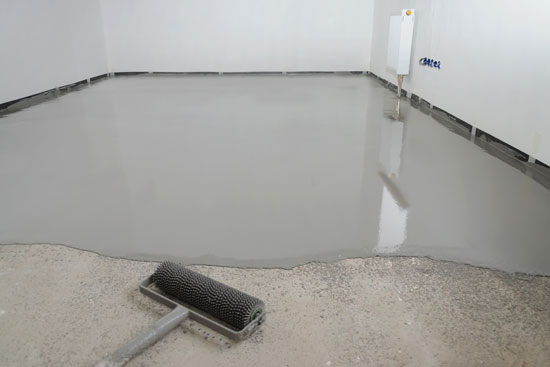
How to Self Level Concrete Floors Like Pros – Self Leveler
Self-Leveling Concrete: Preparing for Installation [Tips]
How to use self-leveling on large floor areas
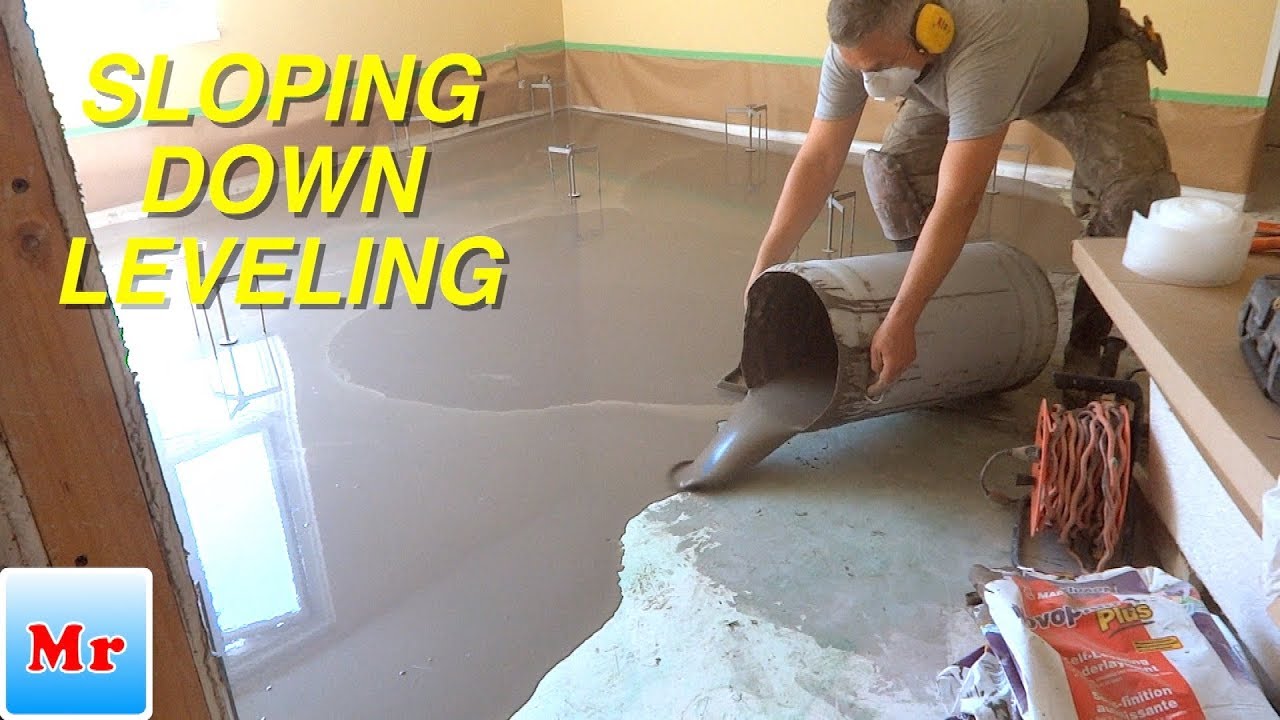
How to Make a Concrete Subfloor Leveling with Sloping Down Side DIY MrYoucandoityourself
Leveling a Concrete Floor – Bob Vila
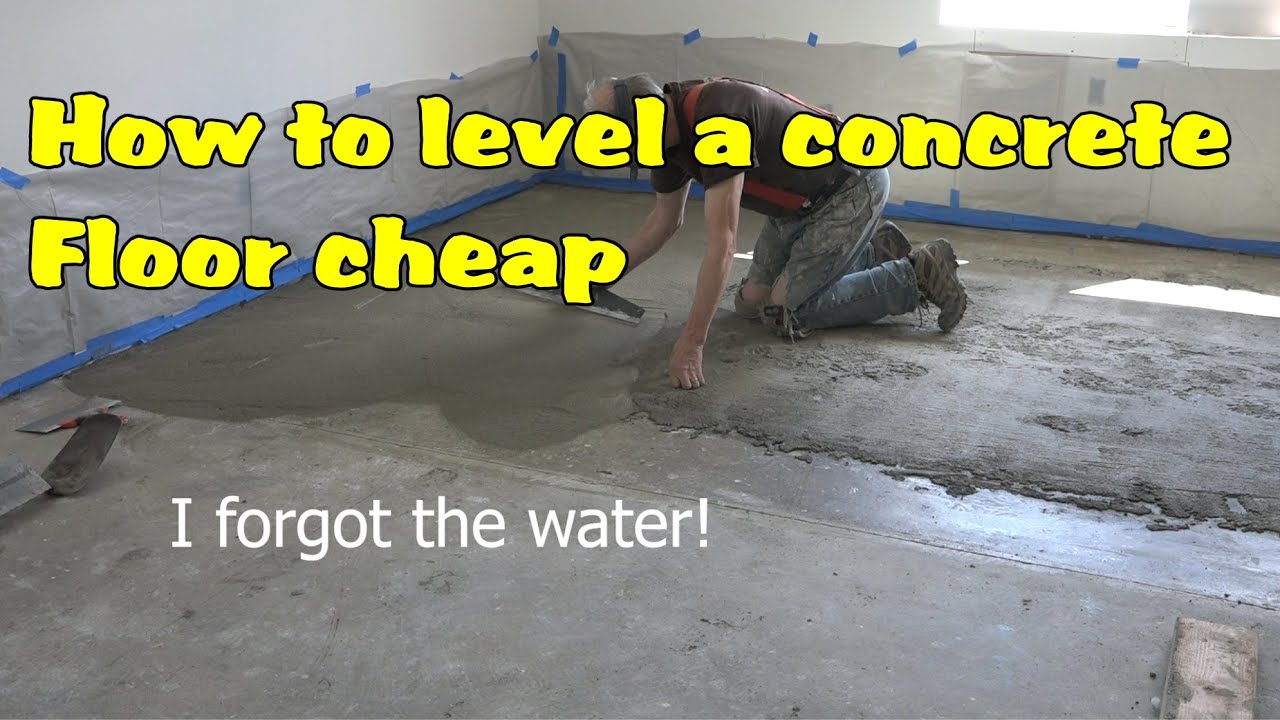
How to level a concrete floor cheap
I have been experimenting with Self-Leveling Concrete as a floor

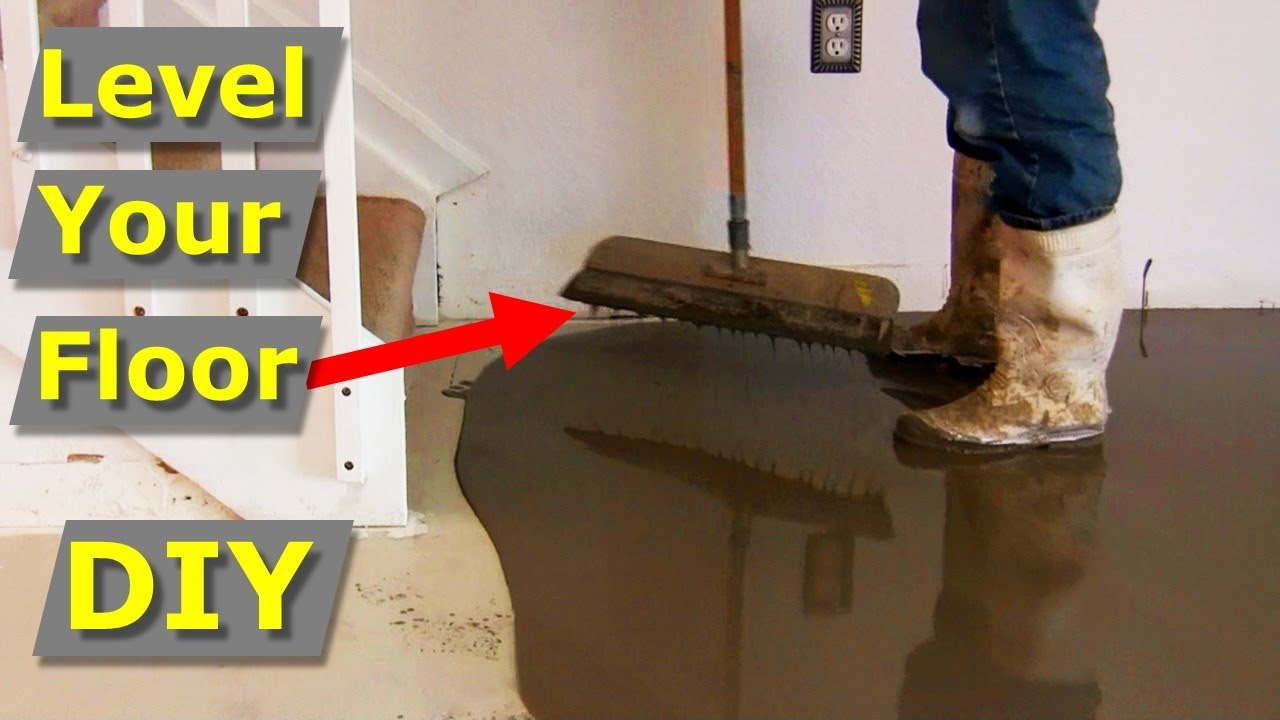
How to Level a Concrete Floor DIY Concrete Floor Leveling

Tips u0026 Tricks to Self-Level a Floor at Millieu0027s Remodel – Pretty
![]()
Related Posts:
- Why Does My Garage Floor Get Wet When It Rains
- Garage Floor Coating Company
- Garage Floor Paint Best
- Garage Flooring For Gym
- Garage Floor Insulation Ideas
- Garage Floor Sweepers
- Rustoleum Garage Floor Epoxy Prep
- Garage Floor Paint Rona
- Commercial Grade Garage Floor Coating
- Garage Floor Liner Mats
DIY Garage Floor Leveling: Step-by-Step Guide to a Smooth Surface
Introduction:
Having a level garage floor is essential for various reasons. Not only does it provide a stable foundation for parking vehicles and storing belongings, but it also enhances the overall aesthetics of your garage. If you’ve noticed unevenness or dips in your garage floor, don’t fret! With a little determination and some DIY skills, you can level your garage floor and create a smooth surface. In this comprehensive guide, we will walk you through the step-by-step process of DIY garage floor leveling, along with some frequently asked questions to address any concerns you may have.
I. Assessing the Condition of Your Garage Floor:
Before diving into the leveling process, it’s crucial to assess the condition of your garage floor. Here are the steps to follow:
1. Clear the Space: Remove all objects from your garage floor, including vehicles, tools, and storage items. This will allow you to thoroughly examine the surface for any cracks or irregularities.
2. Inspect for Cracks: Carefully inspect the entire garage floor for cracks or fractures. Use a flashlight to identify any hidden damages that may not be immediately visible.
3. Measure Dips and High Spots: Using a long straightedge or level, check for dips or high spots in your garage floor. Mark these areas with masking tape or chalk to ensure they’re easily identifiable during the leveling process.
FAQs:
Q1: How do I know if my garage floor needs leveling?
A1: Common signs include noticeable unevenness, cracks, or the inability to park vehicles without them leaning noticeably in one direction.
Q2: Can I level my garage floor if it has extensive damage?
A2: It depends on the severity of the damage. Minor cracks and small dips can be addressed through DIY methods, but major structural issues may require professional intervention.
II. Gathering Materials and Tools:
Once you have assessed the condition of your garage floor, it’s time to gather the necessary materials and tools for the leveling process. Here’s what you’ll need:
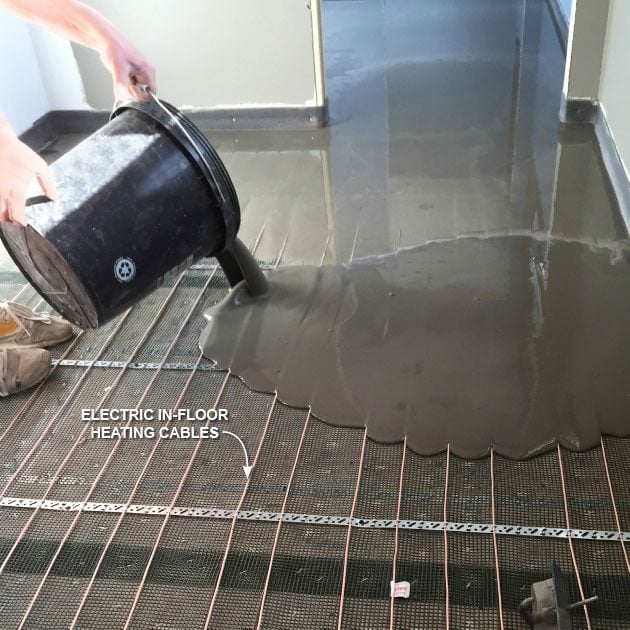
1. Self-Leveling Compound: This is a crucial component of the leveling process. Self-leveling compounds are specifically designed to fill in dips and create a smooth surface.
2. Concrete Patching Compound: If your garage floor has any cracks or small holes, a high-quality concrete patching compound will help repair them effectively.
3. Trowel: A trowel is essential for spreading the self-leveling compound and achieving an even application across the entire surface.
4. Sander or Grinder: You may need a sander or grinder to remove any existing coatings, rough areas, or stubborn stains on your garage floor before applying the self-leveling compound.
5. Safety Gear: Don’t forget to prioritize safety by wearing protective gear such as goggles, gloves, and a dust mask.
FAQs:
Q1: Can I use regular concrete mix instead of a self-leveling compound?
A1: It is not recommended. Regular concrete mix is not designed to self-level and may not provide the desired results. Self-leveling compounds offer better flowability and are specifically formulated for this purpose.
Q2: How much self-leveling compound do I need?
A2: The amount of compound required depends on the square footage of your garage floor and the depth of the dips or unevenness. Refer to the manufacturer’s instructions for guidance on coverage per bag.
III. Preparing Your Garage Floor:
Before you start leveling your garage floor, it’s important to properly prepare the surface. Follow these steps:
1. Clean the Floor: Remove any debris, dirt, or oil stains from the garage floor. Use a broom or vacuum to sweep away loose particles, and consider using a degreaser to remove any stubborn stains.
2. Repair Cracks and Holes: If you identified any cracks or small holes during the inspection, use the concrete patching compound to fill them in. Follow the manufacturer’s instructions for mixing and applying the compound, and make sure to smooth it out for a seamless finish.
3. Roughen the Surface: Use a sander or grinder to roughen up the surface of your garage floor. This will help the self-leveling compound adhere better to the existing concrete. Make sure to wear protective gear and follow safety precautions while using these tools.
4. Apply Primer (if necessary): Some self-leveling compounds require a primer to be applied before the leveling process. Check the instructions provided with your compound and apply primer if required. Allow it to dry according to the recommended time frame.
FAQs:
Q1: Can I skip repairing cracks and holes?
A1: It is not recommended to skip this step as it can affect the overall results of leveling your garage floor. Repairing cracks and holes ensures a smoother surface and prevents further damage.
Q2: What type of primer should I use?
A2: The type of primer needed depends on the self-leveling compound you are using. Refer to the manufacturer’s instructions for their recommended primer or consult with a professional for guidance.
IV. Leveling Your Garage Floor:
Now that your garage floor is prepped, you can begin the leveling process. Follow these steps:
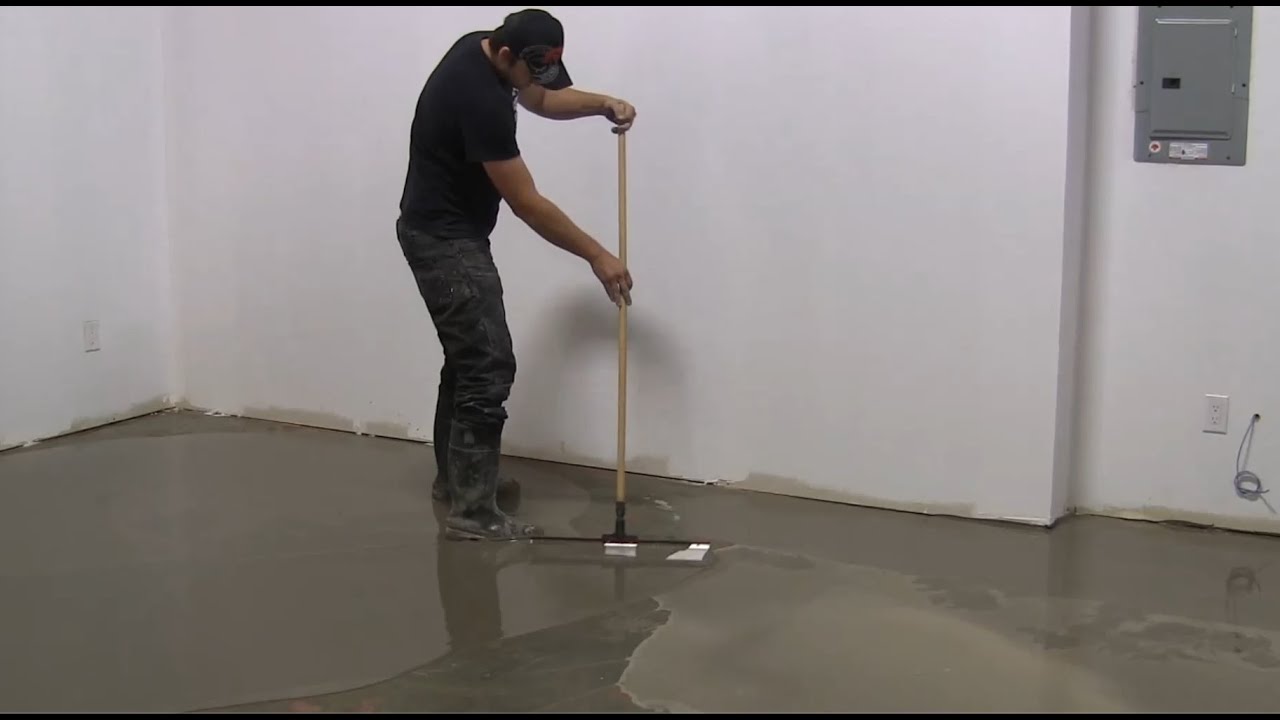
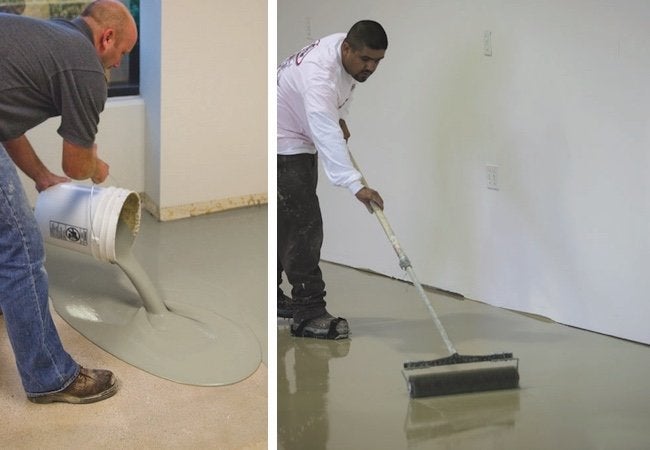
1. Mix the Self-Leveling Compound: Follow the manufacturer’s instructions to mix the self-leveling compound. Use a mixing paddle and a drill to achieve a smooth and consistent mixture.
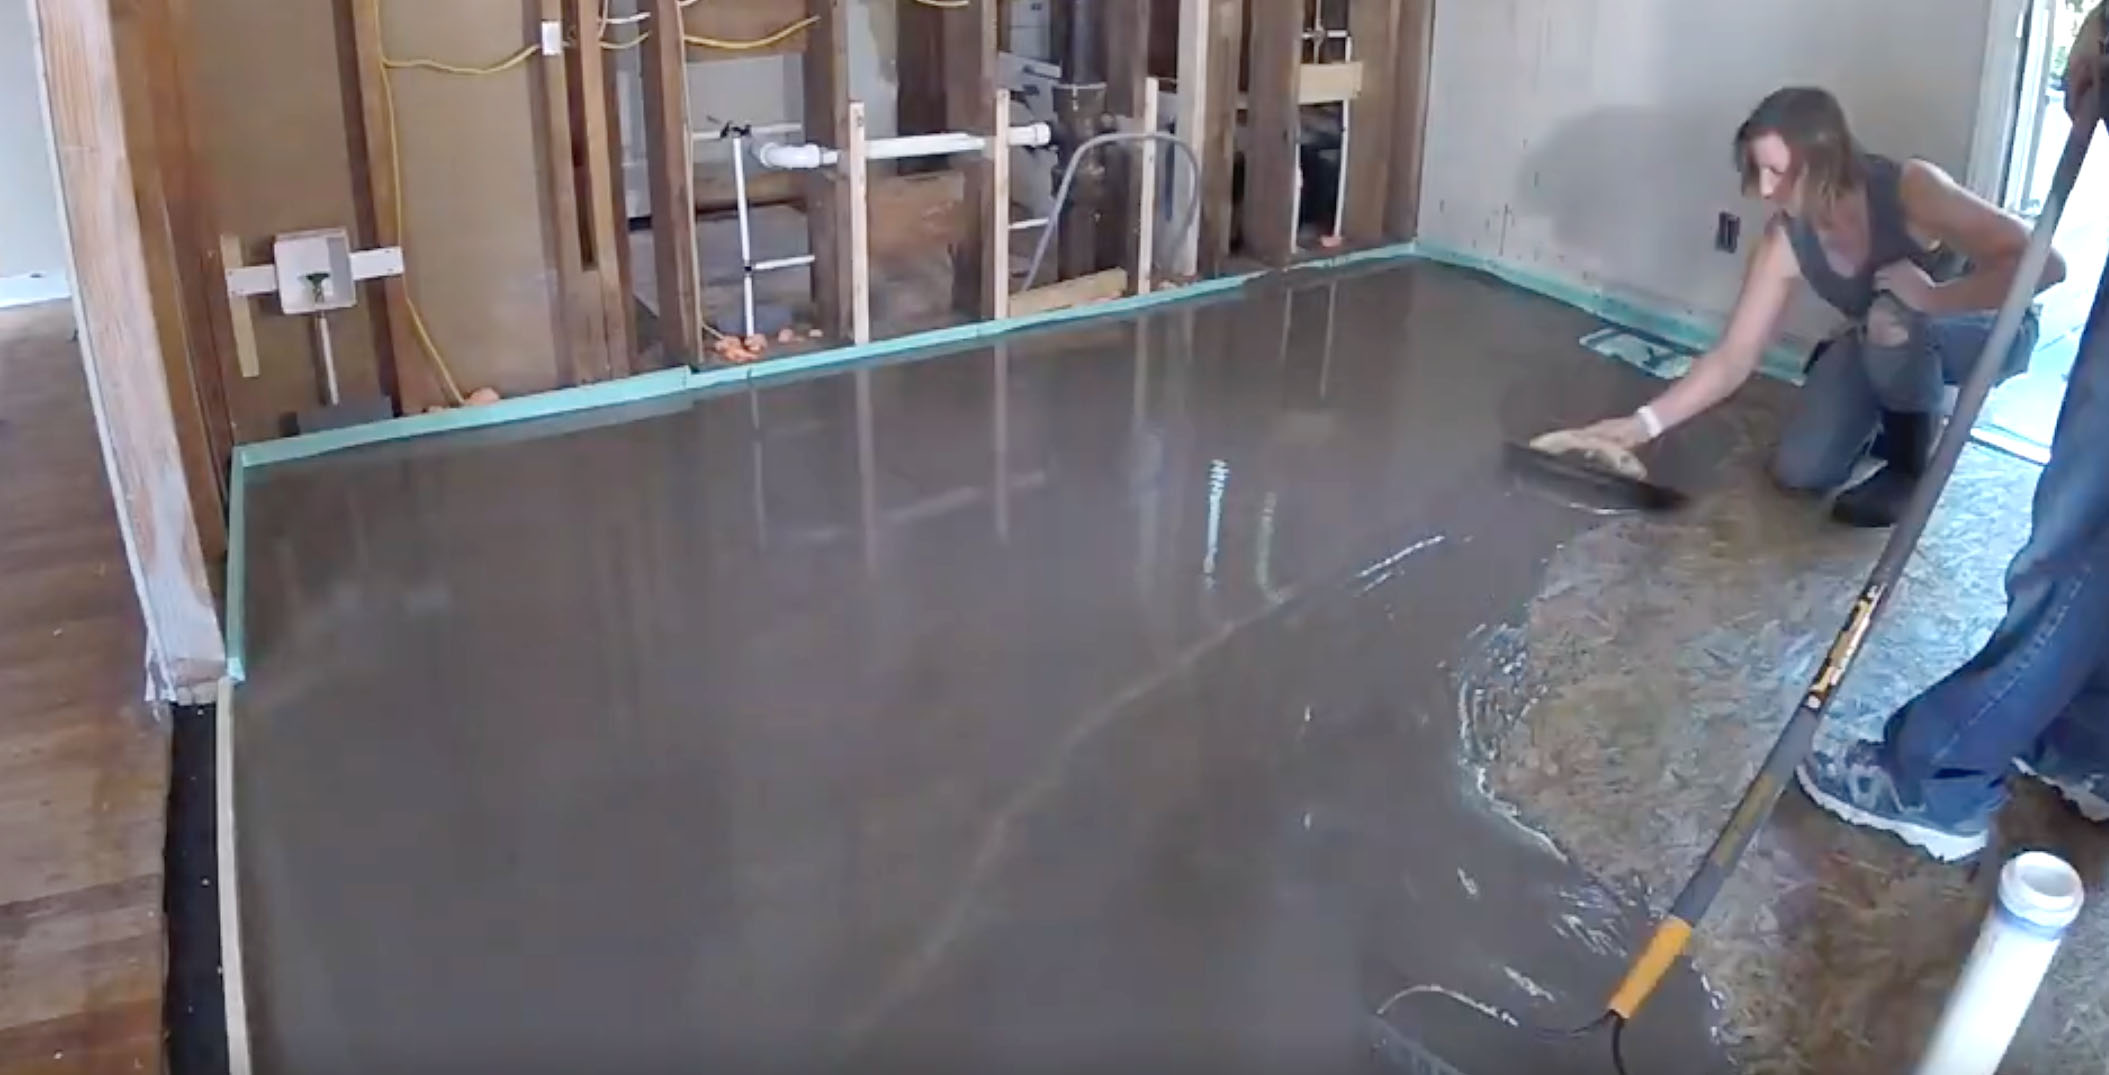
2. Pour and Spread the Compound: Start pouring the self-leveling compound onto the lowest dip or uneven area of your garage floor. Use a trowel to spread it evenly, working towards the edges of the floor. Continue pouring and spreading until you have covered all the marked areas.
3. Smooth Out the Surface: Once you have spread the compound, use a trowel or a long straightedge to ensure an even surface. Smooth out any ridges or bumps by gently dragging the tool across the compound.
4. Allow for Drying Time: The self-leveling compound will require some time to dry and set. Follow the manufacturer’s instructions for drying time, which is usually around 24 hours. Avoid walking on or placing heavy objects on the floor during this time.
FAQs:
Q1: Can I add color to the self-leveling compound?
A1: Yes, some self-leveling compounds allow for color additives to be mixed in. This can be done before adding water to the mixture, but make sure to follow the manufacturer’s instructions for proper ratios and application.
Q2: How long do I have to wait before using my garage after leveling?
A2: The drying time can vary depending on the self-leveling compound and environmental conditions. It’s best to wait at least 24 hours before walking on or placing any heavy objects on the newly leveled floor.