Oak hardwood flooring is preferred over laminate flooring by most of people because of its environmental friendly qualities, you are able to quickly install them and also you merely have to put in just once because oak flooring is actually purchase for lifetime. Moisture content is actually an incredibly crucial component when setting up hardwood flooring.
Images about Finishing Hardwood Floors Steps
Some additional detriments to installing unfinished hardwoods are: the vapors associated with finishing the floor on-site, the decreased amount of coats being used and the lack of ability to seal the finish with the help of the UV light process. This particular artificial substance serves as the bottom level and it is generally impervious to moisture. For centuries, hardwood floors happen to be gracing magnificent homes through the Deep South to stylish homes of kings and queens.
Refinishing Hardwood Floors: How to Refinish Hardwood Floors (DIY
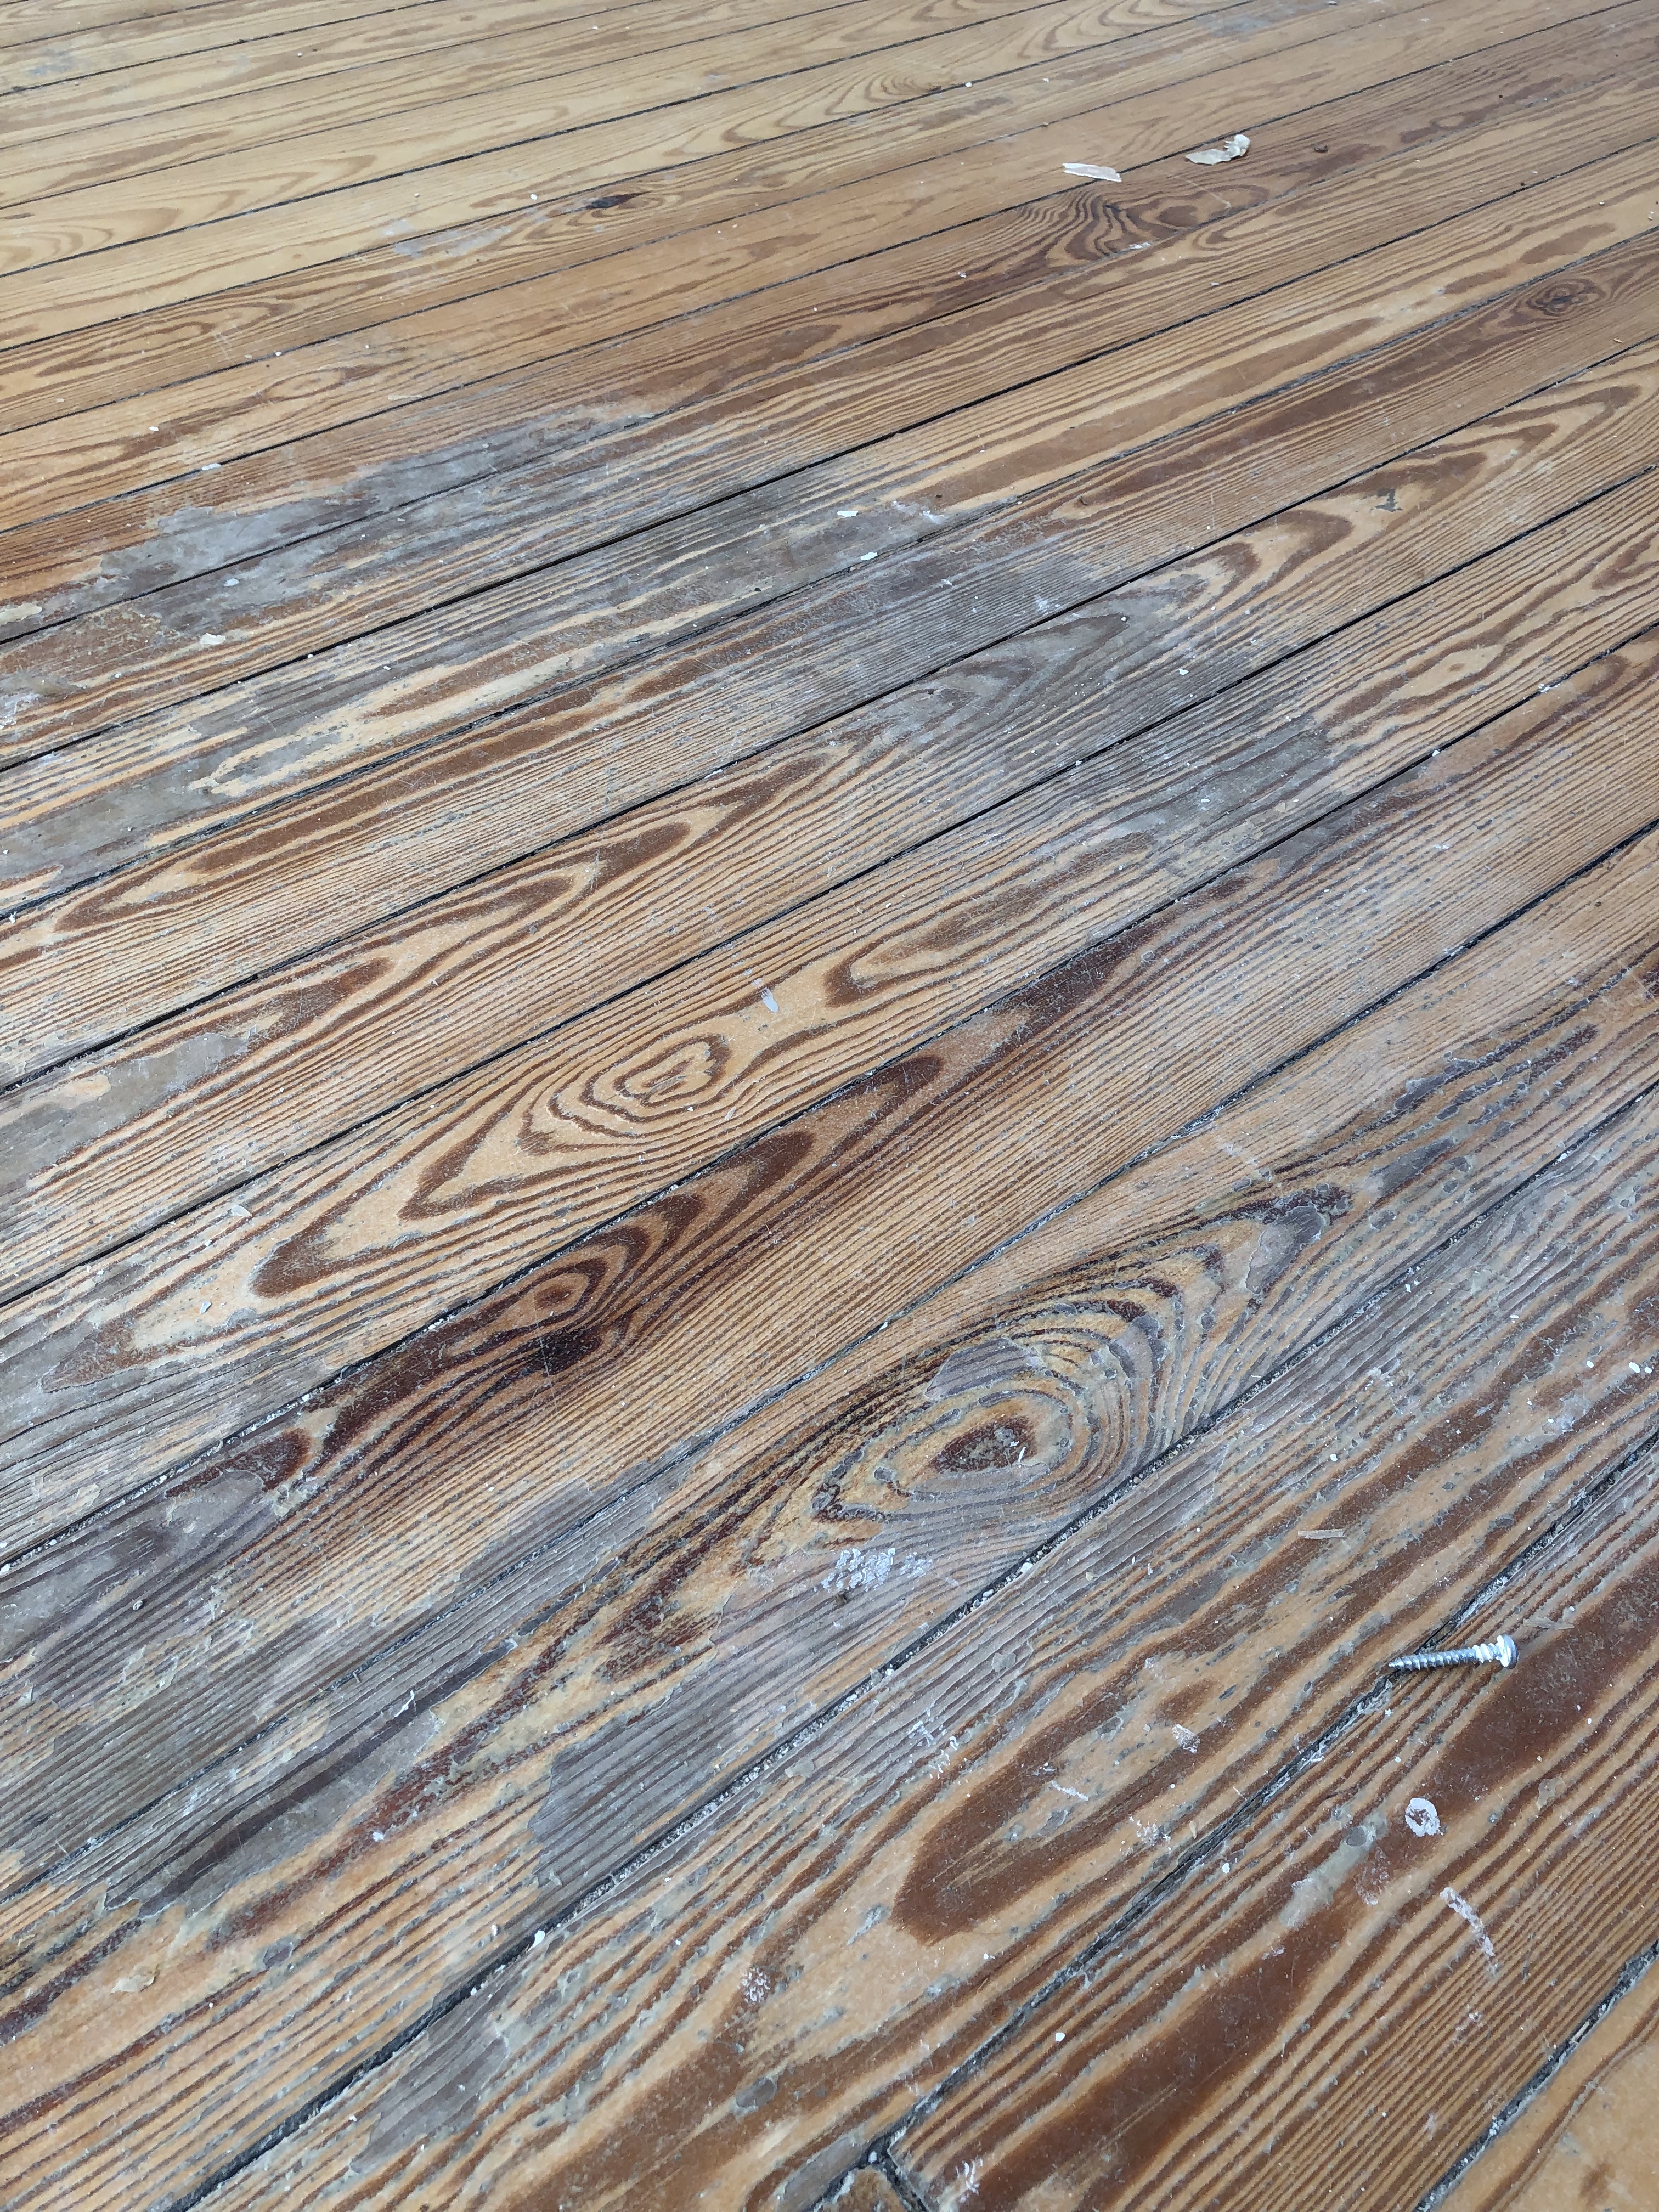
You’ll need to have some severe sledgehammer, crow bar, and then circular saw work in case you ever wish to replace that glued down hardwood floors. Knowing how to clean hardwood floors is actually essential since the bane of hardwood is grit and dirt, which will scratch as well as mark the floor if it is not removed promptly. Hardwood is definitely a premium flooring option for business use and for custom, upscale homes.
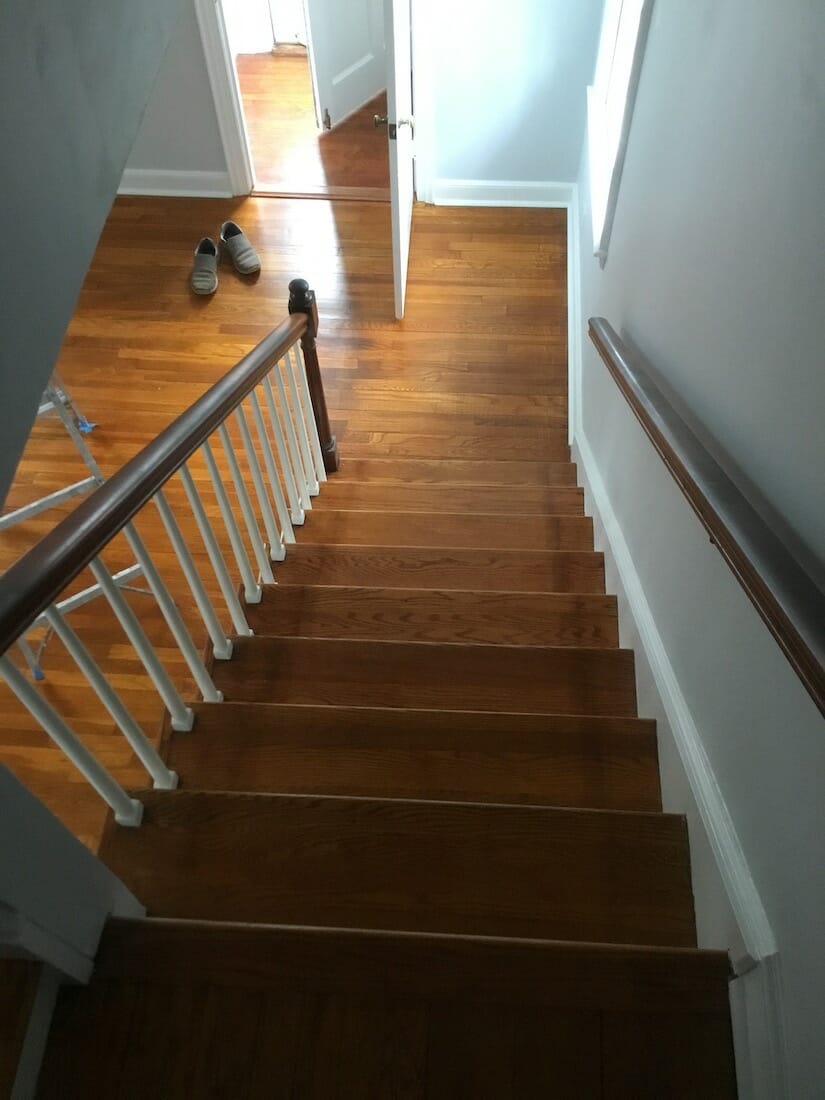
Refinishing Hardwood Stairs u2013 Before u0026 After Stair Remodel Ideas
How To Refinish Hardwood Floors – DIY Home Improvement HGTV

How to Refinish Hardwood Floors the Easy Way – This Old House
/cdn.vox-cdn.com/uploads/chorus_asset/file/19494866/02_refinishing.jpg)
How to Refinish Hardwood Floors – Part 1 Refinishing hardwood

DIY or Professional Hardwood Floor Refinishing – Which One is Good?

How to Sand and Refinish a Hardwood Floor
/refinish-hardwood-flooring-1314864-hero-8c687ea6601148a2af507a47c0e57491.jpg)
How to Refinish Hardwood Floors The Good Guys

How to Refinish Hardwood Floors True Value

How-to Sand u0026 Stain Hardwood Floors
HOW TO REFINISH HARDWOOD FLOORS: Step-by-Step Do It Yourself Guide
How To Refinish Hardwood Floors – DIY Home Improvement HGTV
HOW TO REFINISH HARDWOOD FLOORS: Step-by-Step Do It Yourself Guide
Related Posts:
- Best Thickness For Engineered Hardwood Flooring
- Irwin Tiles Hardwood Floors Monaghan
- Bona Hardwood Floor Cleaning Instructions
- Best Engineered Hardwood Flooring Manufacturers
- Hardwood Flooring From Lumber Liquidators
- Chocolate Hickory Hardwood Flooring
- Hardwood Floor Gap Filler Products
- Hoover Hardwood Floor Cleaning Machine
- Bona Hardwood Floor Cleaner Pads
- Nailing Hardwood Flooring With Gun
Title: Achieving Flawless Hardwood Floors: A Step-by-Step Guide to Finishing
Introduction:
When it comes to adding a touch of elegance and sophistication to your home, hardwood floors are an excellent choice. To ensure their longevity and enhance their natural beauty, finishing hardwood floors is essential. This comprehensive guide will walk you through each step of the process, providing detailed instructions and addressing common FAQs.
I. Preparing the Floor:
Before diving into the finishing process, proper preparation is crucial. Here’s what you need to do:
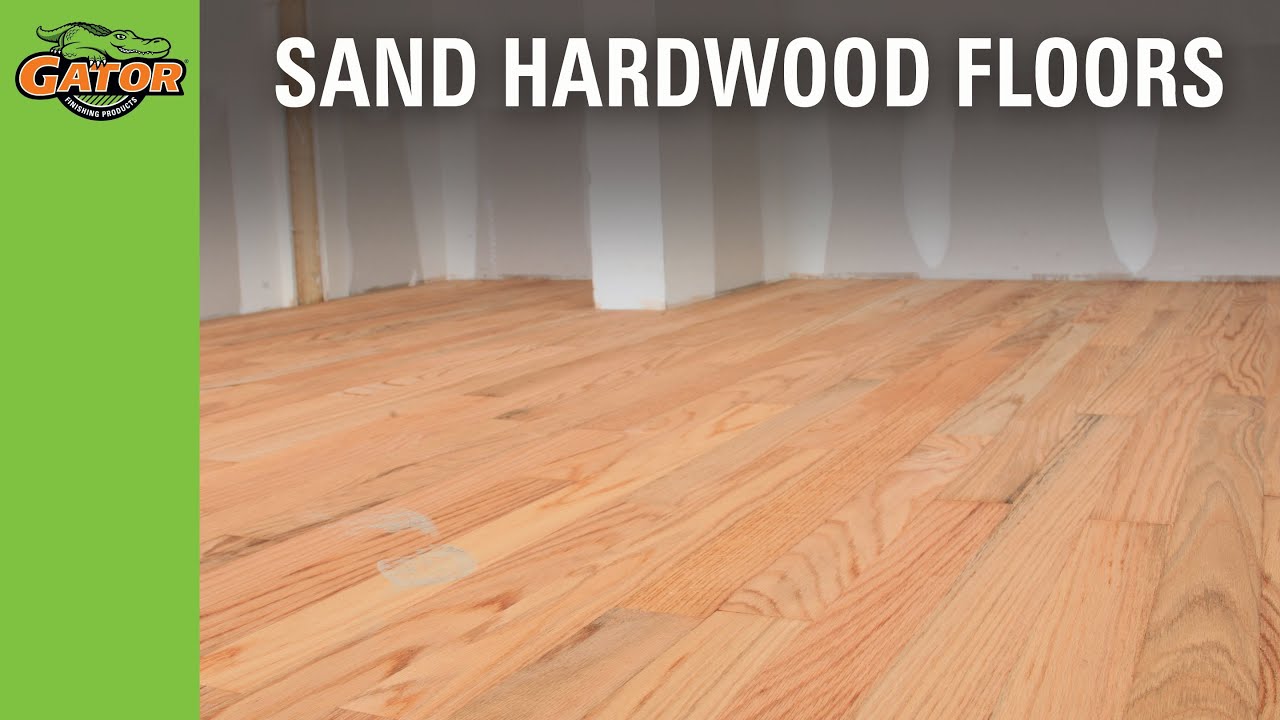
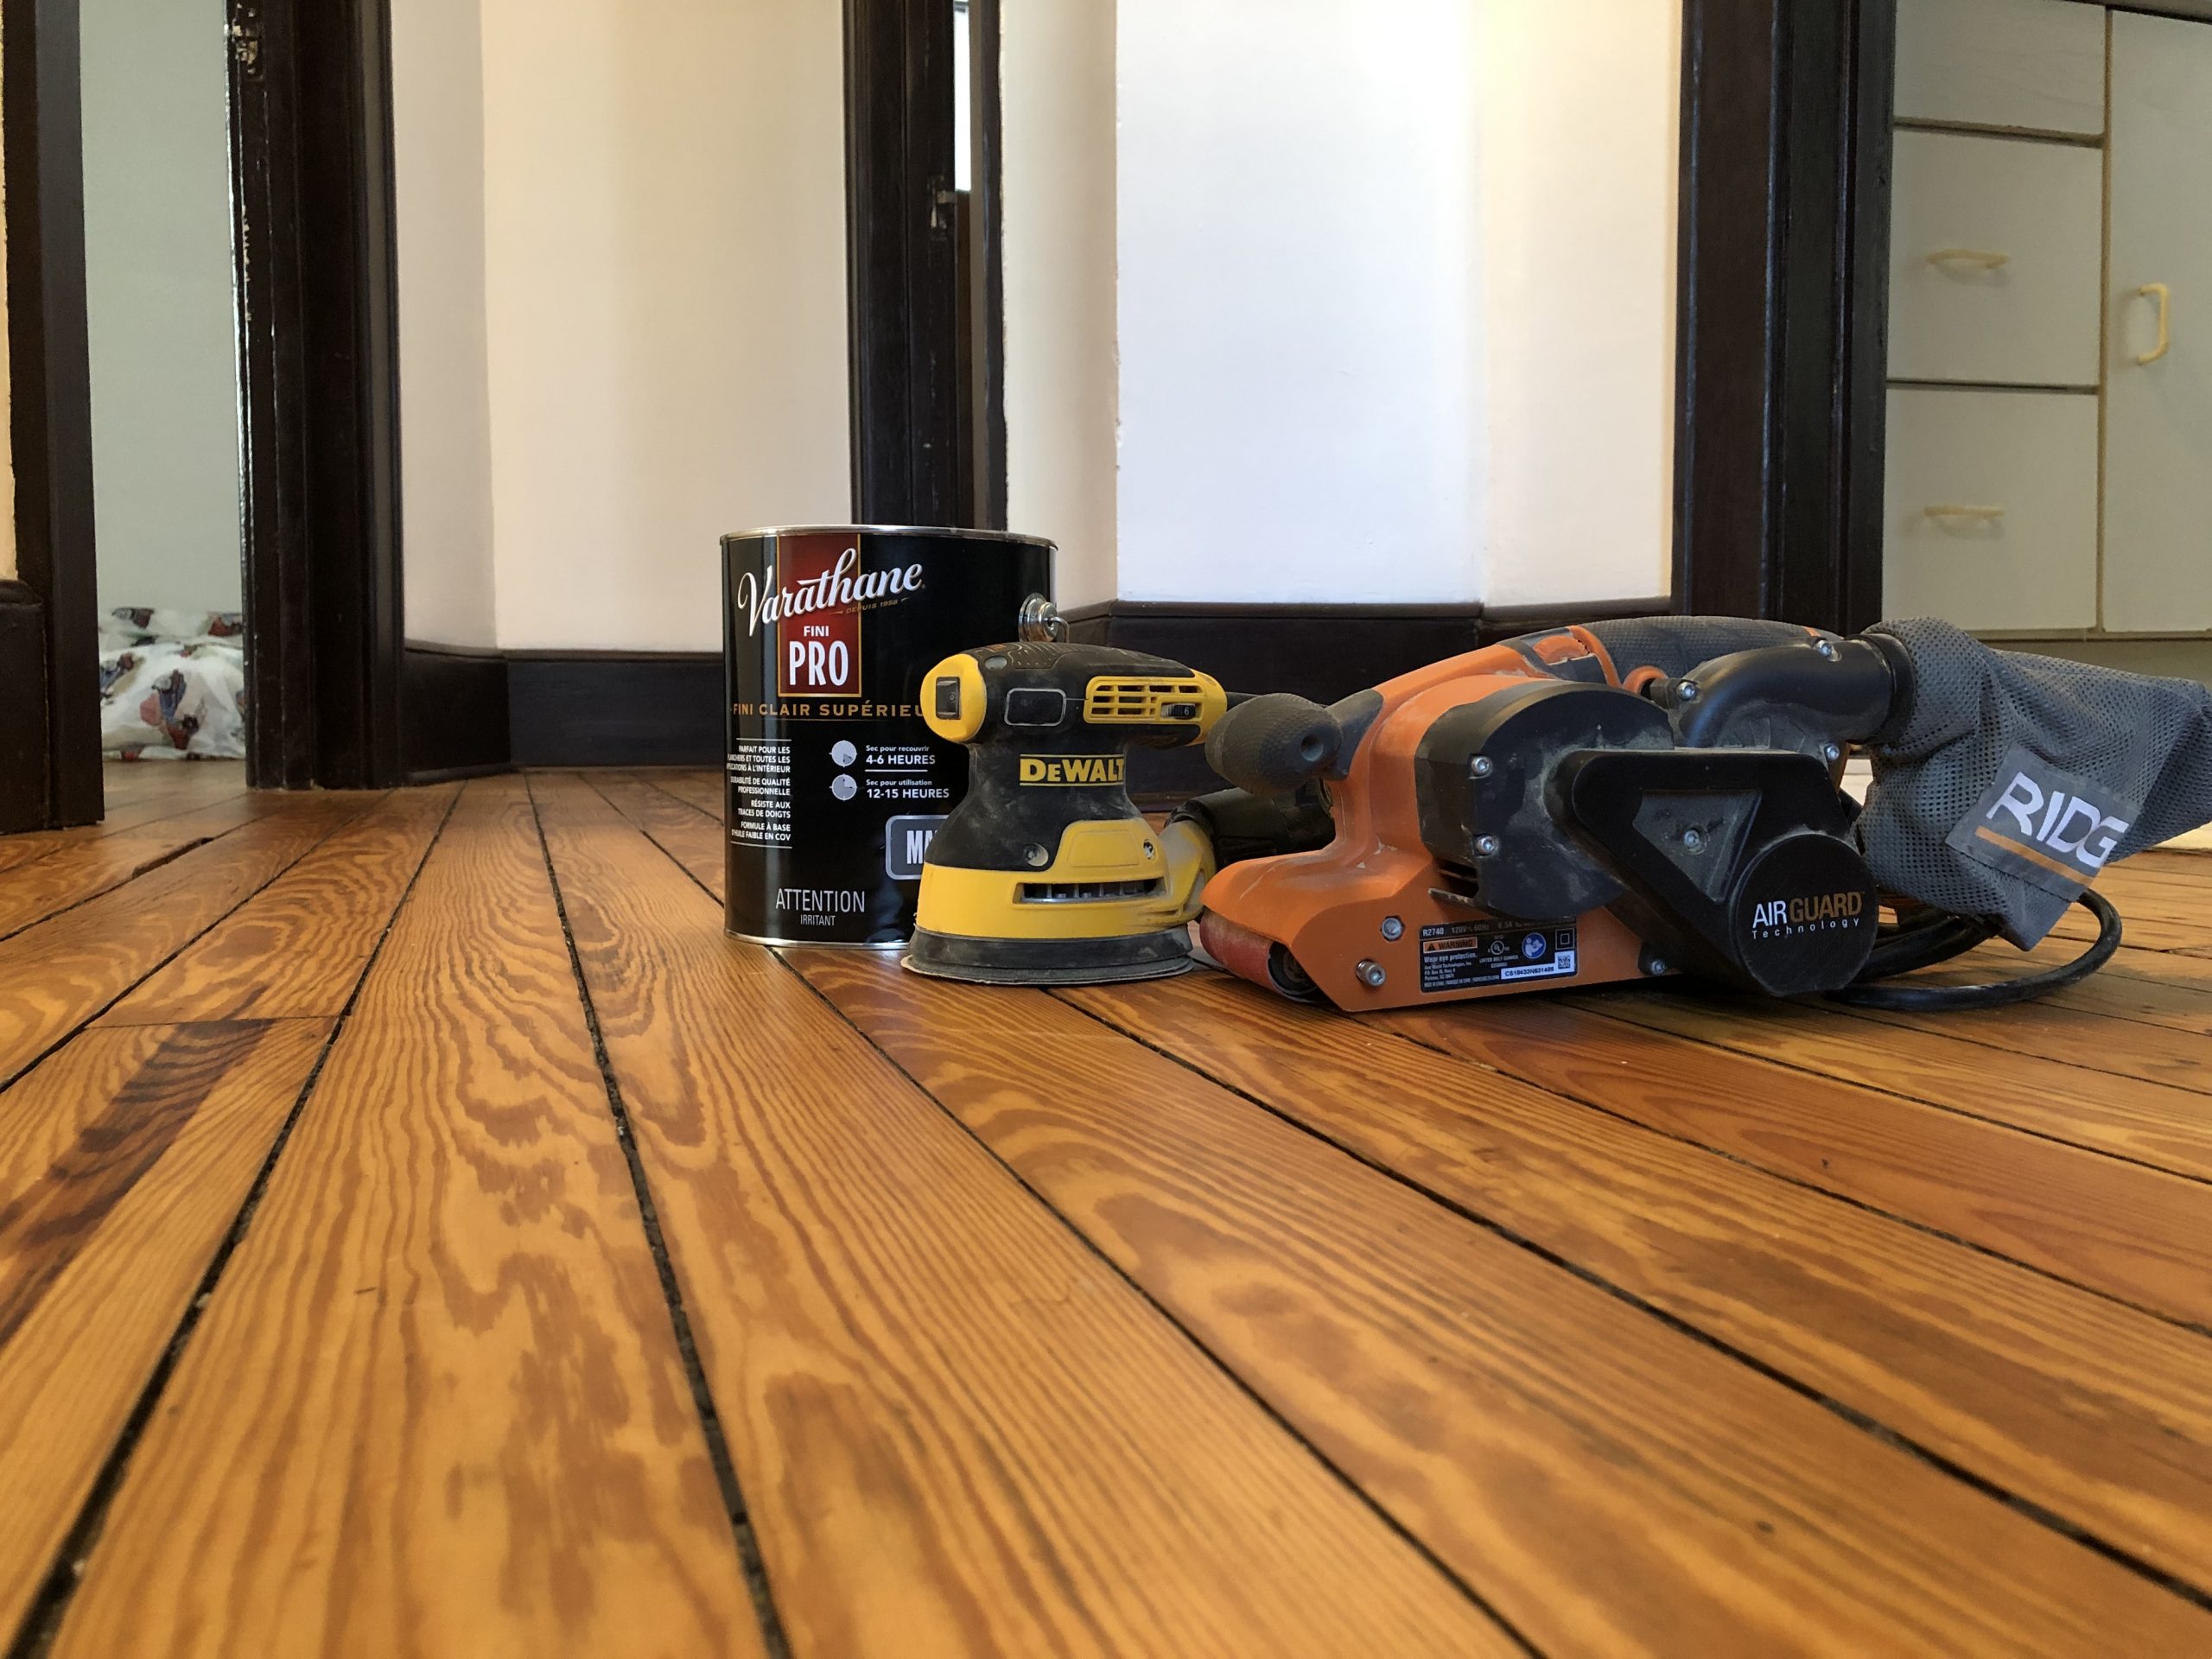
1. Sanding the Surface:
Start by thoroughly sanding the hardwood floor to create a smooth and even canvas for the finish. Use a drum sander or a random orbital sander with progressively finer grits until all imperfections, scratches, and stains are removed.
FAQ: How can I determine the appropriate grit for sanding?
Answer: Begin with a coarse-grit sandpaper (around 36-60) to remove any stubborn blemishes. Gradually switch to medium-grit (80-100) and fine-grit (120-150) papers for a polished look.
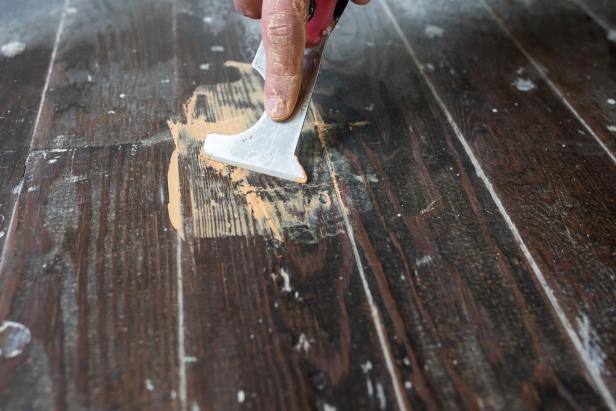
2. Filling Gaps and Holes:
Inspect the floor for gaps, cracks, or nail holes that may need filling. Using a wood filler that matches your floor’s color, carefully apply it to these areas with a putty knife. Allow it to dry completely before proceeding.
FAQ: Can I use wood putty instead of filler?
Answer: While wood putty may initially seem like a viable option, it tends to shrink over time and may not provide lasting results. Opt for a quality wood filler specifically designed for hardwood floors.
II. Applying the Stain:
Now that your floor is prepared, it’s time to infuse it with color by staining.
1. Choosing the Right Stain:
Consider your desired aesthetic when selecting a stain color. Test various options on a small, inconspicuous area to ensure it complements your existing décor. Once you’ve made your choice, follow these steps:
2. Preparing the Staining Area:
Clear the room of any furniture, rugs, or debris that could interfere with the staining process. Cover adjacent surfaces and walls with plastic sheets or painter’s tape to protect them from potential splatters.
3. Applying the Stain:
Using a brush or rag, apply the stain in long, even strokes along the wood grain. Start from one corner and work your way toward an exit point to avoid stepping on the freshly stained areas.
4. Removing Excess Stain:
After allowing the stain to penetrate for a few minutes, use a clean cloth to wipe away any excess. Make sure to follow the manufacturer’s instructions regarding drying time.
FAQ: How many coats of stain should I apply?
Answer: The number of coats depends on the desired intensity of color and transparency. Generally, one coat is sufficient for a lighter finish, while multiple coats create deeper hues.
III. Sealing and Protecting the Floor:
To safeguard your hardwood floors against daily wear and tear, sealing is essential. Follow these steps for optimal protection:
1. Choosing the Right Finish:
Selecting an appropriate finish depends on factors such as foot traffic, desired sheen level, and maintenance preferences. Common options include polyurethane (oil-based or water-based), varnish, or wax.
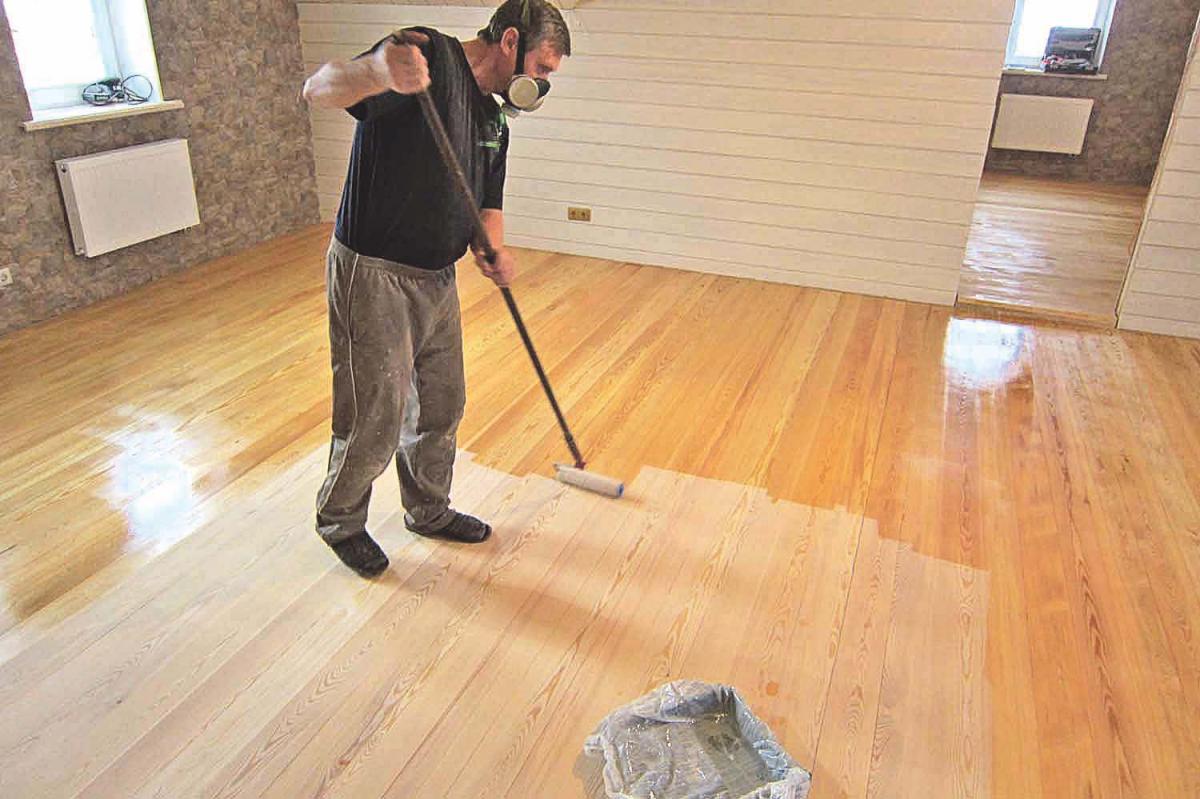
2. Applying the Finish:
Before proceeding with finish application, ensure that the stained floor is completely dry. Using a high Quality brush or roller, apply the finish in long, even strokes along the wood grain. Work from one corner to an exit point to avoid stepping on the finished areas. Allow the first coat to dry completely before applying additional coats if desired.
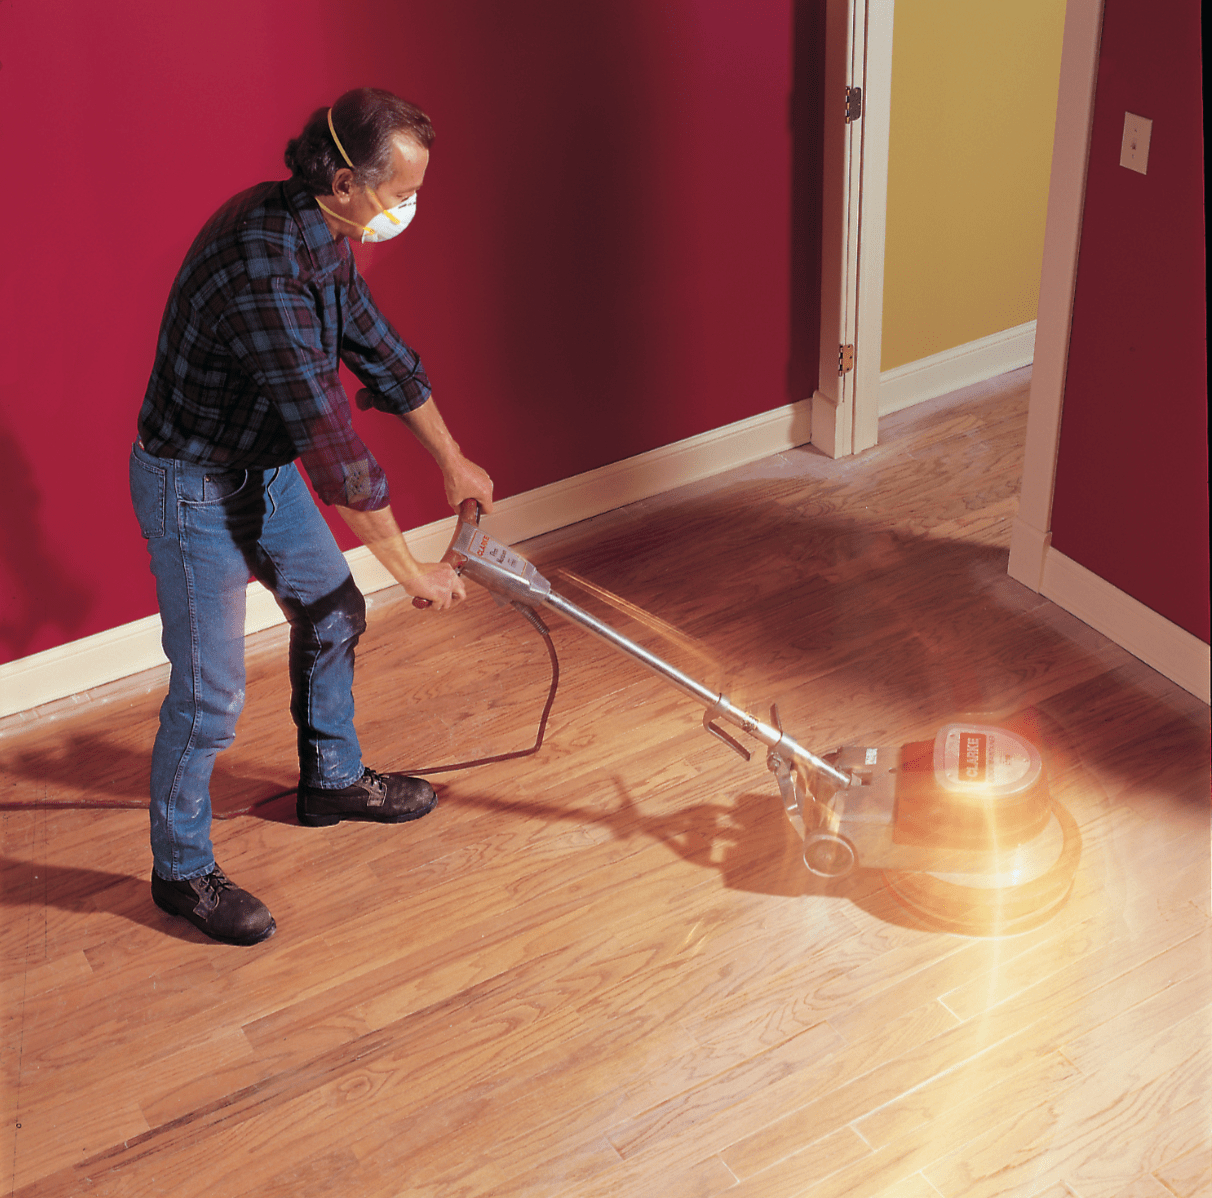
3. Sanding Between Coats:
For a smoother and more professional-looking finish, lightly sand the floor between each coat of finish using fine-grit sandpaper. This will help remove any imperfections or roughness.
4. Curing and Maintenance:
After applying the final coat of finish, allow it to cure according to the manufacturer’s instructions. This typically takes several days. Once cured, avoid placing heavy furniture or rugs on the floor for at least a week to prevent any damage. Regularly clean and maintain the floor by sweeping or vacuuming regularly and using a damp mop with a mild cleaner when necessary.
Conclusion:
Refinishing hardwood floors can be a rewarding DIY project that revitalizes your space. By following these steps and taking proper care of your newly refinished floors, you can enjoy their beauty and durability for years to come. Refinishing hardwood floors can be a time-consuming task, but the end result is well worth the effort. By following these steps, you can achieve a beautiful and durable finish that will enhance the appearance of your space.
First, it’s important to prepare the floor by removing any furniture and thoroughly cleaning it. This will ensure that the stain and finish adhere properly to the wood surface.
Next, apply a chemical stripper to remove any existing finish or stain. Follow the manufacturer’s instructions and use a scraper to gently remove the old finish.
Once the floor is stripped, sanding is necessary to smooth out any imperfections and create a clean surface for staining. Start with a coarse grit sandpaper and gradually work your way up to a finer grit for a smoother finish.
Before applying the stain, protect any adjacent surfaces such as walls or baseboards with plastic sheets or painter’s tape. This will prevent any splatters or drips from staining unwanted areas.
Using a brush or rag, apply the stain in long, even strokes along the wood grain. Work from one corner to an exit point to avoid stepping on freshly stained areas. Allow the stain to penetrate for a few minutes before wiping away any excess with a clean cloth.
To protect your newly stained floor, sealing is essential. Choose an appropriate finish such as polyurethane (oil-based or water-based), varnish, or wax based on factors like foot traffic and desired sheen level. Apply the finish using a high-quality brush or roller in long, even strokes along the wood grain. Allow each coat to dry completely before applying additional coats if desired.
For a smoother finish, lightly sand between each coat of finish using fine-grit sandpaper. This will help remove any imperfections or roughness.
After applying the final coat of finish, allow it to cure according to the manufacturer’s instructions. This typically takes several days. During this time, avoid placing heavy furniture or rugs on the floor to prevent any damage.
Regularly clean and maintain your newly refinished floors by sweeping or vacuuming regularly and using a damp mop with a mild cleaner when necessary. This will help preserve the beauty and durability of the finish.
In conclusion, refinishing hardwood floors is a DIY project that can transform the look of your space. By following these steps and properly caring for your newly refinished floors, you can enjoy their beauty for years to come.