It is flawless as well as non porous, avoiding some kind of mould or bacterial growth on it. The benefit of using epoxy flooring is when you utilize epoxy, you will be assured that you're using an item that is going to give your flooring greater power and resilience. It's quite simple to apply and has almost no maintenance.
Images about How To Epoxy Wood Floor
It will not impact the look of the floor or can it corrode the surface area. Furthermore, you ought to also think about the air temperature in your storage area. Even if your loved ones is actually acknowledged for their rough and tumble conduct, epoxy flooring will not allow you to down with its outstanding overall performance.
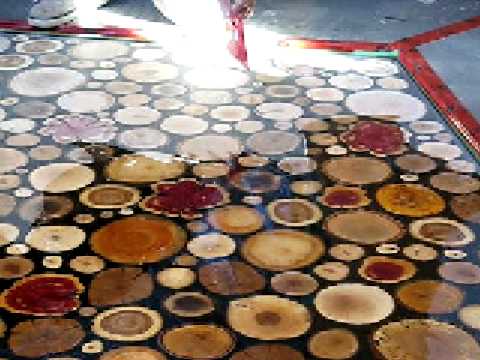
Spreading the epoxy over sanded wooden disks
Epoxy flooring is a kind of area layer that is going to protect a concrete floor from constant wear and tear. A flooring sealed with epoxy is going to have a long life working with a large amount of traffic. As soon as these two are combined they're poured over a current flooring or perhaps base content to be able to make a protective coating. Epoxy is actually simple to clean, and impervious to bacteria and mold.
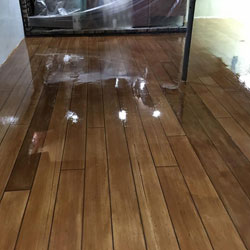
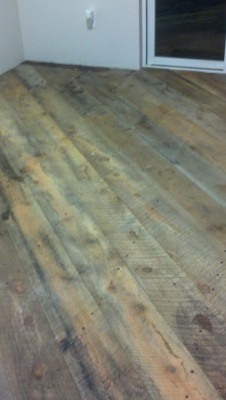
Clear Epoxy Coating over Reclaimed Barn Board Wood Epoxy floor

Any time you cook the surface correctly you will ensure that your epoxy flooring will adhere to the surface to extend the life of the epoxy flooring. Pick an epoxy to coat the floor. This particular ind of flooring also is ideal in case you have damaged flooring currently. You don't ought to hire an expert to use it, and that will save a lot money in the end. It's quite annoying to walk on chipped as well as damaged floors.
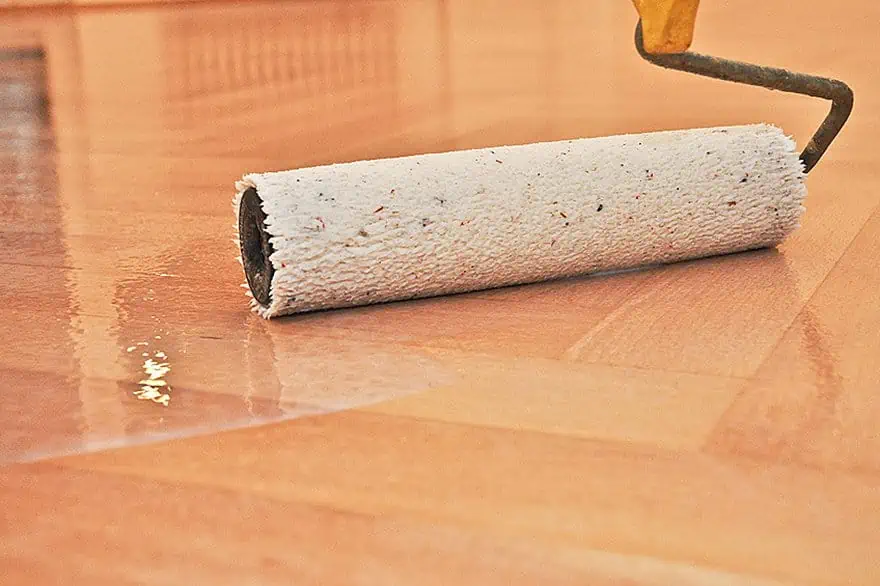
Epoxy Paint for Wood – Epoxy Coating for Wood Floors
Wood-Floor-Look-Epoxy-Concrete (26) –

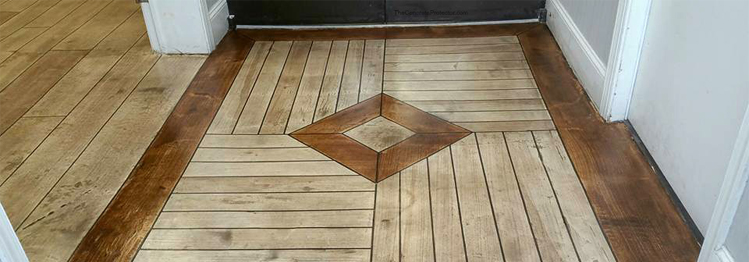
Interior Wood Floor StoneCraft Epoxy Resurfacing

www.epoxyplus.com Designer Epoxy
Self Leveling Epoxy For Wood Floors Concrete decor, Stained

Clear Epoxy Coating over Reclaimed Barn Board Wood
How to Prepare A Hardwood Floor for an Epoxy Coating Application Blog

Epoxy clear coating for wood and other support Sayerlack
![]()
Rustic Wood Concrete Epoxy Flooring Houston Texas
Metallic Marble Epoxy Floor – Gold, Brown, and Copper – Glossy

8+ Wonderful Epoxy Coating For Wood Floors Collection Wood

Related Posts:
- Garage Floor Tiles Vs Epoxy Paint
- Sherwin Williams Concrete Epoxy Floor Coating
- Painting A Garage Floor With Epoxy Paint
- Westcoat Epoxy Flooring
- Waterproof Epoxy Flooring
- Epoxy Flooring Cost Per Sq Ft
- Tennant Epoxy Flooring
- 2 Part Epoxy Floor Coating Kit
- Basement Epoxy Floor Coating Reviews
- Firehouse Epoxy Floors
How to Epoxy Wood Floors: A Comprehensive Guide
Introduction:
Epoxy flooring has become increasingly popular in recent years, thanks to its durability, versatility, and aesthetic appeal. It is especially well-suited for wood floors as it provides a protective layer that enhances the natural beauty of the wood while also making it more resistant to stains, scratches, and moisture. If you’re considering epoxying your wood floors but don’t know where to start, fear not! This detailed guide will walk you through the step-by-step process of how to epoxy wood floors, ensuring a successful and long-lasting finish.
I. Preparing the Wood Floor:
Before diving into the epoxy application process, proper preparation is key to achieving a flawless result. Follow these steps to ensure your wood floor is ready for epoxy:
1. Clean the Surface:
Start by thoroughly cleaning the wood floor surface. Remove any dust, dirt, or debris using a broom or vacuum cleaner. For stubborn stains or spills, use a mild detergent mixed with water and a sponge to gently scrub the area. Allow the floor to dry completely before moving on to the next step.
2. Sanding:
Sanding the wood floor is crucial for achieving a smooth and even surface, promoting better adhesion of the epoxy. Use an orbital sander or sandpaper with medium-grit (around 120) to lightly sand the entire floor. Pay extra attention to rough areas or imperfections, ensuring they are properly smoothed out.
FAQs:
Q: Can I skip sanding if my wood floor is already smooth?
A: Sanding is an essential step regardless of whether your wood floor appears smooth or not. It helps remove any existing finishes or sealants that may interfere with epoxy adhesion.
Q: How long should I wait after sanding before applying epoxy?
A: After sanding, it’s important to thoroughly clean off any residual dust before proceeding with epoxy application. Allow the wood floor to rest for at least 24 hours to ensure it’s completely dry before moving on.
II. Applying the Epoxy:
Once your wood floor is properly prepared, it’s time to apply the epoxy. Follow these steps for a successful application:
1. Choose the Right Epoxy:
Selecting the appropriate epoxy for your wood floor is crucial. Opt for a high-quality epoxy specifically designed for wood surfaces, as this will ensure better adhesion and durability. Consider factors such as UV resistance, low VOC content, and ease of application when making your choice.
2. Mix the Epoxy:
Carefully read the manufacturer’s instructions on how to mix the epoxy resin and hardener. Most epoxies require a specific ratio of resin to hardener to achieve optimal results. Use a clean bucket or container and mix thoroughly, ensuring no streaks or inconsistencies remain.
3. Apply a Primer:
Applying a primer is recommended for improved adhesion and longevity of the epoxy coating. Use a roller or brush to evenly coat the entire wood floor surface with the primer. Allow it to dry according to the manufacturer’s instructions before proceeding.
FAQs:
Q: Can I use any epoxy for my wood floors?
A: While some general-purpose epoxies may work on wood floors, it’s best to choose an epoxy specifically formulated for wood surfaces to ensure proper adhesion and compatibility.
Q: Do I need to apply multiple coats of primer?
A: Usually, one coat of primer is sufficient; however, if you’re working With a particularly porous wood or if you want to achieve a thicker epoxy coating, you may consider applying multiple coats of primer. Follow the manufacturer’s instructions for best results.
4. Apply the Epoxy:
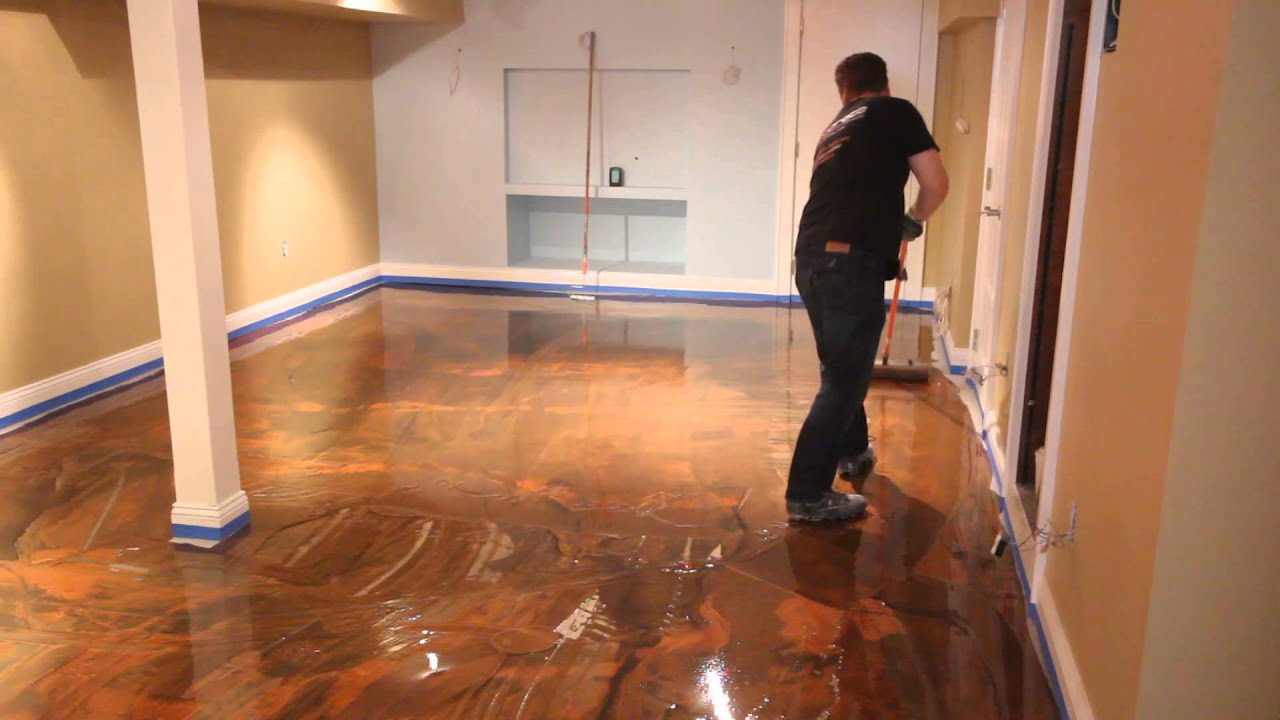
Once the primer is dry, it’s time to apply the epoxy coating. Use a roller or brush to evenly spread the epoxy over the wood floor surface. Work in small sections to ensure thorough coverage and avoid overlapping strokes. Take care not to apply too thick of a layer, as this can lead to uneven drying and potential issues.
5. Level and Smooth Out:
After applying the epoxy, use a squeegee or trowel to level and smooth out the surface. This will help remove any air bubbles or uneven areas for a professional-looking finish. Work quickly but carefully, as the epoxy will start to cure and become less workable over time.
6. Allow Curing Time:
After applying the epoxy and leveling it out, allow it to cure according to the manufacturer’s instructions. This typically takes at least 24 hours but may vary depending on temperature and humidity conditions. Avoid walking on or placing objects on the floor during this curing period to prevent any damage or imperfections.
FAQs:
Q: How long does it take for epoxy to fully cure?
A: The curing time for epoxy varies depending on factors such as temperature, humidity, and the specific product used. Typically, it takes around 24-72 hours for epoxy to fully cure and reach its maximum hardness.
Q: Can I speed up the curing process?
A: While it’s generally best to follow the manufacturer’s recommended curing time, there are some techniques that can help speed up the process. Increasing the temperature and using a heat gun or heat lamp can accelerate the curing time, but be cautious not to overheat the epoxy or cause any damage.
III. Finishing Touches:
Once the epoxy is fully cured, you can add some finishing touches to enhance its appearance and protection:
1. Sanding and Buffing:
After the epoxy has cured, you may notice slight imperfections or rough areas. Use fine-grit sandpaper or an orbital sander to smooth out these areas and create a uniform finish. Follow up with buffing or polishing to further enhance the shine and smoothness of the floor.
2. Apply a Topcoat:
To provide additional protection and durability, consider applying a topcoat over the epoxy. Choose a high-quality polyurethane or epoxy-based topcoat specifically designed for wood floors. Apply it according to the manufacturer’s instructions, ensuring proper ventilation and drying time.
3. Regular Maintenance:
To keep your epoxy-coated wood floor looking its best, follow regular maintenance practices such as sweeping or vacuuming regularly, wiping up spills promptly, and avoiding abrasive cleaners or tools that could scratch or damage the surface. Additionally, consider applying a fresh coat of topcoat every few years to maintain protection and aesthetics.
FAQs:
Q: How often should I reapply a topcoat?
A: The frequency of reapplying a topcoat depends on factors such as foot traffic, environmental conditions, and overall wear. As a general guideline, consider applying a fresh coat every 3-5 years or as needed to maintain the desired level of protection and appearance.
Q: Can I use wax on an epoxy-coated wood floor?
A: It’s generally not recommended to use wax on an epoxy-coated wood floor, as it can create a slippery surface and potentially interfere with the epoxy’s adhesion. Stick to the recommended maintenance practices and products for best results.