Because of our precise sanding throughout the lamination process for the engineered products and after, pieces are definitely more consistent in position, far more consistent for texture, fit collectively tighter, no waste, holes and cracks already filled, and no sanding necessary after install until you want to do a light screen or even buff. You can still have that appealing hardwood warmth and appeal with an engineered flooring.
Images about Wood Floor Glue Installation
Just like engineered and laminate woods the multi strip planks are precision cut to make installation less difficult and faster. You can also choose which width plank you would like. It is replacing carpets which after a couple of years start to look used & dirty, for with wood as long as it's looked after will always look clean and new. Afterward Redwood and Doug Fir supported the country's development as people moved westward.
Fitting Glue Down Wood Flooring
Antique as well as Reclaimed wood floors are an ever well-liked trend in flooring. Some planks are generally wider boards and also have a character along with charm which display an instinctive sense of spirit and harmony of country living. It looks, for all the world, as in case your flooring is laid for a long time and adds a certain authenticity to the home of yours. Of course different houses lend themselves to many woods.
How do I glue wooden flooring over concrete? – The Wood Flo

Best Glue for Hardwood Floors – Different Wooden Floor Adhesives
How to Install an Engineered Hardwood Floor
5 Simple Tips to Help Your Glue-Down Wood Floor Jobs Succeed
Engineered Hardwood Floors Installation – Hardwood Floor
DIY Wood Flooring Installation Guide – Wood and Beyond Blog

Glue Wood Flooring to a Concrete Slab – Fine Homebuilding

How to Choose the Right Flooring Adhesive
:max_bytes(150000):strip_icc()/flooring-adhesive-info-1314718-01-58ecd976f4cf4e5582b68ca3f6b9072f.jpg)
Engineered Hardwood Flooring Installation: Tips and Common

Floating Vs. Glue-Down Wood Flooring [Pros u0026 Cons]

Should You Float or Glue Down Your Wood Flooring? u2014 Inner Space
Floating Floor vs. Nail Down Slaughterbeck Floors, Inc.
Related Posts:
- Fitting Wood Flooring Around Doors
- Method Wood Floor Cleaner Almond
- Wood Flooring Types Pergo
- Light Cherry Wood Flooring
- Wood Floor And Wall Colors
- Wood Flooring Acclimation Time
- Picture Frame Wood Flooring Patterns
- Engineered Wood Flooring Topps Tiles
- Wood Flooring For Mobile Homes
- Engineered Wood Floor Bathroom
Installing Wood Floor Glue: A Comprehensive Guide
Wood floor glue installation is an easy and relatively inexpensive way to add a finished look to your home. It is a great option for homeowners who want an attractive, durable flooring option without the hassle of installing tile or carpeting. This guide will provide detailed instructions on how to install wood floor glue and tips on how to do it correctly.
Getting Started
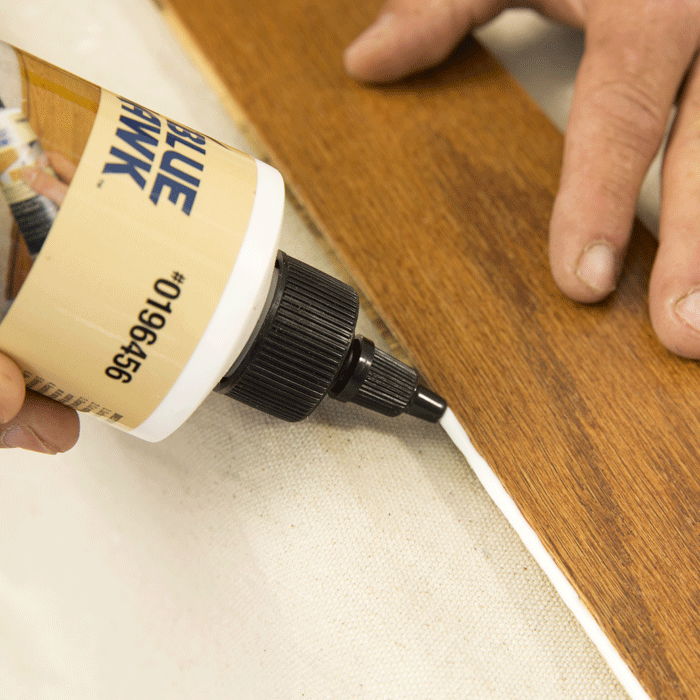
The first step in installing wood floor glue is to choose the type of glue you will use. There are several types available, including water-based, solvent-based, and pressure-sensitive adhesives. Each type has its advantages and disadvantages, so it is important to research the different options before making a decision. Once you have chosen the type of glue that best suits your needs, it’s time to begin the installation process.
Preparing the Area
Before beginning wood floor glue installation, it is important to prepare the area. This includes cleaning and leveling the surface where the glue will be applied. Any dust or debris should be removed from the area before beginning. Additionally, any furniture or other items should be moved out of the way so they don’t interfere with the installation process. Once the area is prepared, it is time to start gluing.
Applying the Glue
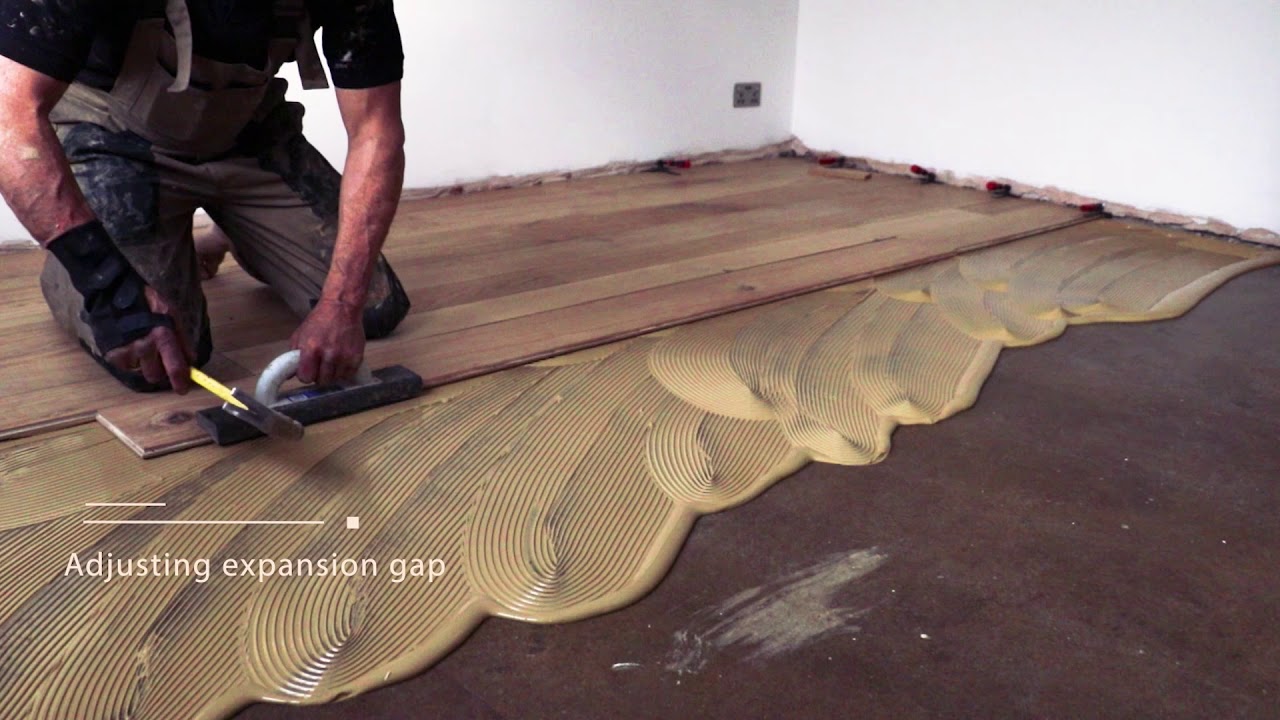
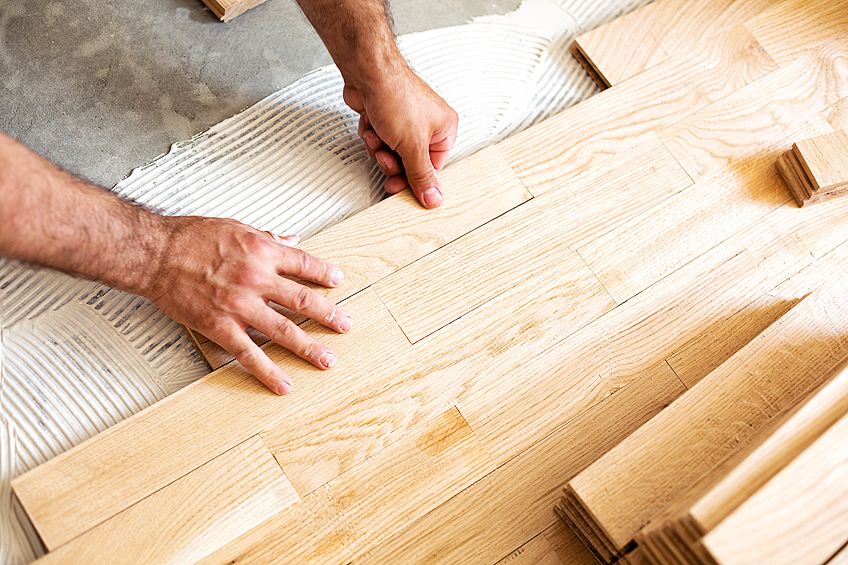
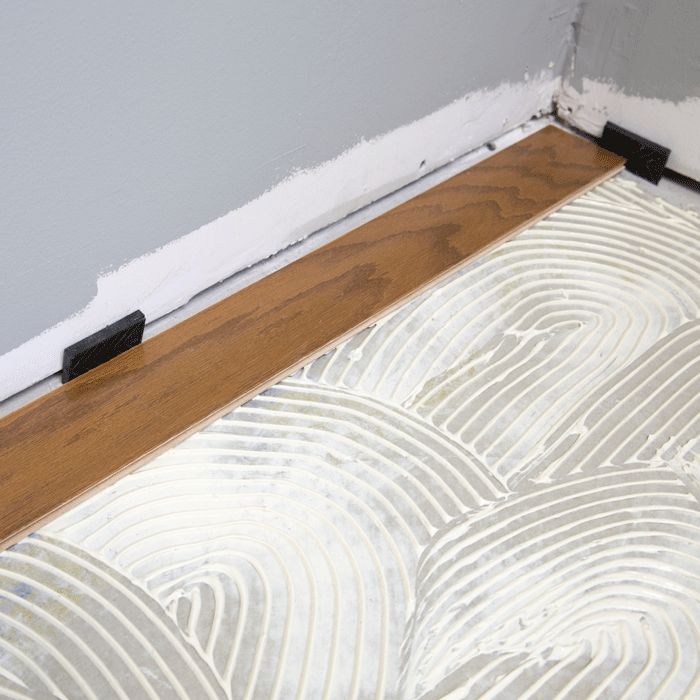
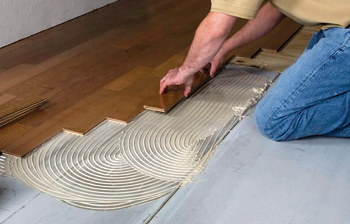
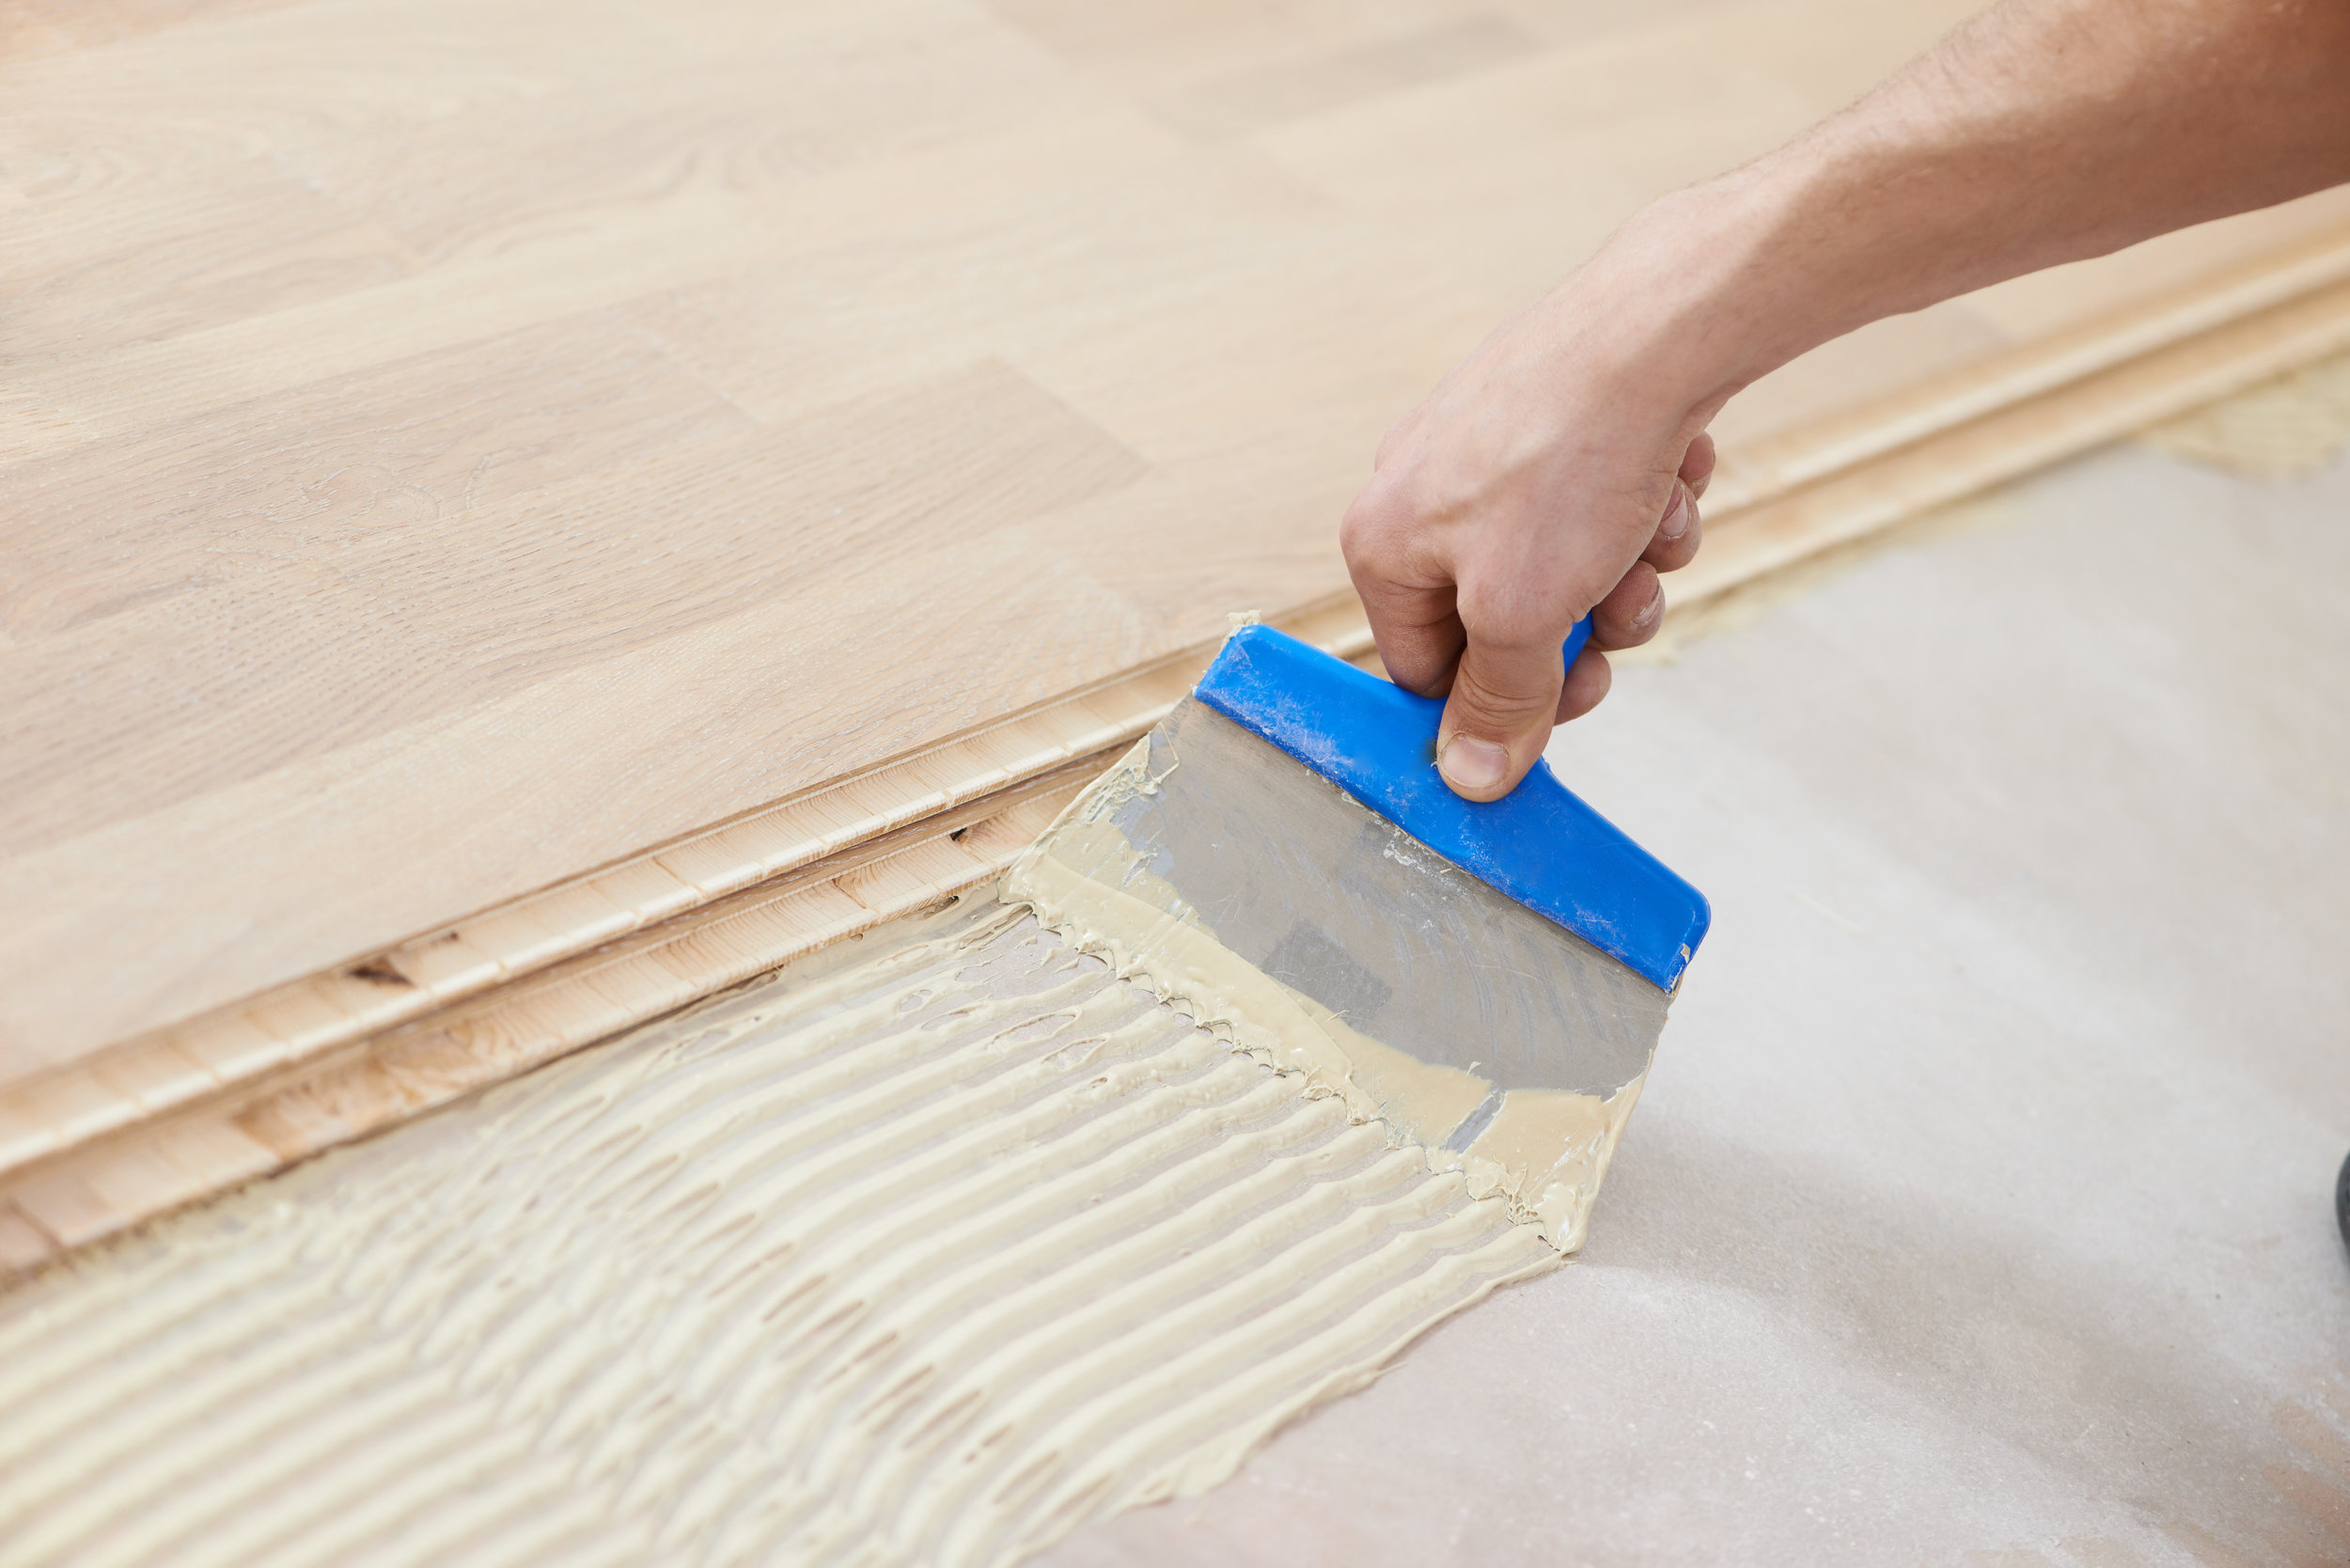
The next step in wood floor glue installation is to apply the glue to the subflooring. This can be done using a trowel or roller, depending on what type of adhesive was chosen. It is important to spread the glue evenly across the entire surface and ensure it reaches every corner and crevice for a secure bond. Once all areas of subflooring have been covered with adhesive, let it sit for about 15 minutes before continuing with the next step.
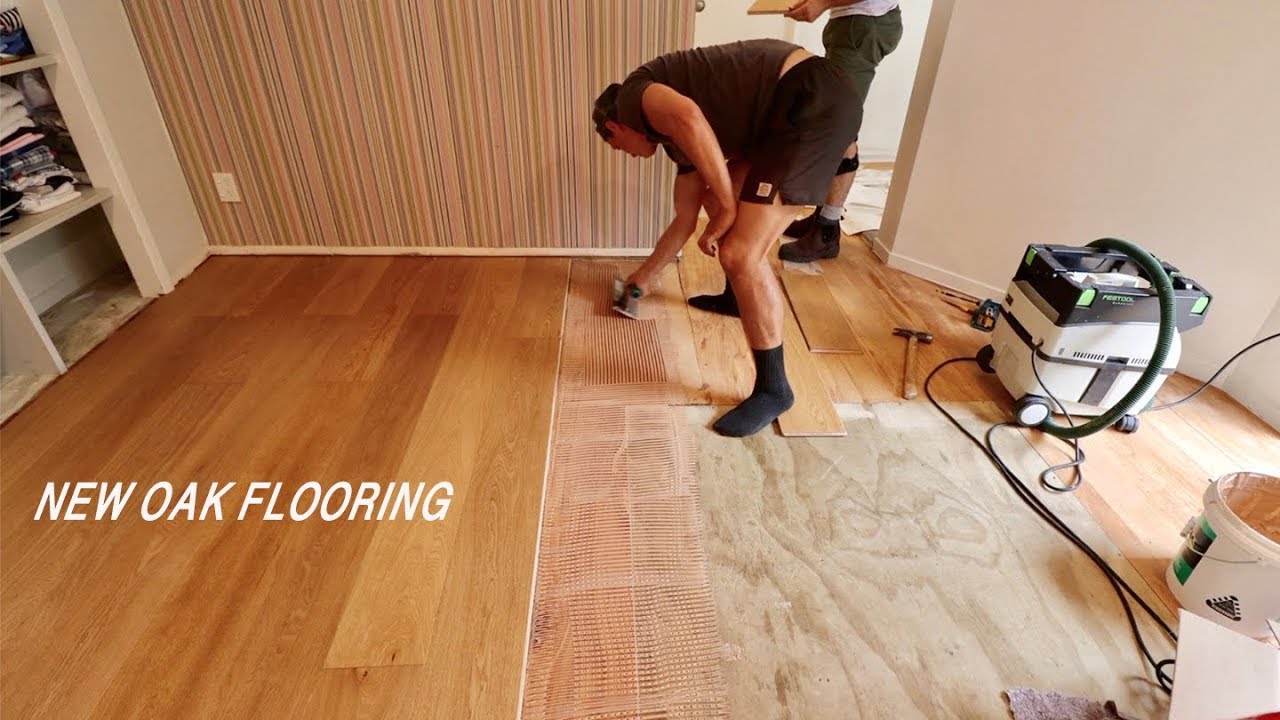
Laying Down Planks
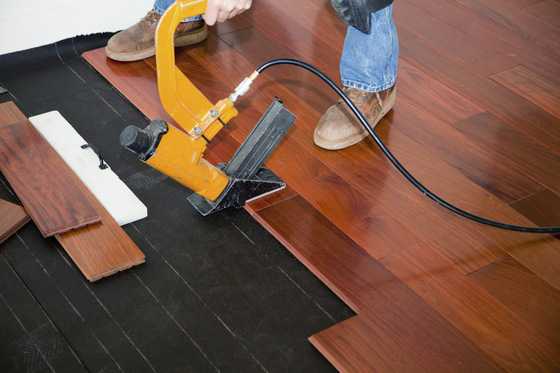
After allowing time for the adhesive to set, begin laying down planks of wood one by one into place on top of it. Begin at one end of the room and work towards the other, making sure each plank fits securely against its neighboring plank and that there are no gaps between them. If needed, use a hammer and nails to secure any loose pieces in place until they are properly glued down.
Finishing Up
Once all planks have been laid down and secured in place with adhesive and nails, it’s time to finish up by adding any trim pieces or moldings that are necessary for your particular project. Make sure these pieces fit snugly against both walls and flooring before securing them with nails or screws as necessary. Finally, apply a sealant over both floors and walls to protect your newly installed wooden floors from moisture damage over time.
FAQs About Wood Floor Glue Installation
Q: What type of glue should I use when installing wood floors?
A: The type of glue you choose will depend on several factors such as cost, ease of use, durability, etc… Generally speaking, water-based glues offer more flexibility when installing wood floors than solvent-based glues do but may not be as durable in high-traffic areas or areas prone to moisture damage over time. Pressure-sensitive adhesives are also available but may not provide as strong of a bond as other types when used With wood flooring.
Q: How do I know if my wood floors are properly glued?
A: One of the easiest ways to tell if your wood floors have been properly glued is to simply try and move a plank. If it moves or comes up easily, then it was not properly installed. Additionally, you can also check the edges of the planks for gaps or loose pieces that may indicate an improper installation. Finally, you can also use a moisture meter to detect any areas that may be suffering from excessive moisture due to improper gluing.