While you are able to have simple garage floor coatings to help protect your floor, others prefer something a bit of flashier. Epoxy color is more durable than latex and has the exact same dampness management but is much more tricky to apply. In a great deal of situations, almost all you actually need is actually a fundamental mat to keep the garage floor undamaged and screened.
Images about How To Install A Garage Floor Drain
Furthermore if you want you can include a flaking substance that is normally manufactured of stone and this offers you a little more grip as well as providing your garage floor with a bit classier look to it. If you have some old, deep oil stains try getting rid of them with chemicals and coarse scrub pads.
Garage Floor Drain vs Catch Basin System MT Drains
Garage flooring coatings have developed improvements of engineering and in different & new levels of coatings. Each flooring has bad and good features, thus you have to complete a bit of house labor to select the best one for you. Repeated connection with corrosive agents, like fossil oil, antifreeze, and rock salt is able to lead to permanent cracks along with other severe damage to concrete floors.
What to Do About a Garage Floor Without a Drain – Danleyu0027s Garages
Hardline Concrete u0026 Masonry » Garage Floors/Drains

Where Does a Garage Floor Drain Go? (Detailed Breakdown!)
Frozen Garage Floor Drain DIY Home Improvement Forum
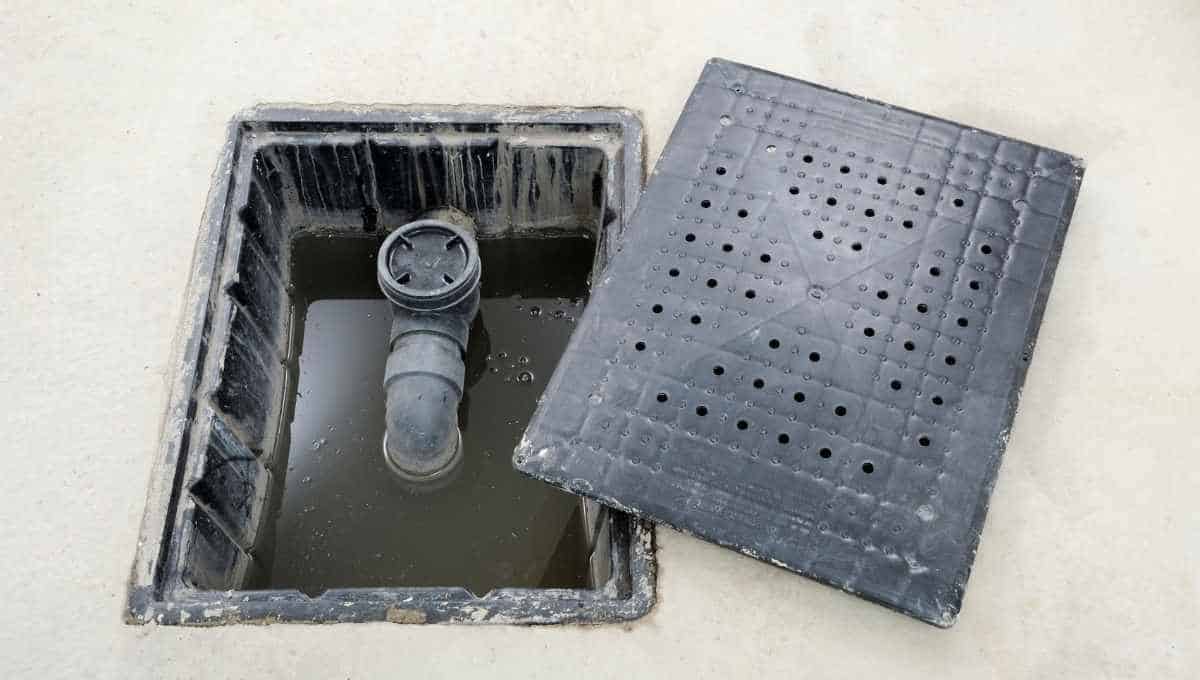
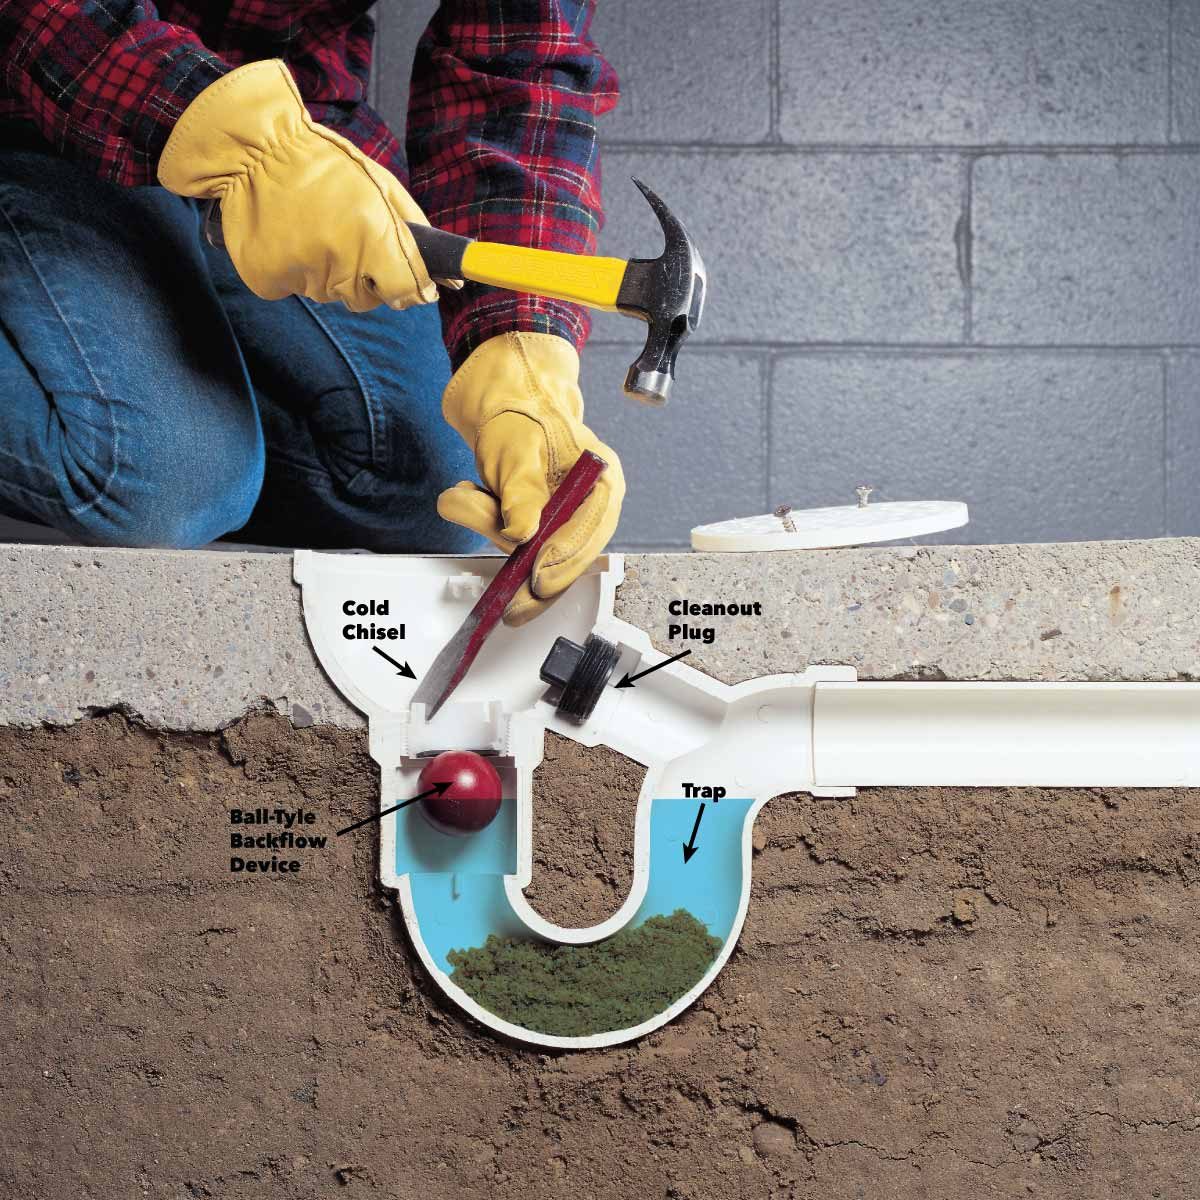
How To Unclog a Garage Floor Drain [Complete Guide] – UnclogADrain.com
How to Unclog a Drain u2014 Tips from The Family Handyman
Question on digging for a floor drain The Garage Journal
Installing a Floor Drain in a Garage

Floor u0026 Area Drains
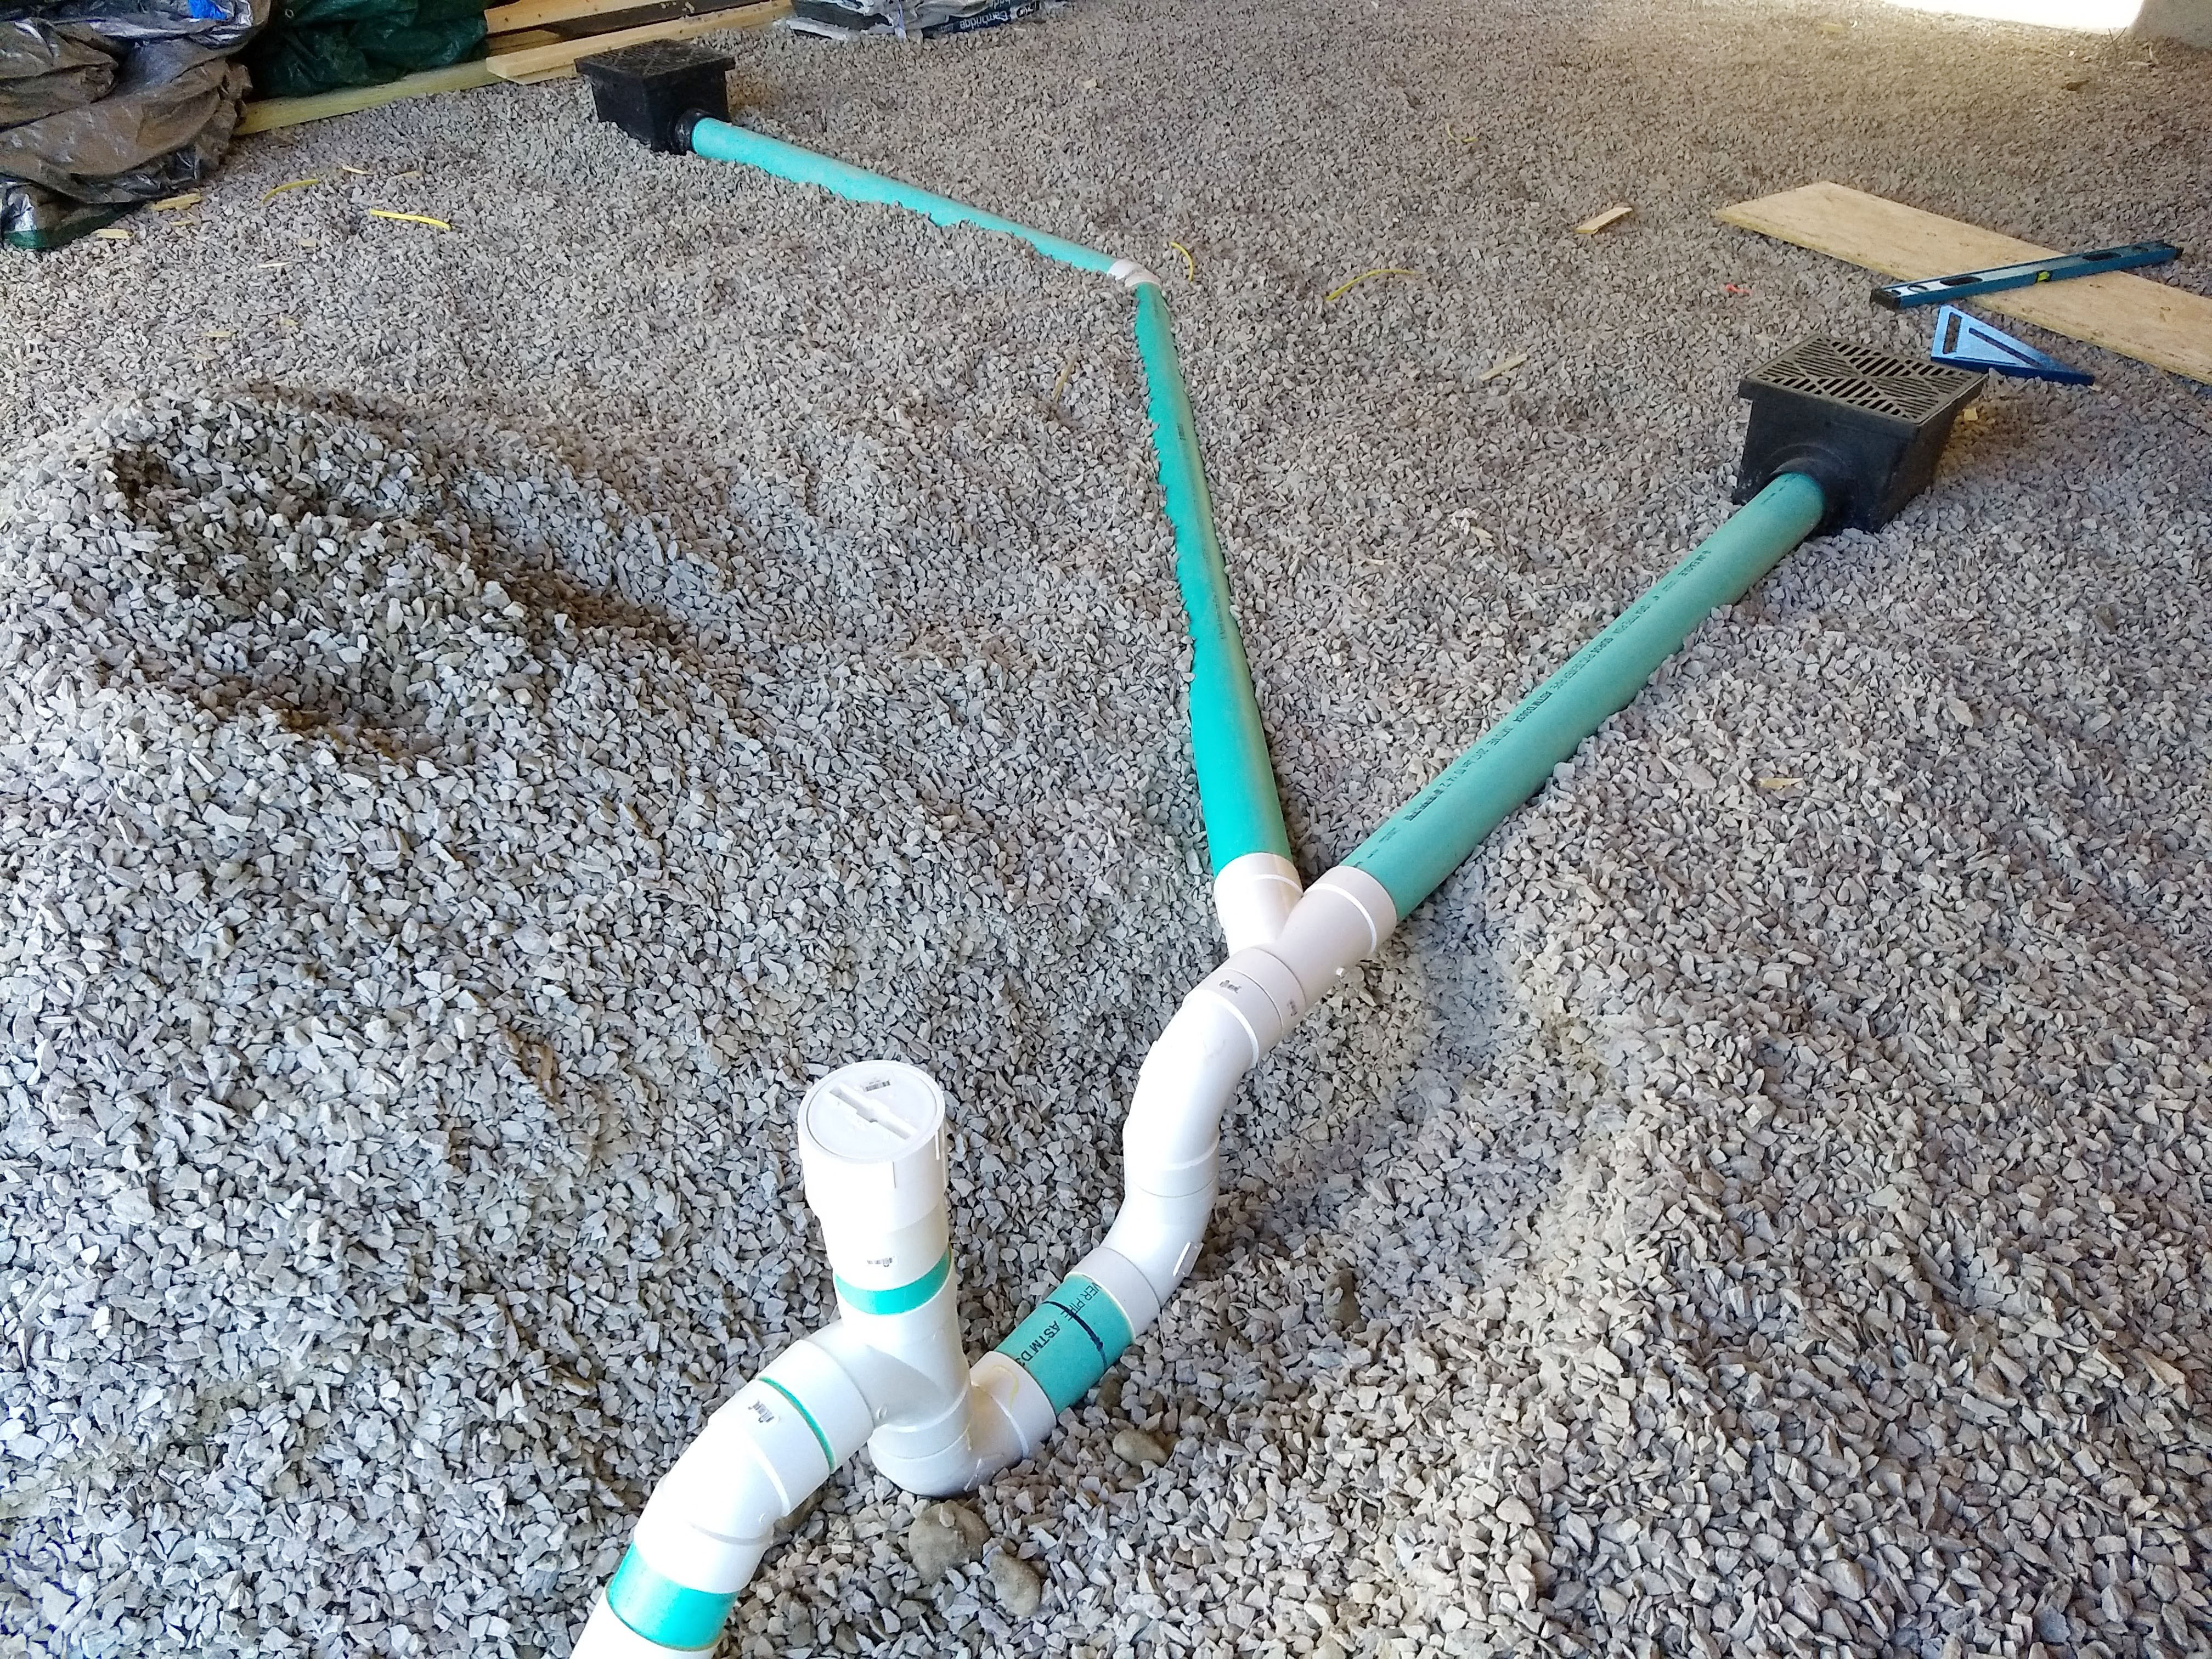
Installing Under-Slab Drain Pipes and Floor Drain

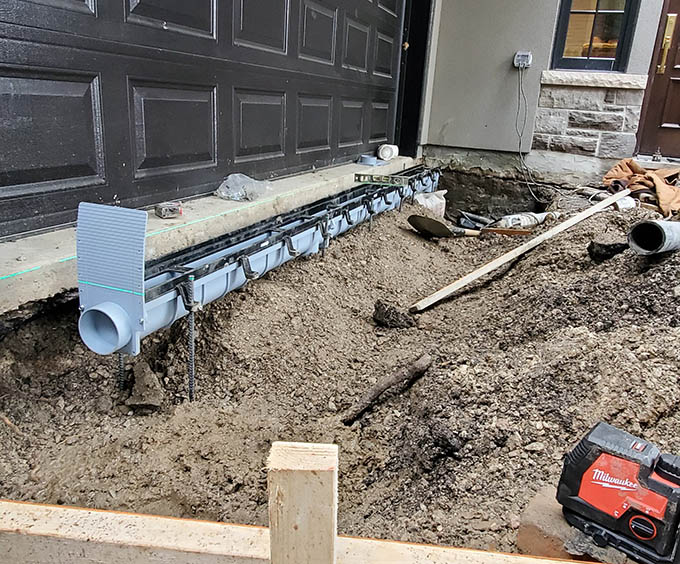
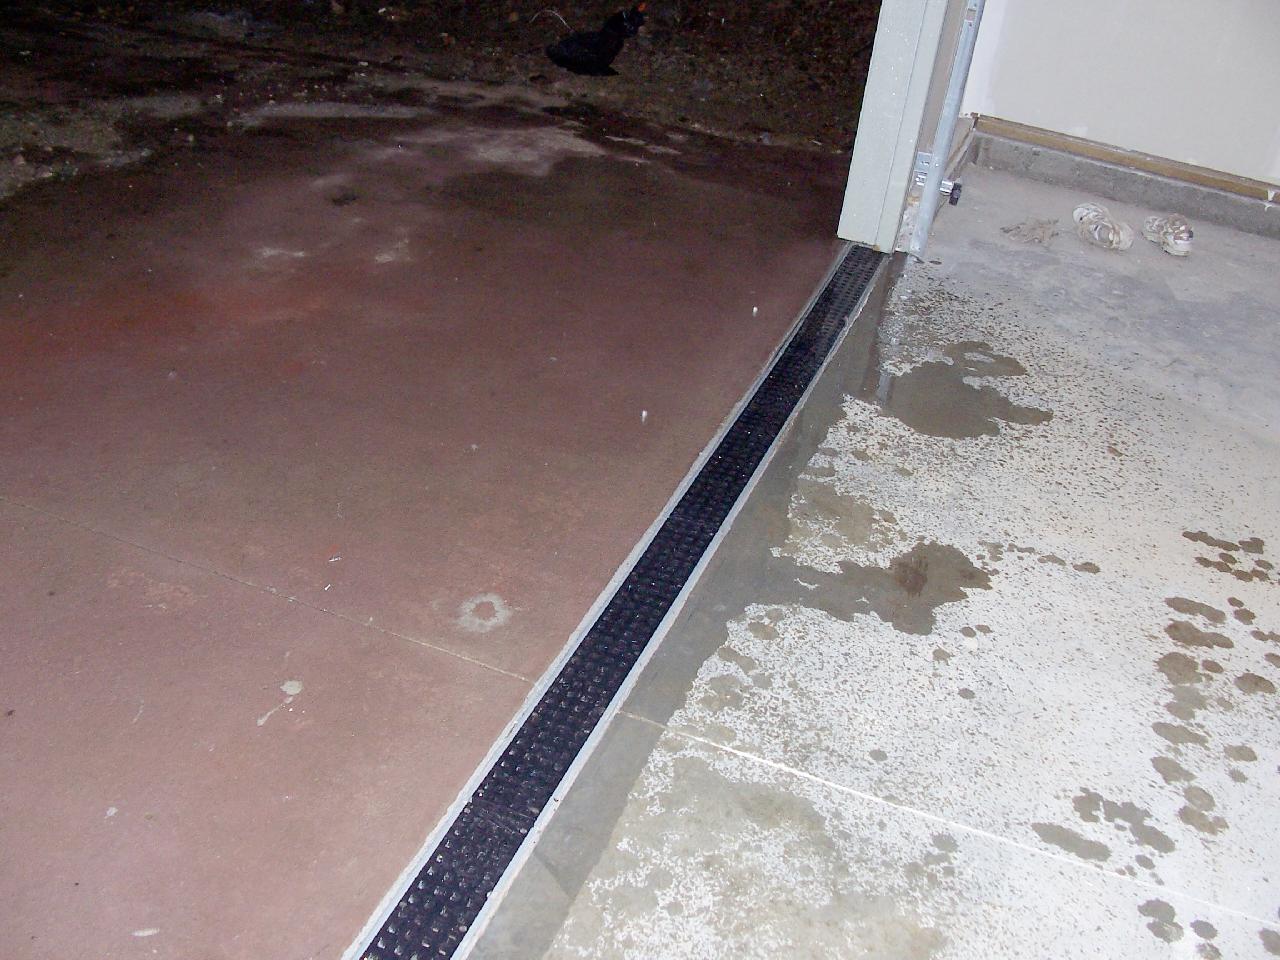
Garage trench drain system – Step by step installation in an existing concrete slab

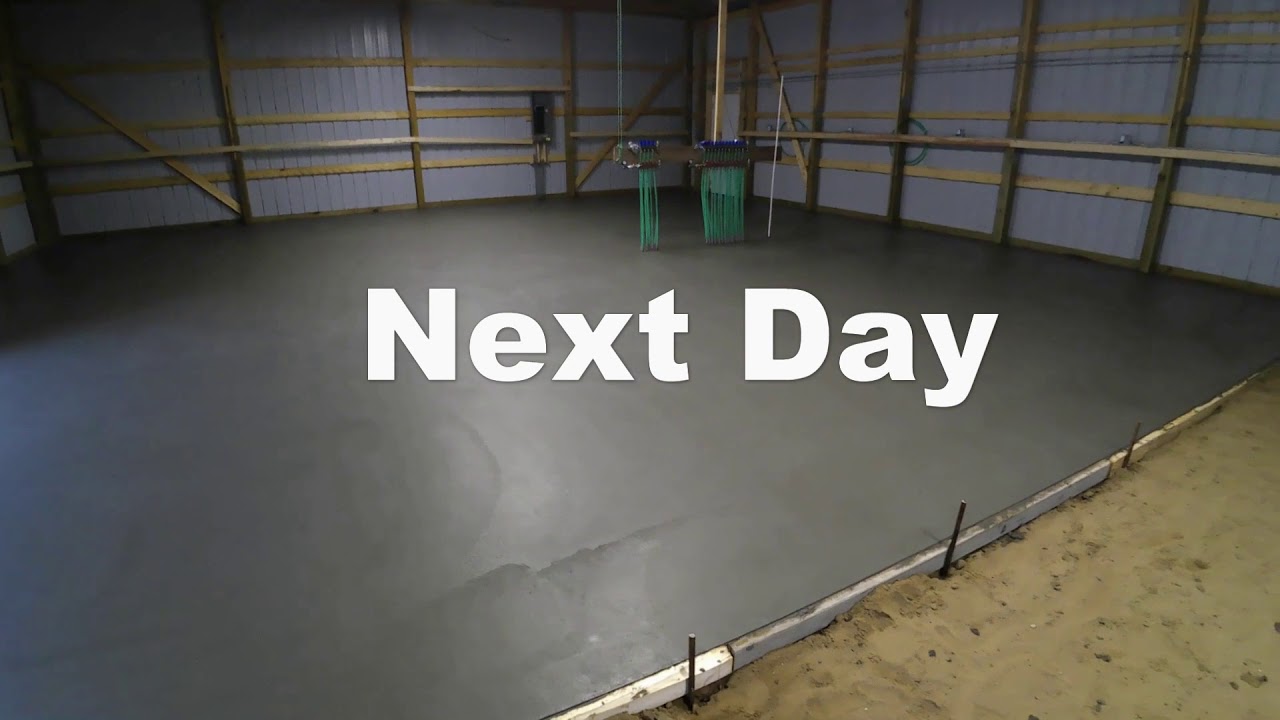
Pole Barn Shop Concrete floor and floor drain tips
Related Posts:
- Sherwin Williams Garage Floor Epoxy Coating
- Garage Floor Paints Dulux
- Garage Floor Covering Mats
- Racetrack Garage Flooring
- Garage Floor Water Pooling
- Ceramic Tiles For Garage Floor
- Matpro Garage Floor Runners
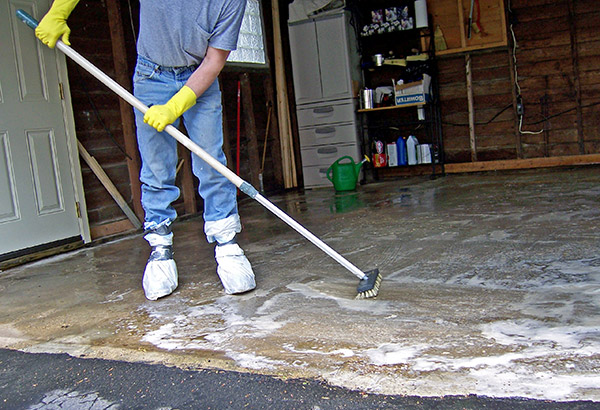
- Cleaning Concrete Garage Floor Before Painting
- Epoxy Garage Flooring Installers
- 2 Part Epoxy Garage Floor Paint Reviews
Title: Step-by-Step Guide: How to Install a Garage Floor Drain
Introduction:
Installing a garage floor drain can be a game-changer, preventing water damage and keeping your garage clean and dry. Whether you’re planning to use your garage as a workshop, storage space, or parking area, a properly installed floor drain is essential. In this comprehensive guide, we will walk you through the step-by-step process of installing a garage floor drain, providing detailed instructions and valuable insights along the way.
I. Assessing the Space:
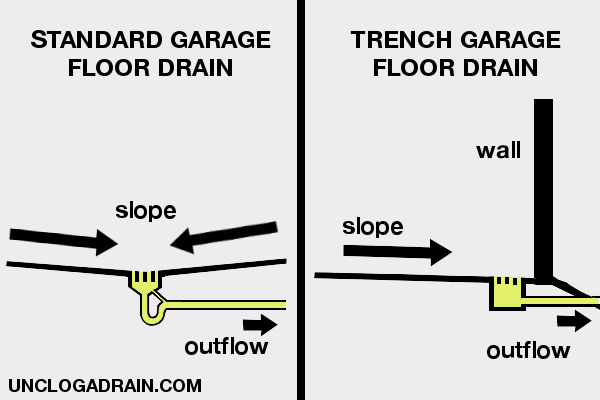
Before diving into the installation process, it’s crucial to assess your garage space and plan accordingly. Consider factors such as the location of water sources, the slope of the floor, and existing drainage systems. Taking these into account will help determine the ideal placement for your new floor drain.
FAQs:
Q1: Can I install a garage floor drain if my garage has a concrete floor?
A1: Yes, you can install a garage floor drain on both concrete and asphalt floors. However, keep in mind that different installation methods may be required depending on the type of flooring.
Q2: How do I determine the slope of my garage floor?
AA2: To determine the slope of your garage floor, place a level tool at various points across the surface. Measure the difference in height between the highest and lowest points to calculate the slope.
II. Gathering Materials and Tools:
To successfully install a garage floor drain, you’ll need several materials and tools readily available before starting the project. Here’s a list of items you’ll need:
1. Floor drain kit (including grate cover)
2. PVC drainpipe
3. Concrete saw or jackhammer
4. Shovel
5. Trowel
6. Pipe wrench
7. Adhesive/sealant
8. Safety goggles
9. Gloves
FAQs:
Q1: Where can I find a good-quality floor drain kit?
A1: Floor drain kits are readily available at local hardware stores or online home improvement retailers. Look for reputable brands that offer durable and corrosion-resistant materials.
Q2: Can I use a different type of pipe instead of PVC?
A2: While PVC is commonly used due to its durability and resistance to moisture, you can use alternative materials such as cast iron or ABS plastic. Ensure the chosen material complies with local building codes.
III. Preparing the Garage Floor:
Now that you have all the necessary materials and tools, it’s time to prepare your garage floor for the installation process. Follow these steps:
1. Mark the desired location: Determine the ideal placement for your floor drain, considering factors like accessibility and proximity to water sources.
2. Cut an opening: Using a concrete saw or jackhammer, carefully cut out a square-shaped opening in the marked area. Ensure the dimensions match the size of your drain kit.
3. Remove excess debris: Clear away any loose concrete or debris from the opening using a shovel or broom.
4. Smooth the edges: Use a trowel to smooth out any rough edges around the opening, ensuring a clean and even surface.
FAQs:
Q1: What safety precautions should I take when using a concrete saw or jackhammer?
A1: Always wear safety goggles and gloves when operating power tools. Additionally, make sure to follow the manufacturer’s instructions and take breaks if necessary to avoid fatigue.
Q2: Can I install multiple floor drains in my garage?
A2: Yes , you can install multiple floor drains in your garage if needed. Just make sure to plan the placement and sizing of the drains accordingly to effectively drain water from different areas of the garage. A3: It is recommended to consult with a professional or follow local building codes to ensure proper installation and drainage in your garage. A3: It is recommended to consult with a professional or follow local building codes to ensure proper installation and drainage in your garage. Q3: How do I ensure that the floor drain is properly sealed to prevent leaks?
A3: To ensure a proper seal, apply adhesive/sealant around the edges of the drainpipe where it connects to the floor drain. This will help prevent any water leakage. Additionally, make sure to tighten the pipe connections using a pipe wrench to ensure a secure fit. Q4: How long does the adhesive/sealant take to dry and cure?
A4: The drying and curing time for adhesive/sealant can vary depending on the product used. It is best to refer to the manufacturer’s instructions for specific drying times. However, in general, it may take several hours or even up to 24 hours for the adhesive/sealant to fully dry and cure. Q3: How do I ensure that the floor drain is properly sealed to prevent leaks?
A3: To ensure a proper seal, apply adhesive/sealant around the edges of the drainpipe where it connects to the floor drain. This will help prevent any water leakage. Additionally, make sure to tighten the pipe connections using a pipe wrench to ensure a secure fit.
Q4: How long does the adhesive/sealant take to dry and cure?
A4: The drying and curing time for adhesive/sealant can vary depending on the product used. It is best to refer to the manufacturer’s instructions for specific drying times. However, in general, it may take several hours or even up to 24 hours for the adhesive/sealant to fully dry and cure.