Basement flooring is clearly the foundation of the method of renovating the basement of yours. Though costlier compared to vinyl or linoleum, ceramic and porcelain floor tile are actually wonderful choices for a basement too. In addition to every one of these basement flooring ideas you will also have a wide range of options.
Images about How To Pour Basement Floor
One of the difficulties faced when changing the house's downstairs room into a living area is the basement's floor surfaces. The reason that the downstairs room is really valuable to your home is because when it's completed, you've produced another living room that is almost always not a component of most people's houses.
pouring basement floor 2017

If you're solid to your choice of remodeling your basement to a thing habitable, the next move is checking the basement for damage. Basements can be used for storage, extra rooms, as a space for entertaining, or possibly most of the above! However, basements also pose their very own issues. The vast bulk of homes have cement downstairs room flooring.
Pour Basement Concrete Slab For New Home icreatables.com

How to Pour a Concrete Floor EasyMix Concrete UK Ltd
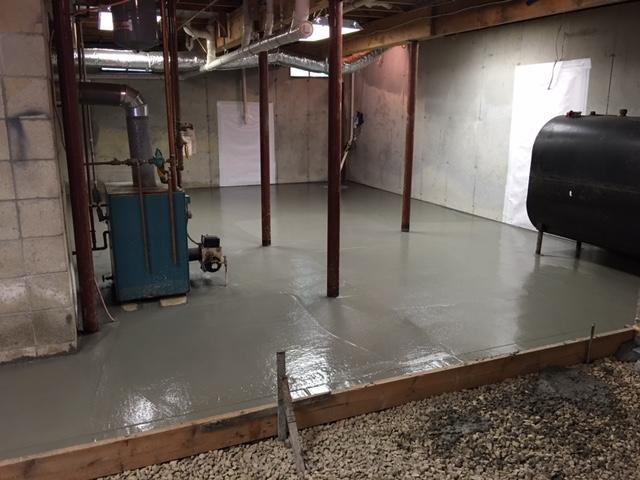
Basement floor poured u0026 garage footers! 9 15 16

Construction Update: Pouring the New Basement Floor Green u0026 Main

Basement Floor Waterproofing For Concrete Floors With A Lot Of
how to pour a concrete basement floor Archives – Maple Concrete

How to Remodel a Dirt Basement Floor DoItYourself.com
Fixing a Concrete Basement Floor American Dry

Basement Waterproofing – Waterproofing and Floor Pour in Rehoboth
How to pour a basement slab

Pouring the Basement Slab – YouTube

Lower Your Basement Floor for More Usable Space U.S. Waterproofing

Related Posts:
- Sealing Old Concrete Basement Floor
- Gravel Basement Floor
- Basement Floor Plans 1200 Sq Ft
- Repairing Cracks In Basement Concrete Floor
- Cork Flooring Basement Concrete Floor
- Basement Epoxy Floor Coating Reviews
- Basement Floor Drain Replacement Cost
- Filling Holes In Concrete Basement Floor
- Cleaning A Cement Basement Floor
- Resurfacing Concrete Basement Floor
How To Pour a Basement Floor: Step-by-Step Guide
Pouring a basement floor is a major undertaking that requires careful planning and preparation. It’s important to understand the process and the steps involved in order to achieve a successful outcome. This guide will provide you with all the information you need to complete your project with confidence.
Preparation
Before pouring your basement floor, it’s essential to lay the groundwork for success. This includes evaluating the site, preparing the foundation, and obtaining necessary permits and materials.
Evaluating the Site
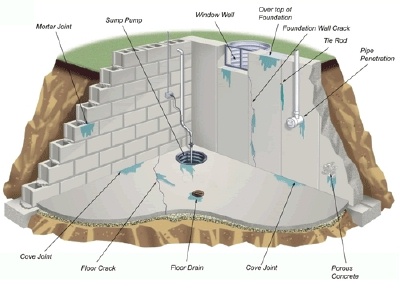
The first step is to take a thorough look at the site where you plan to pour the basement floor. It’s important to identify any potential problems, such as signs of water damage or structural issues, before proceeding with any work. Additionally, you should check local building codes and regulations to make sure your project is compliant.
Preparing the Foundation
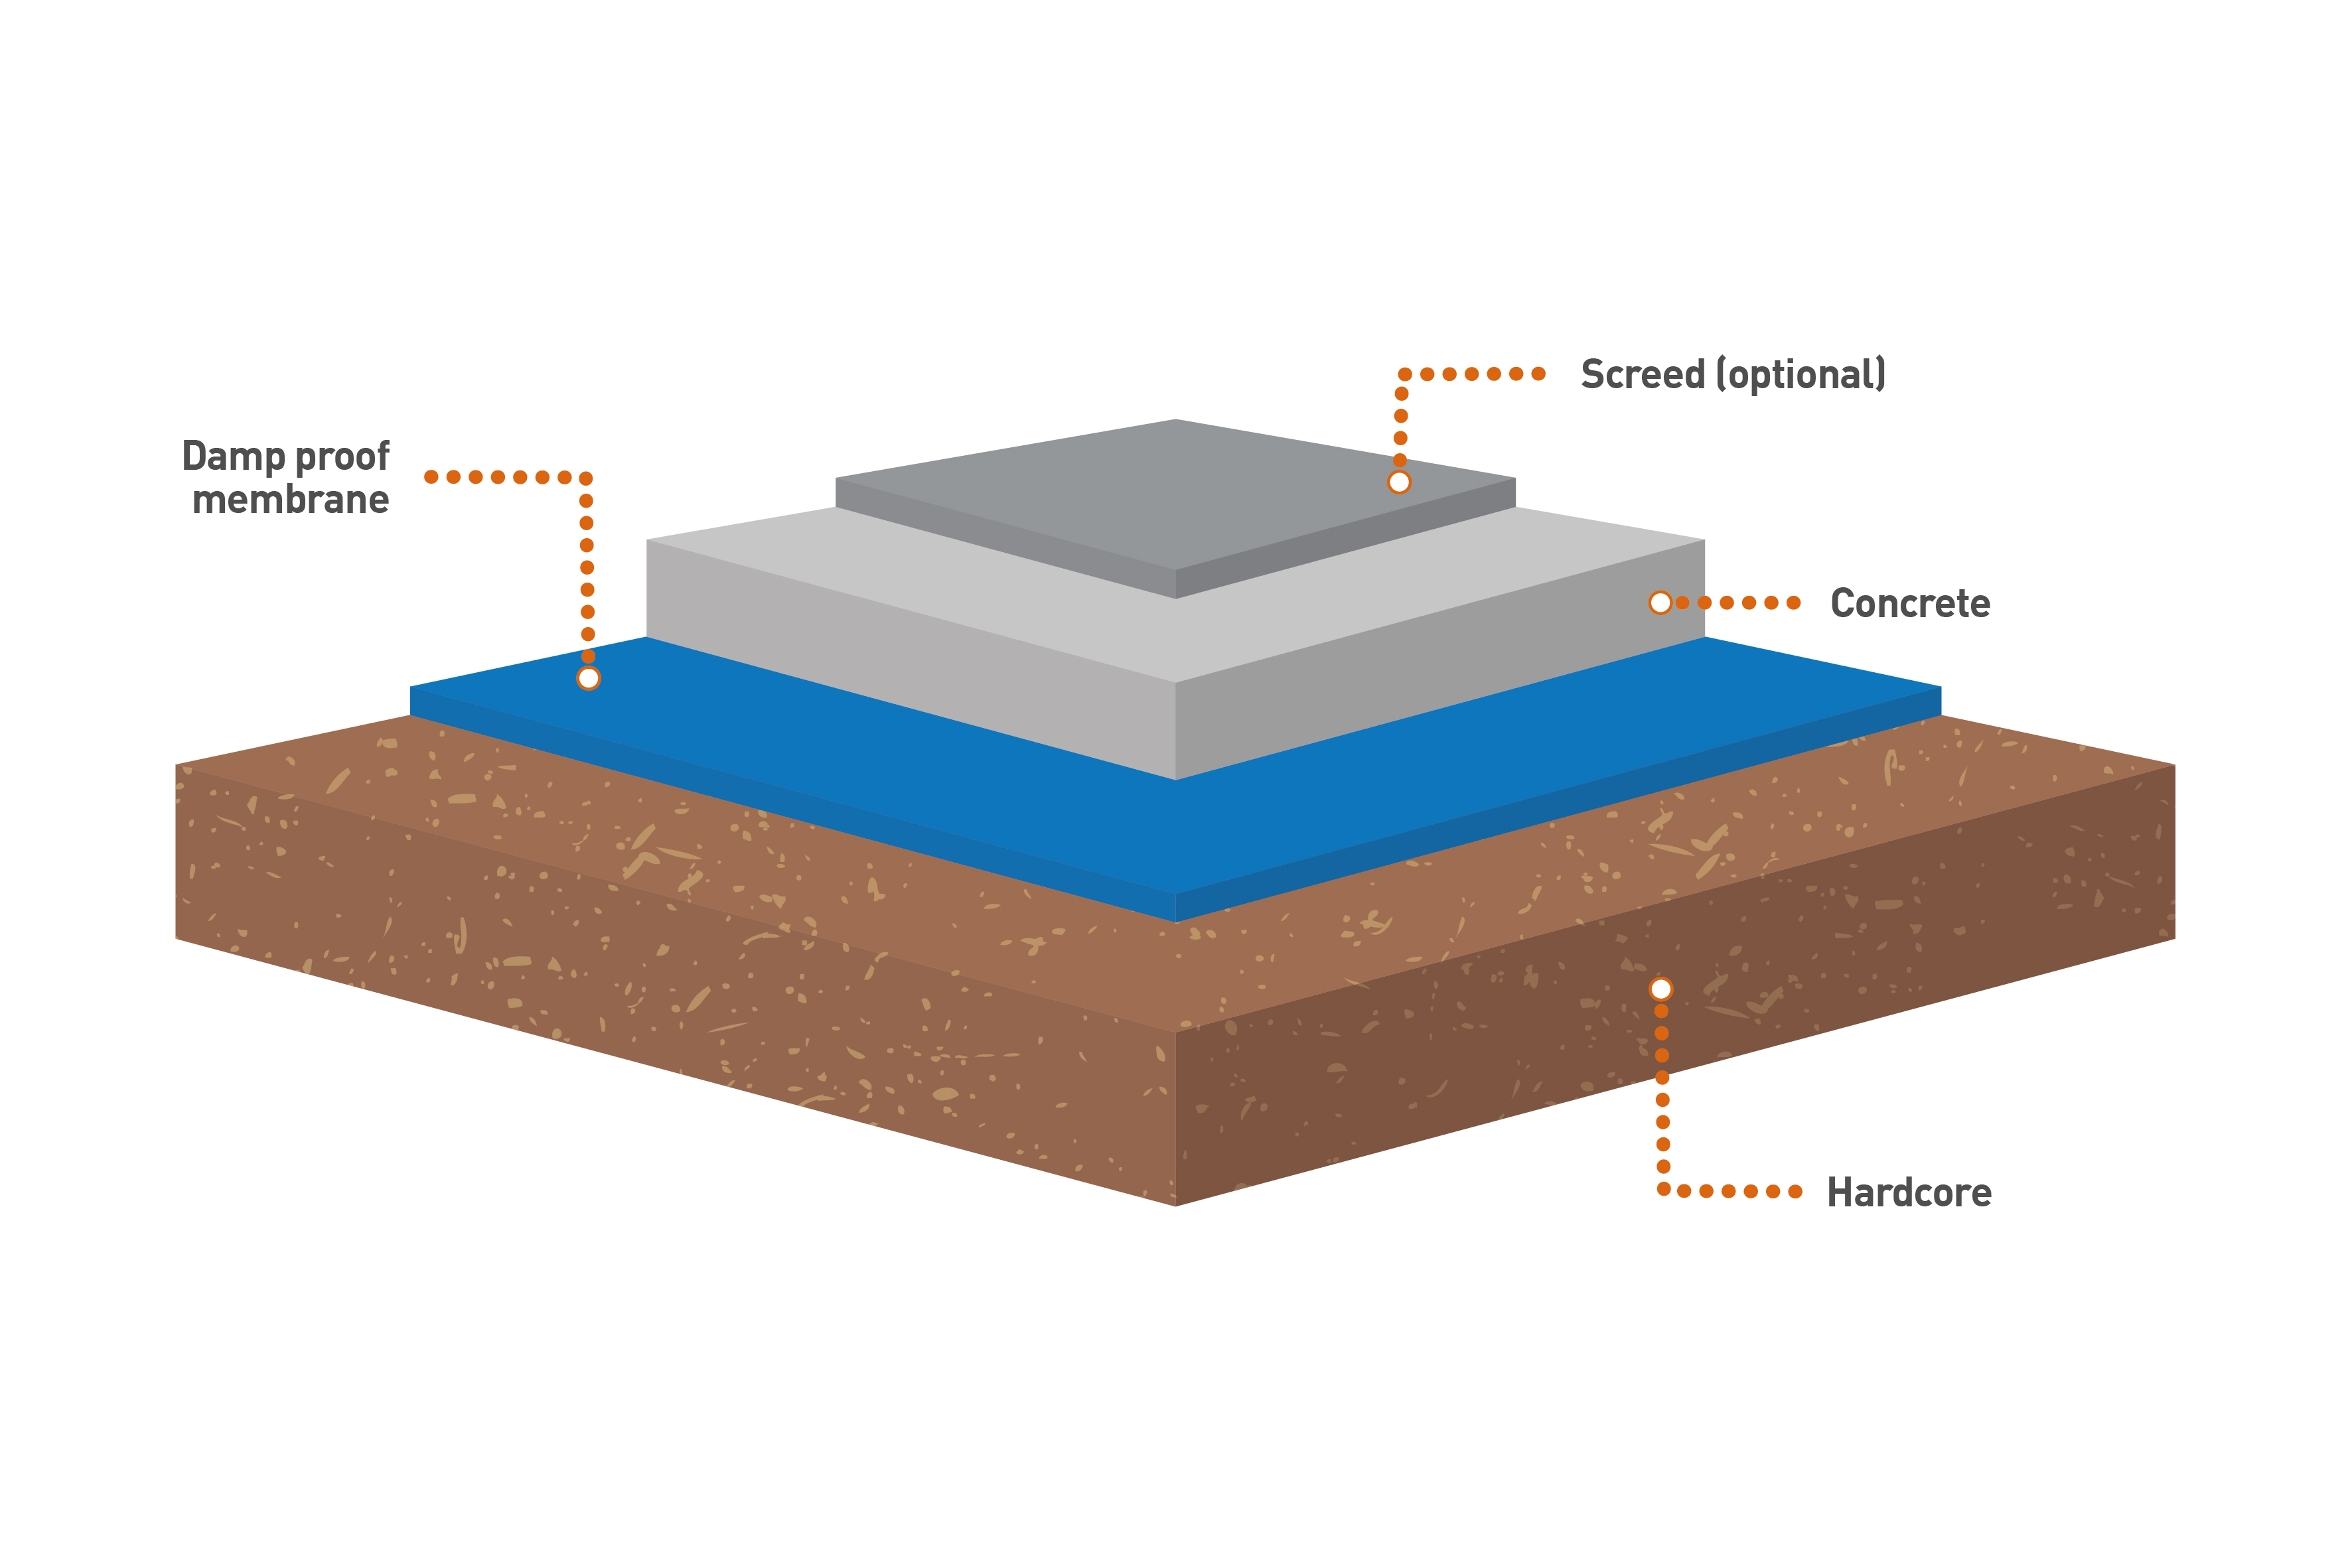
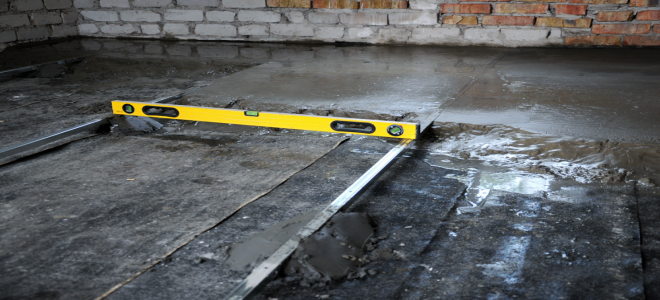
Once you have evaluated the site and obtained necessary permits, you can begin preparing the foundation for pouring. This involves removing any debris or obstructions from the area where you plan to pour, as well as leveling the ground and compacting it down. It’s also important to ensure that there are no cracks or voids in the foundation that could affect the integrity of your poured floor.
Obtaining Materials
The next step is to obtain all of the necessary materials for pouring your basement floor. This includes concrete mix, reinforcement mesh, waterproofing additives such as latex or silicone caulk, reinforcing rods, construction adhesive, and other supplies depending on your project’s needs. Be sure to purchase enough materials for both the initial pour and any repairs or patching that may be required afterward.
Mixing Concrete
Once you have all of your materials gathered, you can begin mixing your concrete according to manufacturer directions. Be sure to use an appropriate ratio of cement, sand, and aggregate (such as gravel) while adding water until you achieve a workable consistency. Once mixed properly, allow your concrete mix to sit for approximately one hour before using it so that it can reach its optimal strength level.
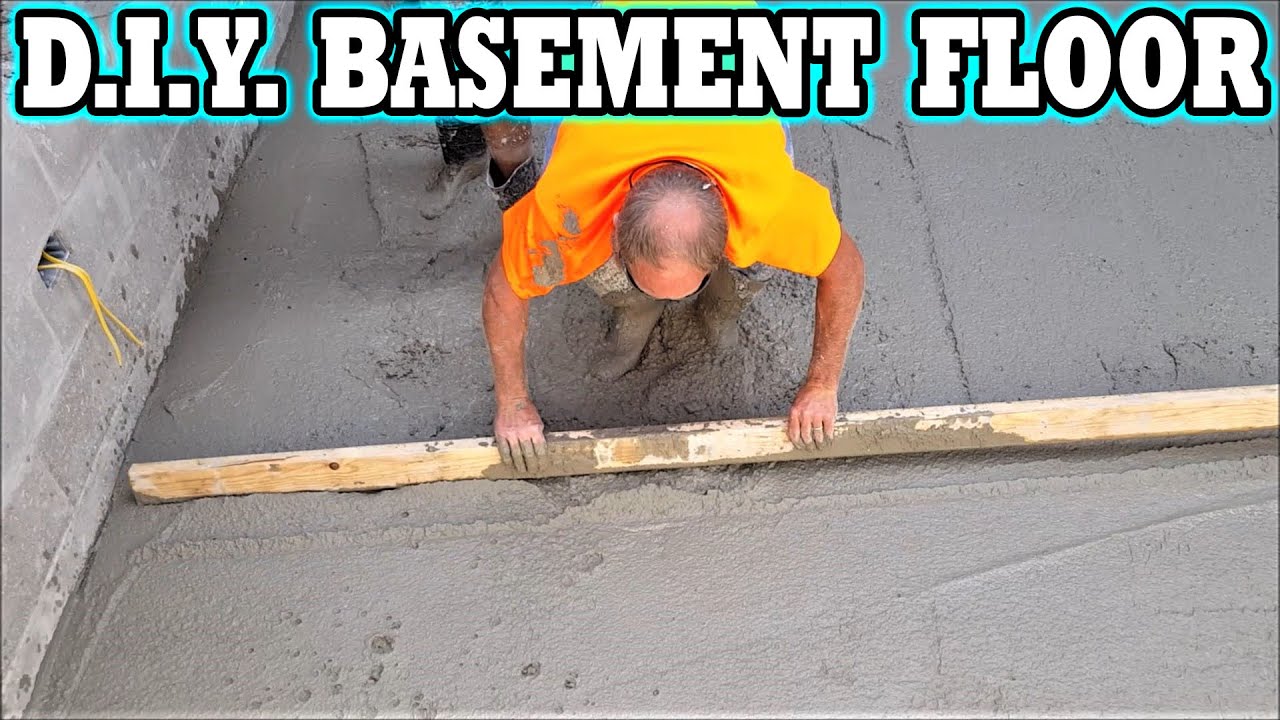
Pouring Concrete
Now that you have prepared your foundation and mixed your concrete mixture properly, it’s time to begin pouring! Begin by filling in small sections with wet concrete and then use a straight-edge tool such as a hoe or trowel to push out any air pockets and even out any imperfections. Be sure not to overwork your concrete during this stage; it’s better for it to be slightly uneven than overly manipulated or worked too much. After each section is filled in, use a float or trowel edge tool to smooth out the surface before moving onto another area.
Finishing Touches
Once all areas have been filled with wet concrete mix, use a steel trowel tool to finish off those areas by creating an even surface with tight joints between each section of poured concrete. Then use a broom or brush to create texture on top of each section that has been laid down – this will help create traction on slick surfaces when walking on them later on after drying time has elapsed. Finally, mist each section lightly with water for curing purposes over several days before being able walk on them .
Pouring a basement floor can be a tricky process, but with the right preparation and materials, you can ensure that it is done properly. By following these steps, you can ensure that your poured basement floor is safe and secure for years to come!
Pouring a basement floor is an important step in any home improvement project. It provides added stability to the area and helps protect against water damage and other issues. However, it's important to understand the process of pouring a basement floor correctly in order to ensure a successful outcome. Here are the steps you need to take when pouring a basement floor.
Evaluating Site Conditions
Before beginning any project, it's important to assess the condition of the site where you plan on pouring the concrete. Make sure to check for potential hazards or prl problems, such as signs of water damage or structural issues, before proceeding with any work. Additionally, you should check local building codes and regulations to make sure your project is compliant.
Preparing the Foundation
Once you have evaluated the site and obtained necessary permits, you can begin preparing the foundation for pouring. This involves removing any debris or obstructions from the area where you plan to pour, as well as leveling the ground and compacting it down. It's also important to ensure that there are no cracks or voids in the foundation that could affect the integrity of your poured floor.
Obtaining Materials
The next step is to obtain all of the necessary materials for pouring your basement floor. This includes concrete mix, reinforcement mesh, waterproofing additives such as latex or silicone caulk, reinforcing rods, construction adhesive, and other supplies depending on your project’s needs. Be sure to purchase enough materials for both the initial pour and any repairs or patching that may be required afterward.
Mixing Concrete
Once you have all of your materials gathered, you can begin mixing your concrete according to manufacturer directions. Be sure to use an appropriate ratio of cement, sand, and aggregate (such as gravel) while adding water until you achieve a workable consistency. Once mixed properly, allow your concrete mix to sit for approximately one hour before using it so that it can reach its optimal strength level.
Pouring Concrete
Now that you have prepared your foundation and mixed your concrete mixture properly, it’s time to begin pouring! Begin by filling in small sections with wet concrete and then use a straight-edge tool such as a hoe or trowel to push out any air pockets and even out any imperfections. Be sure not to overwork your concrete during this stage; it’s better for it to be slightly uneven than overly manipulated or worked too much. After each section is filled in, use a float or trowel edge tool to smooth out the surface before moving onto another area.
Finishing Touches
Once all areas have been filled with wet concrete mix, use a steel trowel tool to finish off those areas by creating an even surface with tight joints between each section of poured concrete. Then use a broom or brush to create texture on top of each section that has been laid down – this will help create traction on slick surfaces when walking on them later on after drying time has elapsed. Finally, mist each section lightly with water for curing purposes over several days before being able walk on them .
Pouring a basement floor can be a tricky process, but with the right preparation and materials, you can ensure that it is done properly. By following these steps, you can ensure that your poured basement floor is safe and secure for years to come!Advertisements