Ceramic tile can appear Southwestern, starkly contemporary or smoothly traditional. When you used to think of tile for the floor flooring, you may possibly have believed cream, off white, or even black as that was virtually what was readily available. Whatever strategy you decide to master from, take copious notes to be able to do a great job on ones own. In terms of maintenance, tile flooring is actually among the simplest to manage.
Images about Installing Heated Tile Floor On Concrete

Furthermore, carpeting absorbs heat and tends to make the space feel warmer. You are able to mix and match the floor tile with various other kinds of flooring to accent the floor and develop a point of interest in the space. Possess some sandpaper handy for smoothing out cut edges. You have to gauge the length and breadth of the area of floor you're likely to tile and also the length as well as width of each tile.
How to Install Heated Floors? Warmup Blog
Linoleum tile floors almost never scratch and this can be an enormous plus. Mix the formula the right way and soak a portion of cloth in it. Run your damp mop over the floor as soon as a week and you are going to have a clean floor. Owners must be built with the best hard tile floor cleaners. You can select these tiles both for the bedroom of yours or maybe the living rooms of yours, kitchen and even bathroom.
How to install a heated tile floor. and also how NOT to install
Heated Tile Floor on Slab » Rogue Engineer

How to Install In-Floor Radiant Heat

Heated Tile Floor on Slab » Rogue Engineer
How to install a heated tile floor. and also how NOT to install

Heated Floor Tile Installation
Radiant Floor Heating: All About Electric and Hydronic Systems
/cdn.vox-cdn.com/uploads/chorus_asset/file/20789538/K0DFK3.jpg)
How to install a heated tile floor. and also how NOT to install
How to Install Radiant Floor Heating in Concrete – Warmup

Best Flooring for Radiant Heat Systems
:max_bytes(150000):strip_icc()/install-floors-over-radiant-heating-systems-4121256-hero-a5fa0082e1534638a557d51c119d28c2.jpg)
How to install a heated tile floor. and also how NOT to install
151: When Is It Worth It To Splurge? Young House Love Floor

Related Posts:
- Water Damage To Ceramic Tile Floor
- How To Polish Slate Tile Floors
- Hardwood Porcelain Tile Flooring
- Cory Tile Flooring
- Allure Gripstrip Resilient Tile Flooring Reviews
- Baby Hit Head On Tile Floor
- Tile Floor Smells After Mopping
- Best Rated Steam Mop For Tile Floors
- Glueless Vinyl Tile Flooring
- Allure Resilient Plank And Tile Flooring
Installing Heated Tile Floor On Concrete
Introduction:
Heated tile floors are a luxurious addition to any home, providing warmth and comfort during the colder months. If you have a concrete subfloor, you may be wondering if it’s possible to install heated tile flooring. The answer is yes! In this article, we will guide you through the step-by-step process of installing heated tile floors on concrete.
1. Preparing the Concrete Subfloor:
Before you begin the installation process, it’s essential to prepare your concrete subfloor properly. Start by inspecting the concrete for any cracks or damage. Repair any issues using an appropriate concrete repair product. Next, ensure that the surface is clean and free from any debris or dust. If necessary, use a vacuum cleaner or broom to remove any loose particles.
FAQ: Can I install heated tile floors on uneven concrete?
Answer: It is not recommended to install heated tile floors on uneven concrete surfaces. The subfloor should be smooth and level to ensure proper heat distribution and prevent damage to the heating elements.
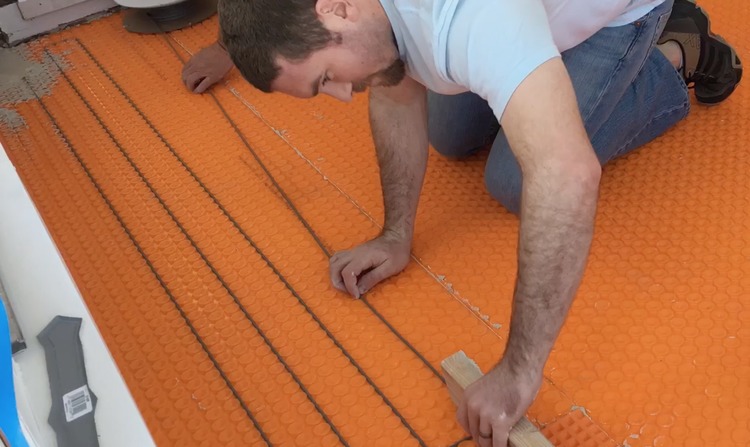
2. Installing Insulation:
To improve the energy efficiency of your heated tile floor and enhance its performance, it’s advisable to install insulation before laying down the heating system. Insulation helps prevent heat loss into the concrete subfloor, directing it upward towards your tiles instead.
Start by rolling out a suitable insulation material, such as extruded polystyrene foam boards or cork underlayment, over your clean and dry concrete subfloor. Ensure that the insulation material covers the entire floor area where you plan to install the heated tile flooring system. Secure the insulation in place using adhesive or tape, making sure there are no gaps or seams.
FAQ: Is insulation necessary when installing heated tile floors on concrete?
Answer: While not mandatory, installing insulation beneath your heated tile floor can significantly improve its energy efficiency and performance by reducing heat loss into the subfloor.
3. Planning the Layout:
Before proceeding with the installation, it’s essential to plan the layout of your heated tile floor carefully. Consider factors such as the size and shape of the room, the location of furniture or fixtures, and any areas where you may want to avoid installing heating elements, such as under cabinets or appliances.
Using a measuring tape and chalk lines, mark the positions where you intend to lay down the heating cables or mats. Ensure that the spacing between each cable or mat follows the manufacturer’s guidelines for optimal heat distribution.
FAQ: Can I install heated tile floors in all rooms of my house?
Answer: Yes, you can install heated tile floors in any room of your house, including bathrooms, kitchens, living rooms, and bedrooms. However, it’s important to consider factors such as moisture levels and potential damage from heavy furniture or appliances before installation.
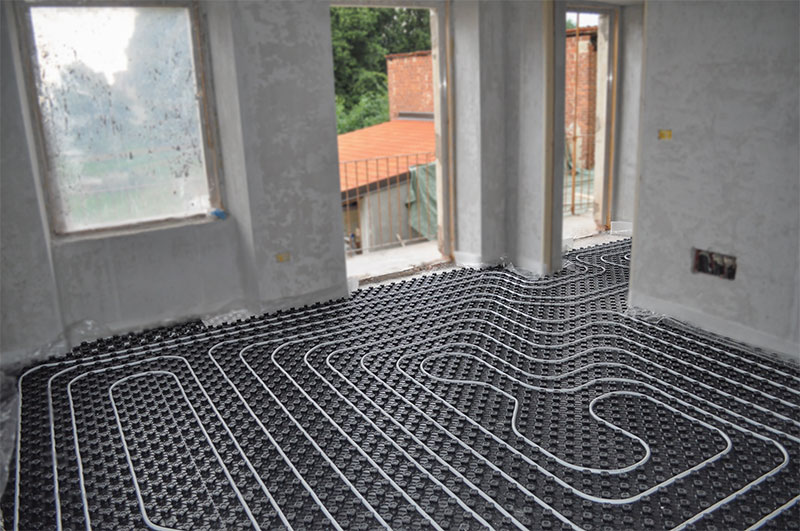
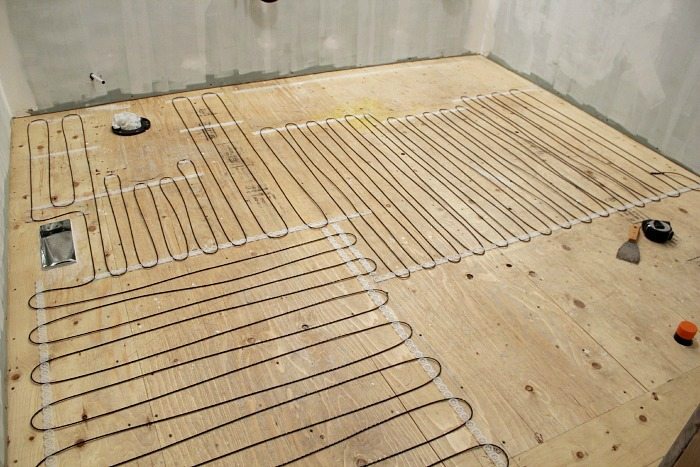
4. Installing the Heating System:
There are two main types of heating systems commonly used for heated tile floors: electric radiant heat cables and electric radiant heat mats. Both options are suitable for installation on concrete subfloors.
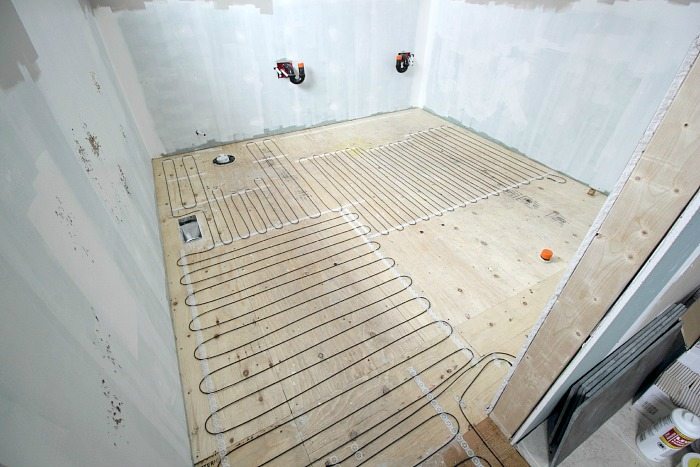
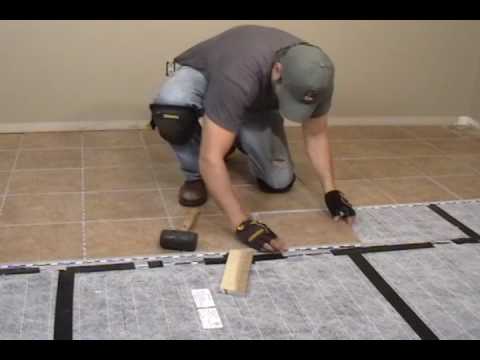
When using electric radiant heat cables, start by securing them to the subfloor using adhesive or staples. Follow the manufacturer’s guidelines regarding spacing and positioning. For electric radiant heat mats, roll them out over your prepared subfloor according to your planned layout.
After installing the cables or mats, connect them to a thermostat control unit following the manufacturer’s instructions. It’s crucial to have a qualified electrician handle any electrical connections to ensure safety and compliance with local building codes.
FAQ: Are heated tile floors Safe to use?
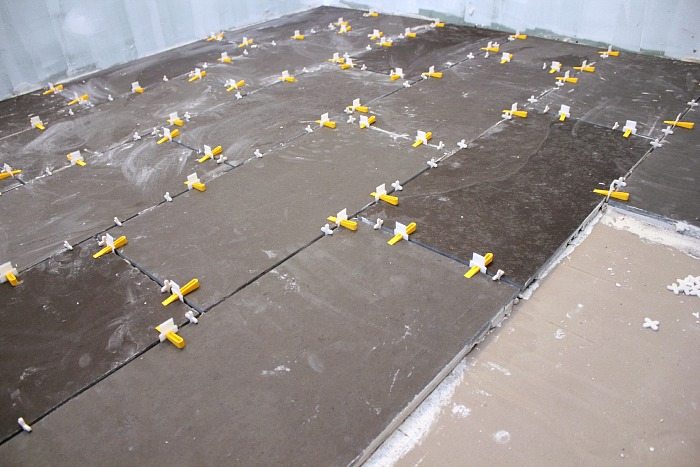
Answer: Yes, heated tile floors are safe to use when installed correctly and maintained properly. It’s important to follow the manufacturer’s instructions and guidelines for installation and operation to ensure safety. Additionally, having a qualified electrician handle any electrical connections is recommended to ensure compliance with local building codes and safety standards. 5. Installing the Tile:
After the heating system is installed and connected, you can proceed with laying the tile. Begin by applying a layer of thin-set mortar to the subfloor using a trowel, following the manufacturer’s instructions.
Carefully place each tile onto the mortar, pressing down firmly to ensure proper adhesion. Use tile spacers to maintain consistent spacing between tiles. Continue until all tiles are laid out according to your planned layout.
Allow the mortar to dry for the recommended time before proceeding. Once dry, remove the tile spacers and prepare to grout the tiles.
6. Grouting and Finish:
Mix and apply grout to fill in the gaps between tiles, using a grout float or trowel. Work in small sections at a time, wiping away any excess grout with a damp sponge before it dries.
After grouting, allow the grout to cure according to the manufacturer’s instructions. Once cured, clean the tiles thoroughly to remove any remaining residue or haze.
Finally, apply a sealant or finishing product to protect the tiles and enhance their appearance. Follow the manufacturer’s instructions for application and drying times.
FAQ: How long does it take for heated tile floors to warm up?
Answer: The time it takes for heated tile floors to warm up can vary depending on factors such as room size, insulation, and temperature settings. Generally, it can take anywhere from 30 minutes to several hours for the floor to reach its desired temperature. It’s important to use a programmable thermostat to schedule heating cycles and ensure optimal comfort and energy efficiency.