You might also have the same pattern installed in your kitchen – an area where few would consider wood for because of the heavy foot traffic as well as strong probability of stains and spills. Even in case you are tempted to cut on costs and just DIY installation of the vinyl sheets/ tiles of yours, be happy to find that hiring a pro will be an obviously better choice.
Images about Painting Vinyl Floor Tiles In Kitchen

When you do not heed this advice, the vinyl being an extremely pliable material could eventually reflect the complications that you made an effort to cover up. The sad thing about this’s that once the vinyl flooring is destroyed, there is absolutely nothing you are able to do but in order to have it removed. If you are looking for something that is advanced and of higher quality, vinyl tiles is definitely the much better choice.
How to Paint Linoleum Floors or Vinyl Flooring for a Quick Redo
Vinyl kitchen floors will not rip. As stated prior to the material isn’t the same as normal hardwood, stone or tile. But, you have to know that the longevity of its is greatly influenced by the way you lay it out. There could be a cushioning layer on some styles. For all the moisture which will come together with the territory, the water may well slip through the fractures of a tile floor.
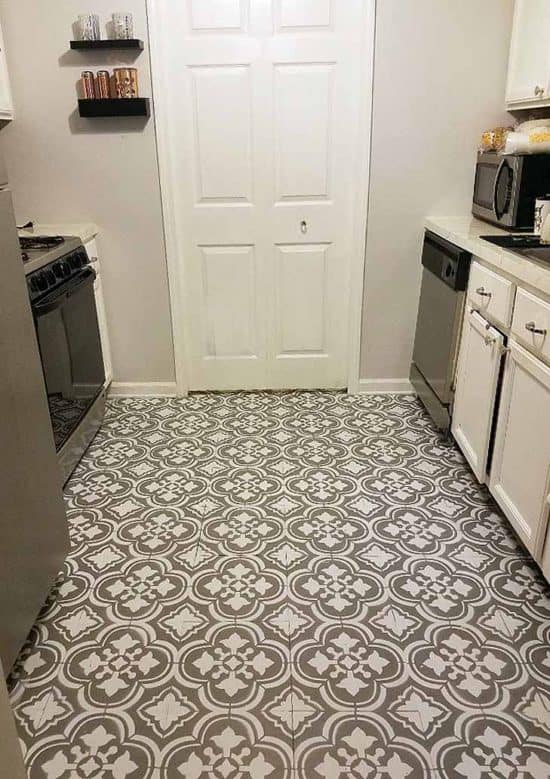
Casablanca Trellis Moroccan Stencil

How to Paint Vinyl Floors: Long-Lasting Results
How I Painted My Vinyl Floor Painted vinyl floors, Floor

How to Paint a Vinyl Floor DIY Painted Floors Dans le Lakehouse

How to Paint Over Vinyl Floors Modernize

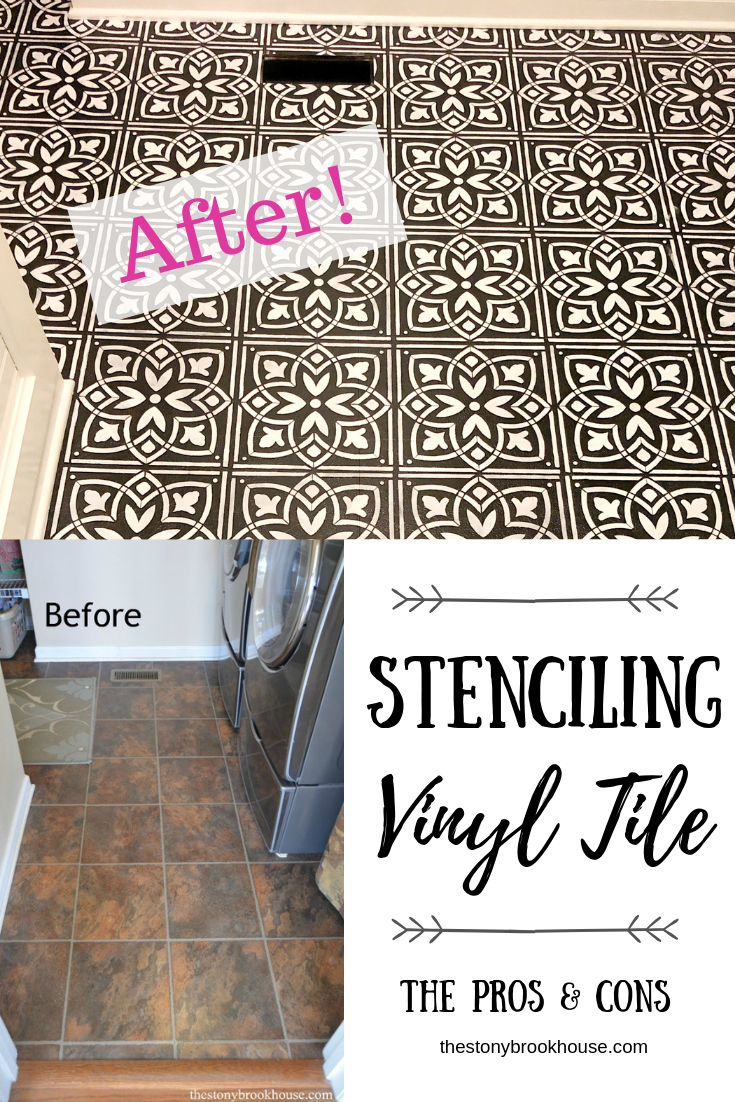
Painting u0026 Stenciling Vinyl Flooring – The Pros u0026 Cons The
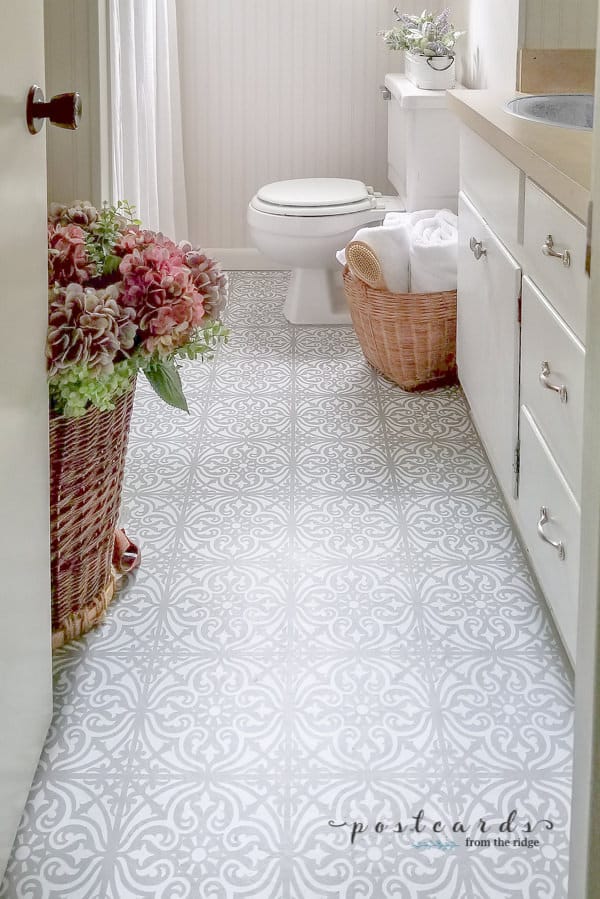
How to Paint a Vinyl or Linoleum Floor the Right Way – Postcards
How To Paint Linoleum Flooring – The Honeycomb Home
How to paint your Vinyl floor! How to paint floors

Painting Linoleum Floors THE RIGHT WAY (and what supplies to use)

How to Paint Old Linoleum Kitchen Floors – 1915 House

MONDAY MAKEOVER u2013 PAINTED VINYL KITCHEN FLOOR Diy flooring

Related Posts:
- Epoxy Paint For Vinyl Floors
- Drying Time For Vinyl Floor Glue
- Armstrong Tile And Vinyl Floor Cleaner Where To Buy
- Diamond Vinyl Flooring
- Parquet Vinyl Flooring Roll
- Platinum Vinyl Flooring
- Water Got Under Vinyl Flooring
- Flower Vinyl Flooring
- Black Sparkle Vinyl Flooring
- Vinyl Flooring White Marble
Painting Vinyl Floor Tiles In Kitchen
Vinyl floor tiles are a popular choice for kitchen flooring due to their affordability, durability, and easy maintenance. However, over time, the color and design of vinyl floor tiles can become outdated or worn out. Instead of going through the hassle and expense of replacing the entire floor, a cost-effective solution is to paint the vinyl floor tiles. Painting the floor can give it a fresh new look that matches your kitchen decor and style. In this article, we will provide you with a step-by-step guide on how to paint vinyl floor tiles in the kitchen.
I. Preparation
Before you begin painting your vinyl floor tiles, it is crucial to prepare the surface properly. Taking the time to prepare the floor will ensure better adhesion and longevity of the paint.
1. Clean the Floor: Start by thoroughly cleaning the vinyl floor tiles using a mild detergent and warm water. Remove any dirt, grease, or grime that may be present on the surface. You can use a soft-bristle brush or a mop to scrub away any stubborn stains.
2. Sanding: After cleaning the floor, lightly sand the surface of the vinyl tiles using fine-grit sandpaper. Sanding helps to roughen up the smooth surface of the vinyl, allowing better adhesion for the paint.
3. Repair Any Damaged Areas: Inspect the floor for any cracks, chips, or loose tiles. If you find any damaged areas, use a vinyl repair kit to fix them before proceeding with painting.
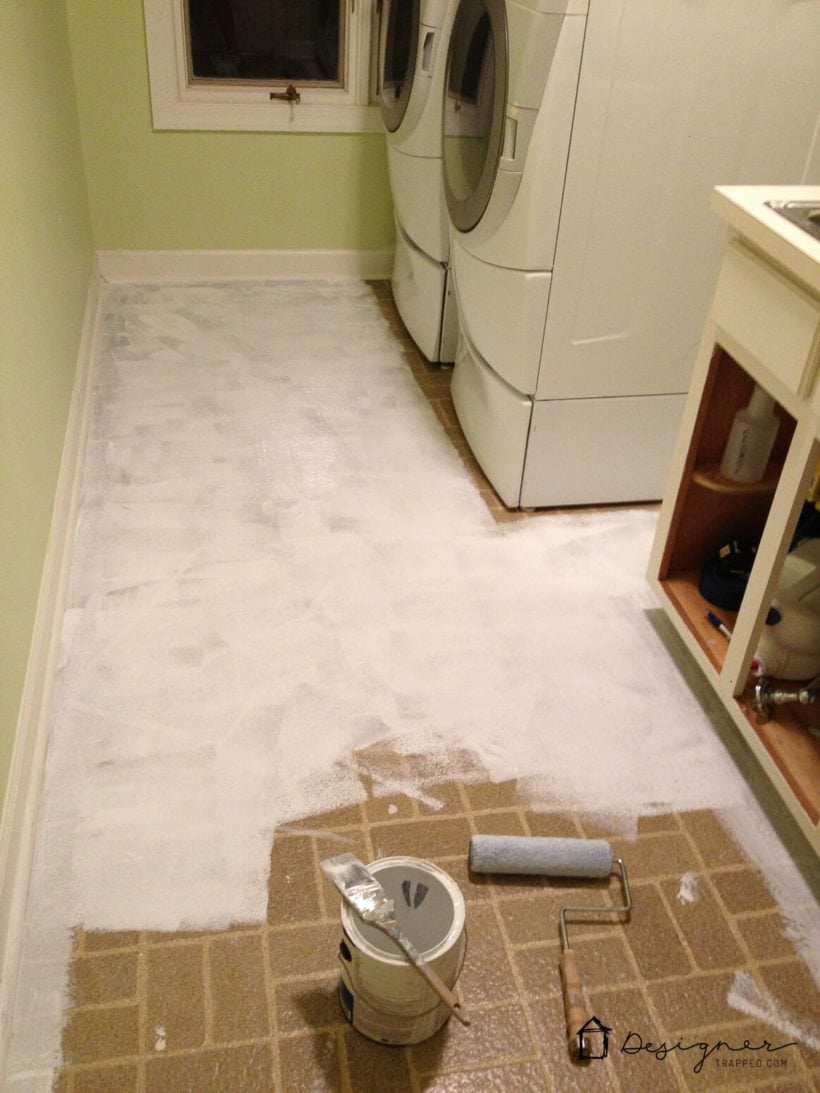
4. Prime the Floor: Applying a primer is essential to promote adhesion between the paint and vinyl surface. Use a high-quality bonding primer specifically designed for use on vinyl surfaces. Apply an even coat of primer using a roller or brush and allow it to dry according to manufacturer instructions.
FAQs:
Q1: Can I skip sanding if my vinyl floor tiles are already textured?
A1: Sanding is highly recommended, even if the vinyl tiles have a textured surface. It helps to create a rougher surface for better paint adhesion.
Q2: Can I use any primer for painting vinyl floor tiles?
A2: No, it is essential to use a bonding primer specifically formulated for use on vinyl surfaces. Regular primers may not adhere properly to the vinyl and can lead to peeling or flaking of the paint.
II. Painting
Once you have prepared the vinyl floor tiles, it’s time to start painting. Follow these steps to achieve a professional-looking finish.
1. Choose the Right Paint: Selecting the right paint for your vinyl floor tiles is crucial to ensure long-lasting results. Look for a high-quality, latex-based paint that is suitable for use on floors. Avoid oil-based paints as they can yellow over time.
2. Apply the Base Coat: Start by applying a base coat of paint using a roller or brush. Use long, even strokes to achieve a smooth and consistent finish. Allow the base coat to dry completely before proceeding with additional layers.
3. Create a Pattern or Design: If you want to add some visual interest or create a pattern on your floor, now is the time to do so. You can use stencils, masking tape, or freehand techniques to create unique designs. Make sure to plan your design beforehand and take measurements if necessary.
4. Apply Additional Coats: Depending on the desired color and coverage, you may need to apply multiple coats of paint. Allow each coat to dry Completely before applying the next one. This will help prevent smudging or smearing of the paint.
5. Seal the Paint: Once you are satisfied with the color and coverage, seal the painted vinyl floor tiles with a clear, water-based polyurethane sealer. This will protect the paint from scratches and wear, ensuring longevity of the finish.
6. Allow Sufficient Drying Time: After applying the sealer, allow the painted floor to dry completely before using it. Follow the manufacturer’s instructions for drying time, as it may vary depending on the product used.
7. Maintain and Clean: To keep your painted vinyl floor tiles looking their best, regularly sweep or vacuum to remove dirt and debris. Clean up any spills immediately to prevent staining. Avoid using harsh chemicals or abrasive cleaners that can damage the paint finish.
8. Enjoy Your Newly Painted Floor: Once everything is dry and cleaned up, you can enjoy your freshly painted vinyl floor tiles! Whether it’s a bold color or a subtle pattern, your painted floor can transform the look of any room.
Overall, it is important to properly prepare the vinyl floor tiles before painting and use a bonding primer specifically formulated for use on vinyl surfaces. Choosing the right paint, applying multiple coats if necessary, sealing the paint with a clear polyurethane sealer, and allowing sufficient drying time are also crucial steps to achieve a professional-looking finish. Regular maintenance and cleaning will help keep the painted floor looking its best. Overall, the steps to achieve a professional-looking finish for painted vinyl floor tiles are:
1. Choose the right paint suitable for use on floors.
2. Apply a base coat of paint using a roller or brush.
3. Create a pattern or design using stencils, masking tape, or freehand techniques.
4. Apply additional coats of paint as needed, allowing each coat to dry completely before applying the next one.
5. Seal the painted floor with a clear, water-based polyurethane sealer to protect the paint from scratches and wear.
6. Allow sufficient drying time according to the manufacturer’s instructions.
7. Regularly sweep or vacuum to remove dirt and debris and clean up spills promptly to prevent staining.
8. Enjoy your newly painted floor.
To achieve the best results, it is also important to properly prepare the vinyl floor tiles before painting by cleaning and ensuring they are free of any dirt, grease, or wax. Additionally, using a bonding primer specifically formulated for vinyl surfaces can help improve adhesion and durability of the paint.