These woods often give superior qualities from wood that grew slowly and is generally much more dense than faster grown wood. We have mentioned that strong floors are generally the very best, with laminate flooring surfaces following, and engineered wood floors last (with respect to quality. This means not much material winds up as garbage in landfills, which which does is still biodegradable.
Images about Putting Wood Flooring On Walls
In the opinion of mine, wood flooring is great, but laminate flooring has become one of the fastest-growing items in the flooring industry. Wood flooring is the most abundantly renewable material we are able to use to build floors. Settler's cabins throughout the South, Victorian mansions up the eastern seaboard and hotels and palaces all over Europe were constructed out of the after great old-growth Heart Pine ecosystem. These are the criteria that affect the overall performance of real wood flooring.
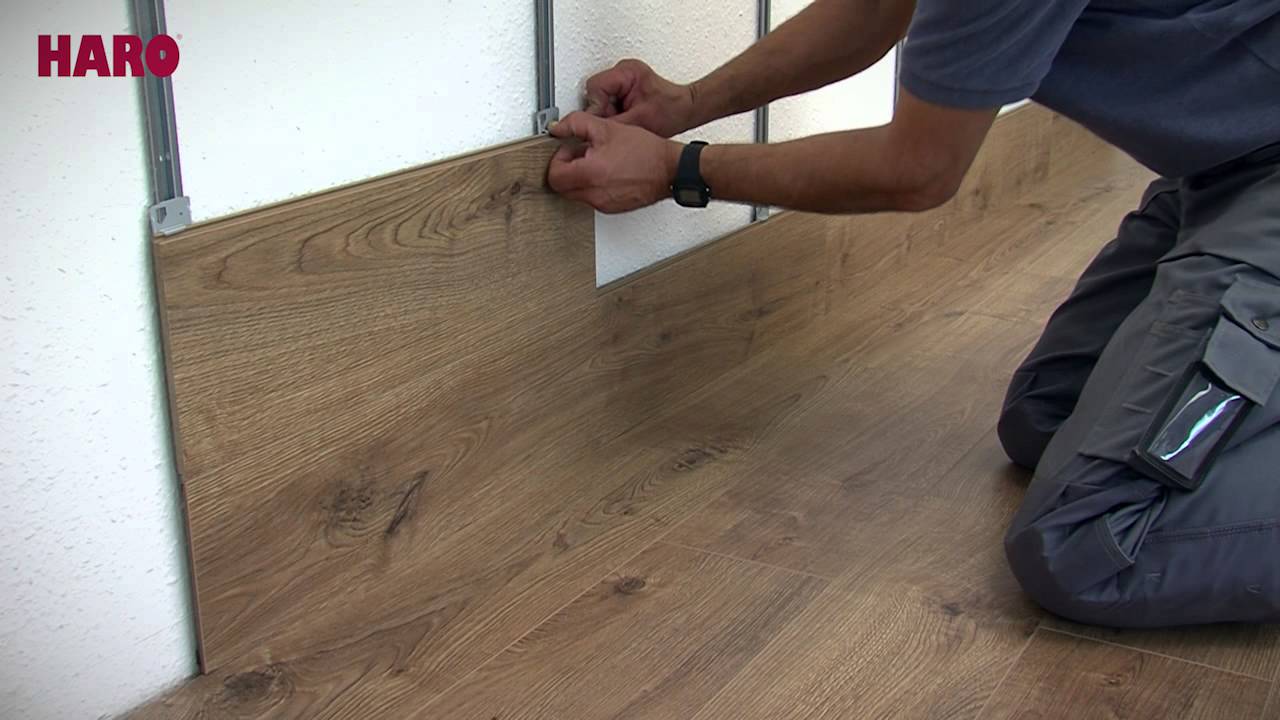
Installation instructions for “Floor on the Wall” u2013 HARO Laminate (English)
Tile flooring or natural stone was reserved only for the financially elite, big companies, or government buildings as a result of cost. The quantity of sustainable forest management helps it be easy for us to harvest wood with no serious influence on our environment. Engineered wood flooring can be bought in many different designs. It is not difficult knowing how. You will find no anti scratch warranties in the wood floors business.
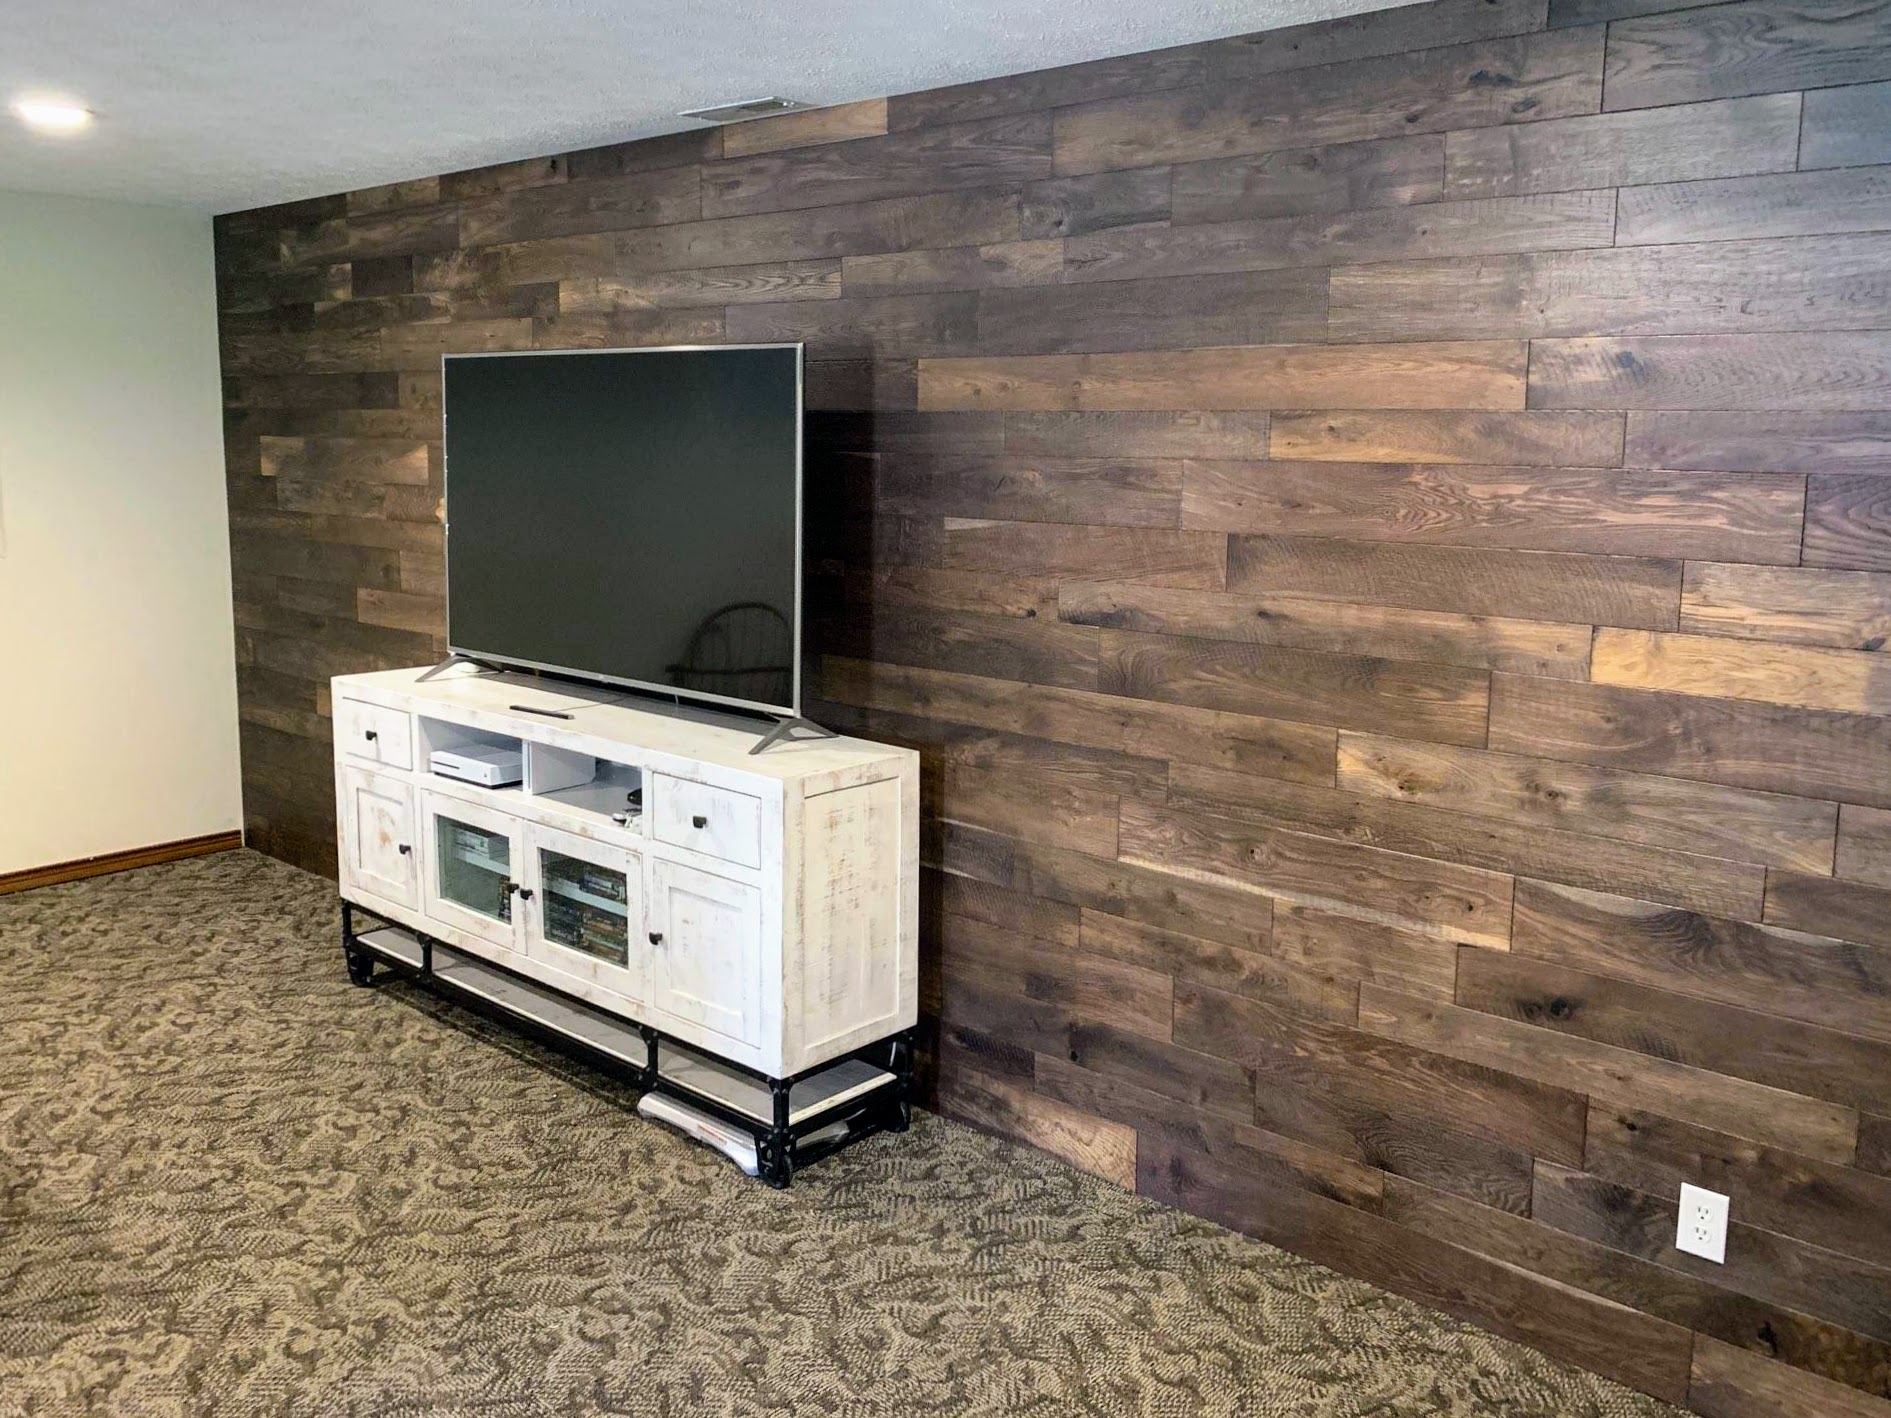
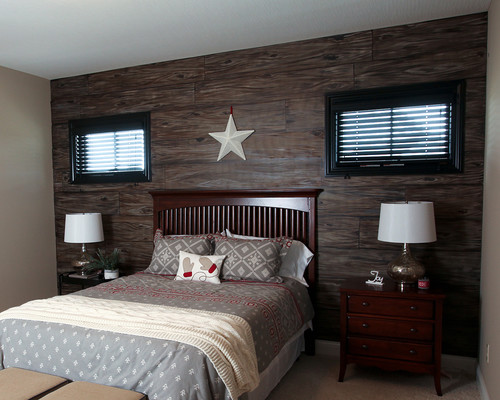
Engineered Wood Flooring As An Accent Wall BuildDirect® Blog
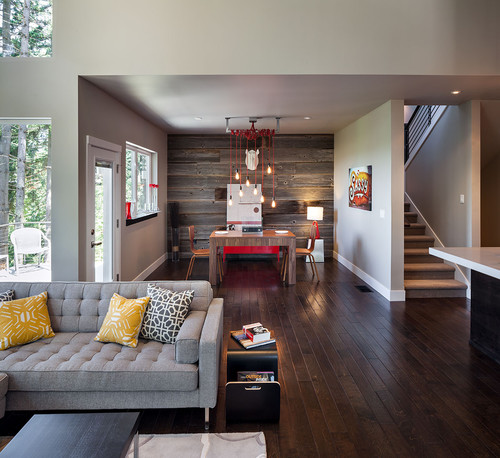
Feature Wall From Salvaged Hardwood Flooring : 4 Steps (with

How to Horizontally Install Pergo Laminate Flooring On Your Walls
Engineered Wood Flooring As An Accent Wall BuildDirect® Blog
Going up the Wall: Installing Flooring Vertically 2018-10-26

18 Flooring on Walls ideas flooring on walls, flooring, house design

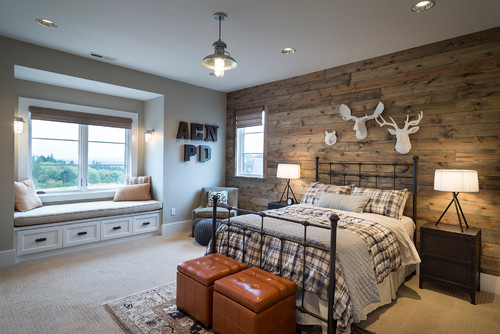
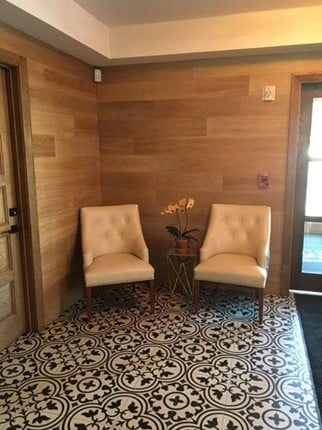
Interested in a Wood Accent Wall?
Engineered Wood Flooring As An Accent Wall BuildDirect® Blog
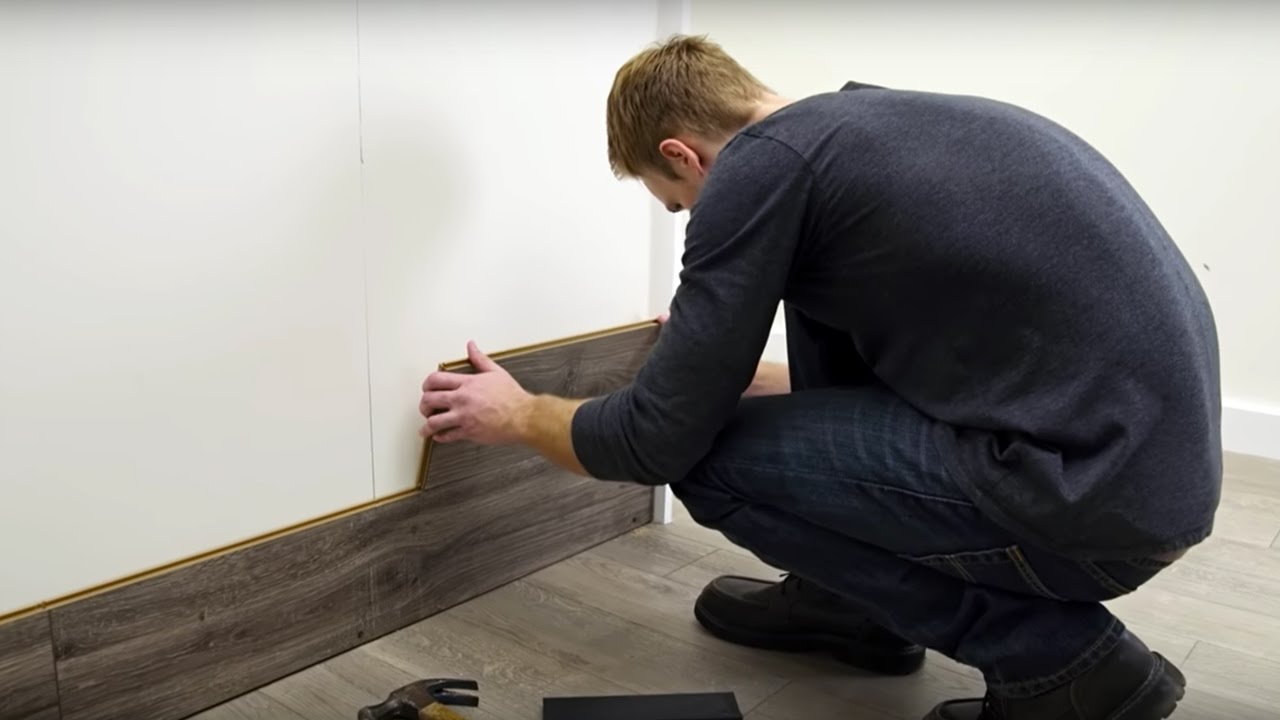
How to Put Laminate Flooring on the Wall Hunker

Accent wall, made from engineered hardwood flooring, air nailed to

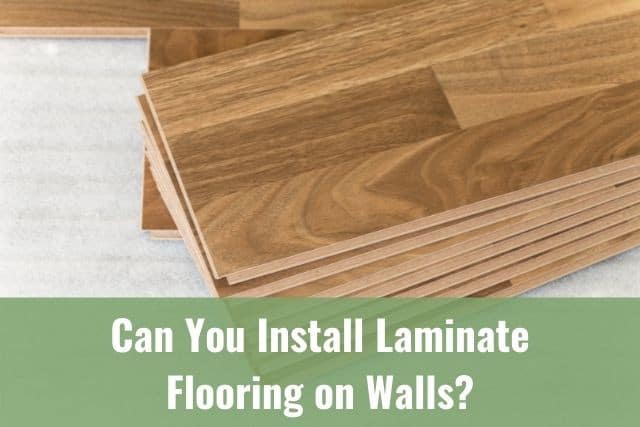
Can You Install Laminate Flooring on Walls? – Ready To DIY
How To Install a Wood Flooring Feature Wall

Related Posts:
- Wood Floor Border Ideas
- Wood Floor Multi Color
- Jatoba Solid Wood Flooring
- Basement Wood Flooring Ideas
- Wood Floor Drops
- Tileable Wood Floor Texture
- Dark Wood Flooring For Bathrooms
- Wood Flooring Ideas Patterns
- Engineered Parquet Wood Flooring
- Brazilian Tigerwood Flooring Review
Putting Wood Flooring On Walls: A Comprehensive Guide to Transform Your Space
Introduction:
Wood flooring is a popular choice for homeowners seeking to enhance the aesthetic appeal and warmth of their living spaces. Traditionally, wood flooring has been limited to installation on the ground, but in recent years, a new trend has emerged – putting wood flooring on walls. This innovative approach not only adds a touch of elegance and sophistication to any room but also offers unique design possibilities. In this comprehensive guide, we will delve into the process of installing wood flooring on walls, explore different design options, address common concerns, and provide detailed answers to frequently asked questions.
I. The Benefits of Installing Wood Flooring on Walls:
Adding wood flooring to your walls can transform an ordinary room into a visually stunning space. Here are some key benefits of this unique design choice:
1. Enhanced Aesthetic Appeal:
By incorporating wood flooring on your walls, you introduce natural textures and patterns that create depth and visual interest. The warmth and charm of wood add a cozy ambiance to any room, making it more inviting and comfortable.
2. Unique Design Possibilities:
Wood flooring allows you to experiment with various installation patterns and finishes. Whether you opt for a traditional horizontal or vertical placement or choose a more dynamic herringbone or chevron pattern, the possibilities are endless. The versatility of wood flooring opens up countless design opportunities to suit your personal style.
3. Acoustic Benefits:
Wood is known for its sound-absorbing properties, making it an excellent choice for rooms where noise reduction is desired. By installing wood flooring on walls, you can minimize echo and reverberation, resulting in improved acoustic quality within the space.
FAQs:
Q: Can I install wood flooring on any type of wall?
A: Wood flooring can be installed on various types of walls such as drywall, plasterboard, plywood, or even brick or concrete surfaces. Proper preparation and surface treatment are essential to ensure a secure and long-lasting installation.
Q: Is there a specific type of wood flooring suitable for walls?
A: Any type of wood flooring can be used on walls, including solid hardwood, engineered wood, or laminate. However, it is important to consider the weight and thickness of the chosen material to ensure proper installation and structural integrity.
II. Preparing for Installation:
1. Assessing Wall Condition:
Before proceeding with the installation, it is crucial to evaluate the condition of the wall. Ensure that the surface is flat, clean, and free from any defects such as cracks or moisture damage. If necessary, repair or treat the wall before moving forward.
2. Gathering Materials and Tools:
To successfully install wood flooring on walls, you will need a range of materials and tools, including:
– Wood flooring planks
– Adhesive or nails (depending on the chosen installation method)
– Measuring tape
– Level
– Circular saw or miter saw
– Construction adhesive
– Finishing nails
– Hammer or nail gun
– Carpenter’s square
– Sandpaper
3. Determining Installation Method:
There are two primary methods for installing wood flooring on walls: adhesive-based and nail-based installations.
a) Adhesive-Based Installation:
This method involves applying construction adhesive directly onto the back of each wood plank before securing it to the wall. Adhesive-based installations are ideal for lightweight materials such as engineered wood or laminate.
b) Nail-Based Installation:
For solid hardwood planks or thicker wood materials, a nail-based installation may be more Suitable. This method involves using finishing nails to secure the wood planks to the wall. It provides a more secure and permanent installation, but it requires additional tools and may leave visible nail holes that need to be filled and finished.
4. Measuring and Cutting:
Before installing the wood flooring on the walls, accurately measure the dimensions of the wall and cut the planks accordingly. Use a circular saw or miter saw to make precise cuts for a clean and professional-looking installation.
III. Installation Process:
1. Start at the Bottom:
Begin the installation process at the bottom of the wall. Apply construction adhesive or place nails at strategic points along the first row of wood planks to secure them in place. Use a level to ensure that the planks are straight and even.
2. Continue Row by Row:
Continue installing subsequent rows of wood planks, making sure to stagger the joints for a visually appealing pattern. Apply adhesive or use nails as necessary to keep the planks secure.
3. Trim and Finish:
Once all the planks are installed, trim any excess material and sand down any rough edges or surfaces. Fill in any nail holes with wood filler, then sand and finish the wood according to your desired look.
IV. Maintenance and Care:
To maintain the beauty and longevity of wood flooring on walls, follow these maintenance tips:
– Regularly dust or vacuum the surface to remove debris and prevent scratching.