Specialized removal may be needed, but usually one that you are able to stay away from by raising the floor. This particular sort of tile is the economical way to achieve the overall look of granite or maybe marble floors. You'll need to be cautious adequate to handle a damp tile saw or perhaps utility knife. The next phase of your ceramic tile flooring surfaces installation is actually the adequate measuring of your floor and your tiles.
Images about Ways To Lay Tile Flooring
You can furthermore cut the tile while you're laying it, but in that case you've to be positive you have not laid down the mortar right up until you have made the required cuts. Eliminate all nails as well as debris and look at the subfloor closely for signs of rot, broken spots and warped boards. Colors vary from lively to subdued; textures vary from classically sleek to antiqued markings.
9 Types of Floor Tile Patterns To Consider in Tallahassee
In addition, the longevity of these tiles implies a great investment intended to hold good for a minimum of twenty years. When it's some time to vacuum, it's truly complicated to get rid of dust and sand stuck in the carpeting of yours. Tile next to wood can be quite a distinctive appearance, as brilliant hardwood in one room is married to elegant ceramic in the following. Mix the grout in line with the directions by the manufacturer.
How to Lay Tile on a Plywood Subfloor
/Tile-install-GettyImages-183066355-588a1cb15f9b5874eed0a1ba.jpg)
How to Install Ceramic Tile Flooring in 9 Steps – This Old House
:no_upscale()/cdn.vox-cdn.com/uploads/chorus_asset/file/19496947/color_gutters_illo_web_1.jpg)
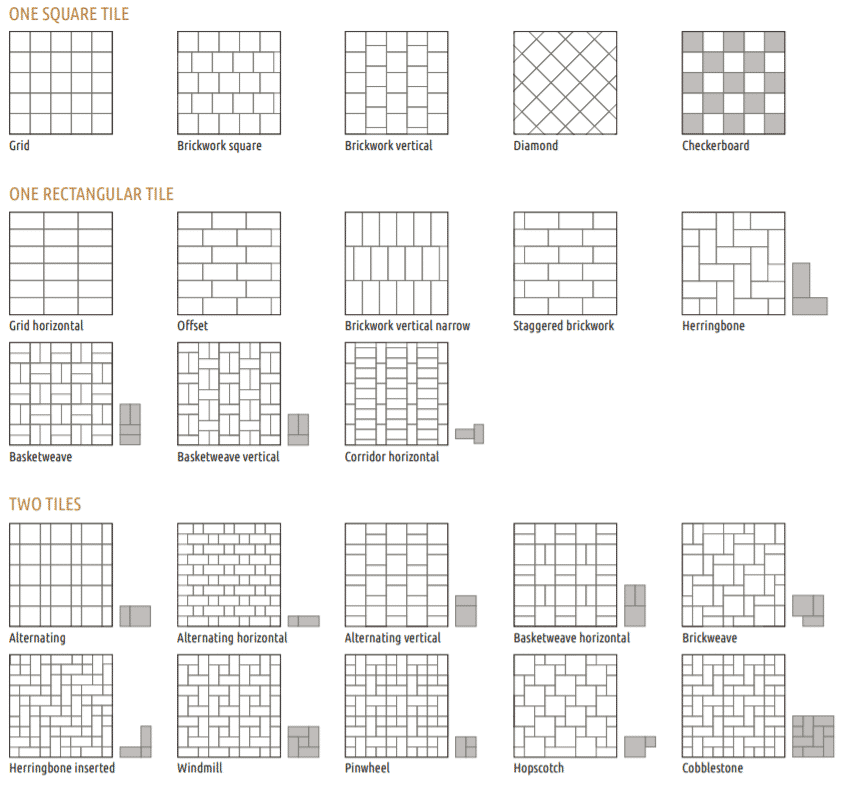
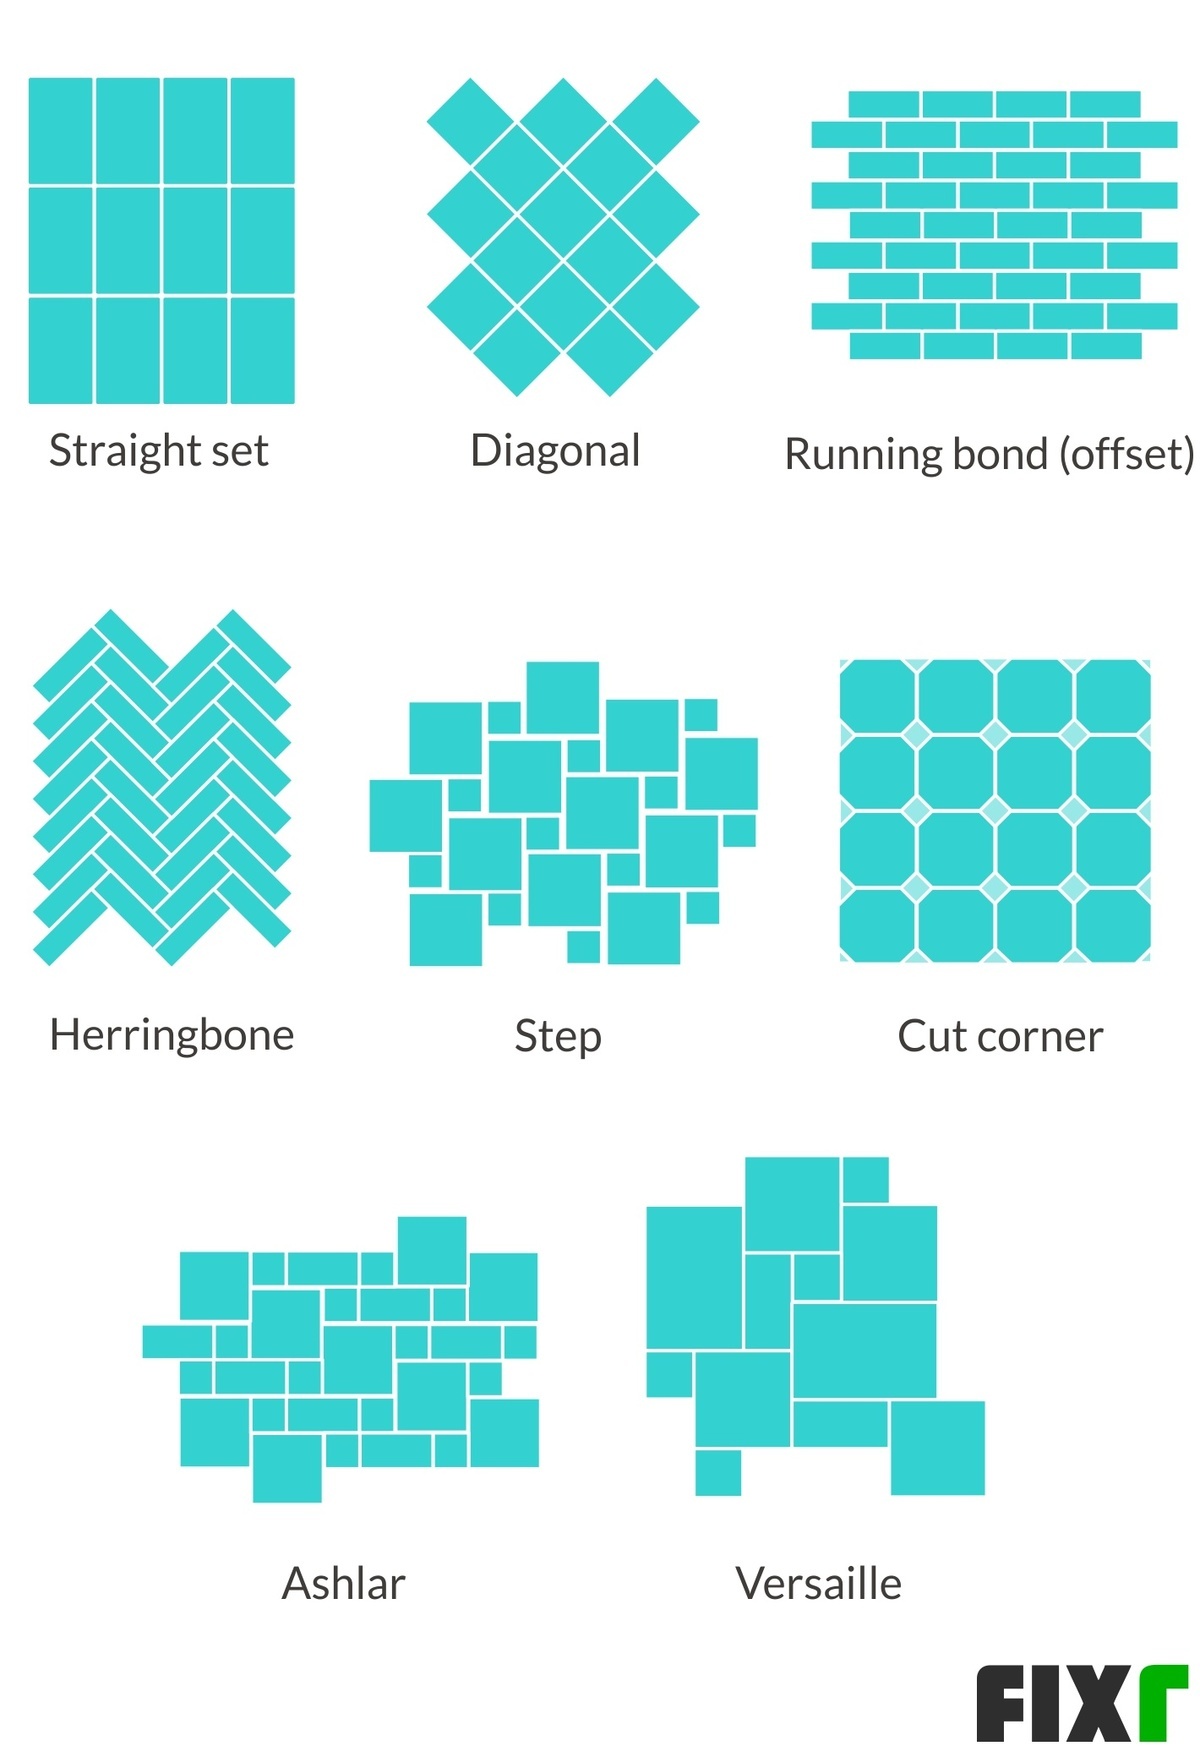
Top 7 Tile Patterns You Need To Know Popular Tile Layouts

Subfloors and Underlayment for Ceramic Tile Floors
/best-subfloors-to-use-for-laying-tile-1822586-hero-efcfac9422ab457da5d2cbc7f7361df7.jpg)
Beginneru0027s Guide to Laying Tile – A Beautiful Mess

Top 7 Tile Patterns You Need To Know Popular Tile Layouts

2022 Tile Flooring Installation Cost Tile Floor Prices
10 Most Common Mistakes When Installing Tile Floor
Top Nine Ways to Lay Down Wood and Tile Flooring

15 Tile Installation Patterns for Your Tile Design Project – Tile
Floor Tile Patterns – Tile Flooring Patterns And Layouts

10 New Ways to Lay Wall Tiles and Floor Tiles – Tile Mountain

Related Posts:
- Sunroom Tile Floor
- Clean And Seal Tile Floors
- Best Vinyl Tile Flooring
- Professional Steam Cleaner For Tile Floors
- How To Buff A Tile Floor Without A Buffer
- Adura Tile Flooring Reviews
- Pictures Of Mexican Tile Floors
- Grey Tile Floor Ideas
- How To Take Out Tile Floor
- Do You Have To Seal Grout On Tile Floors
Laying Tile Flooring: A Comprehensive Guide
Tile flooring is a classic, stylish and timeless option that can be used in almost any room in the home. Tile flooring is popular for its durability, water resistance, and wide variety of styles and colors. Laying tile flooring can be an intimidating task, but with the proper preparation and guidance, anyone with basic DIY skills can successfully lay a tile floor. This comprehensive guide will cover the steps for laying tile flooring for both ceramic and stone tiles, as well as some additional tips and tricks.
Tools Needed For Laying Tile Flooring
Before beginning any project, it is important to make sure you have all the necessary tools and materials on hand. The following list outlines the most common tools needed for laying tile flooring:
– Tape measure
– Notched trowel
– Level
– Chalk line or laser level
– Grout float
– Rubber mallet
– Sponges
– Safety glasses
– Knee pads (optional)
– Power saw (optional)
Preparing The Subfloor For Tile Flooring
The first step in laying tile flooring is to prepare the subfloor. The subfloor must be clean, dry, flat, and free of dirt, dust and debris before starting the project. If there are any cracks or uneven surfaces in the subfloor, these should be filled with a self-leveling compound. If there are any high or low spots in the subfloor, these should be leveled using a layer of thinset mortar before laying the tiles.
Dry Layout For Tile Flooring
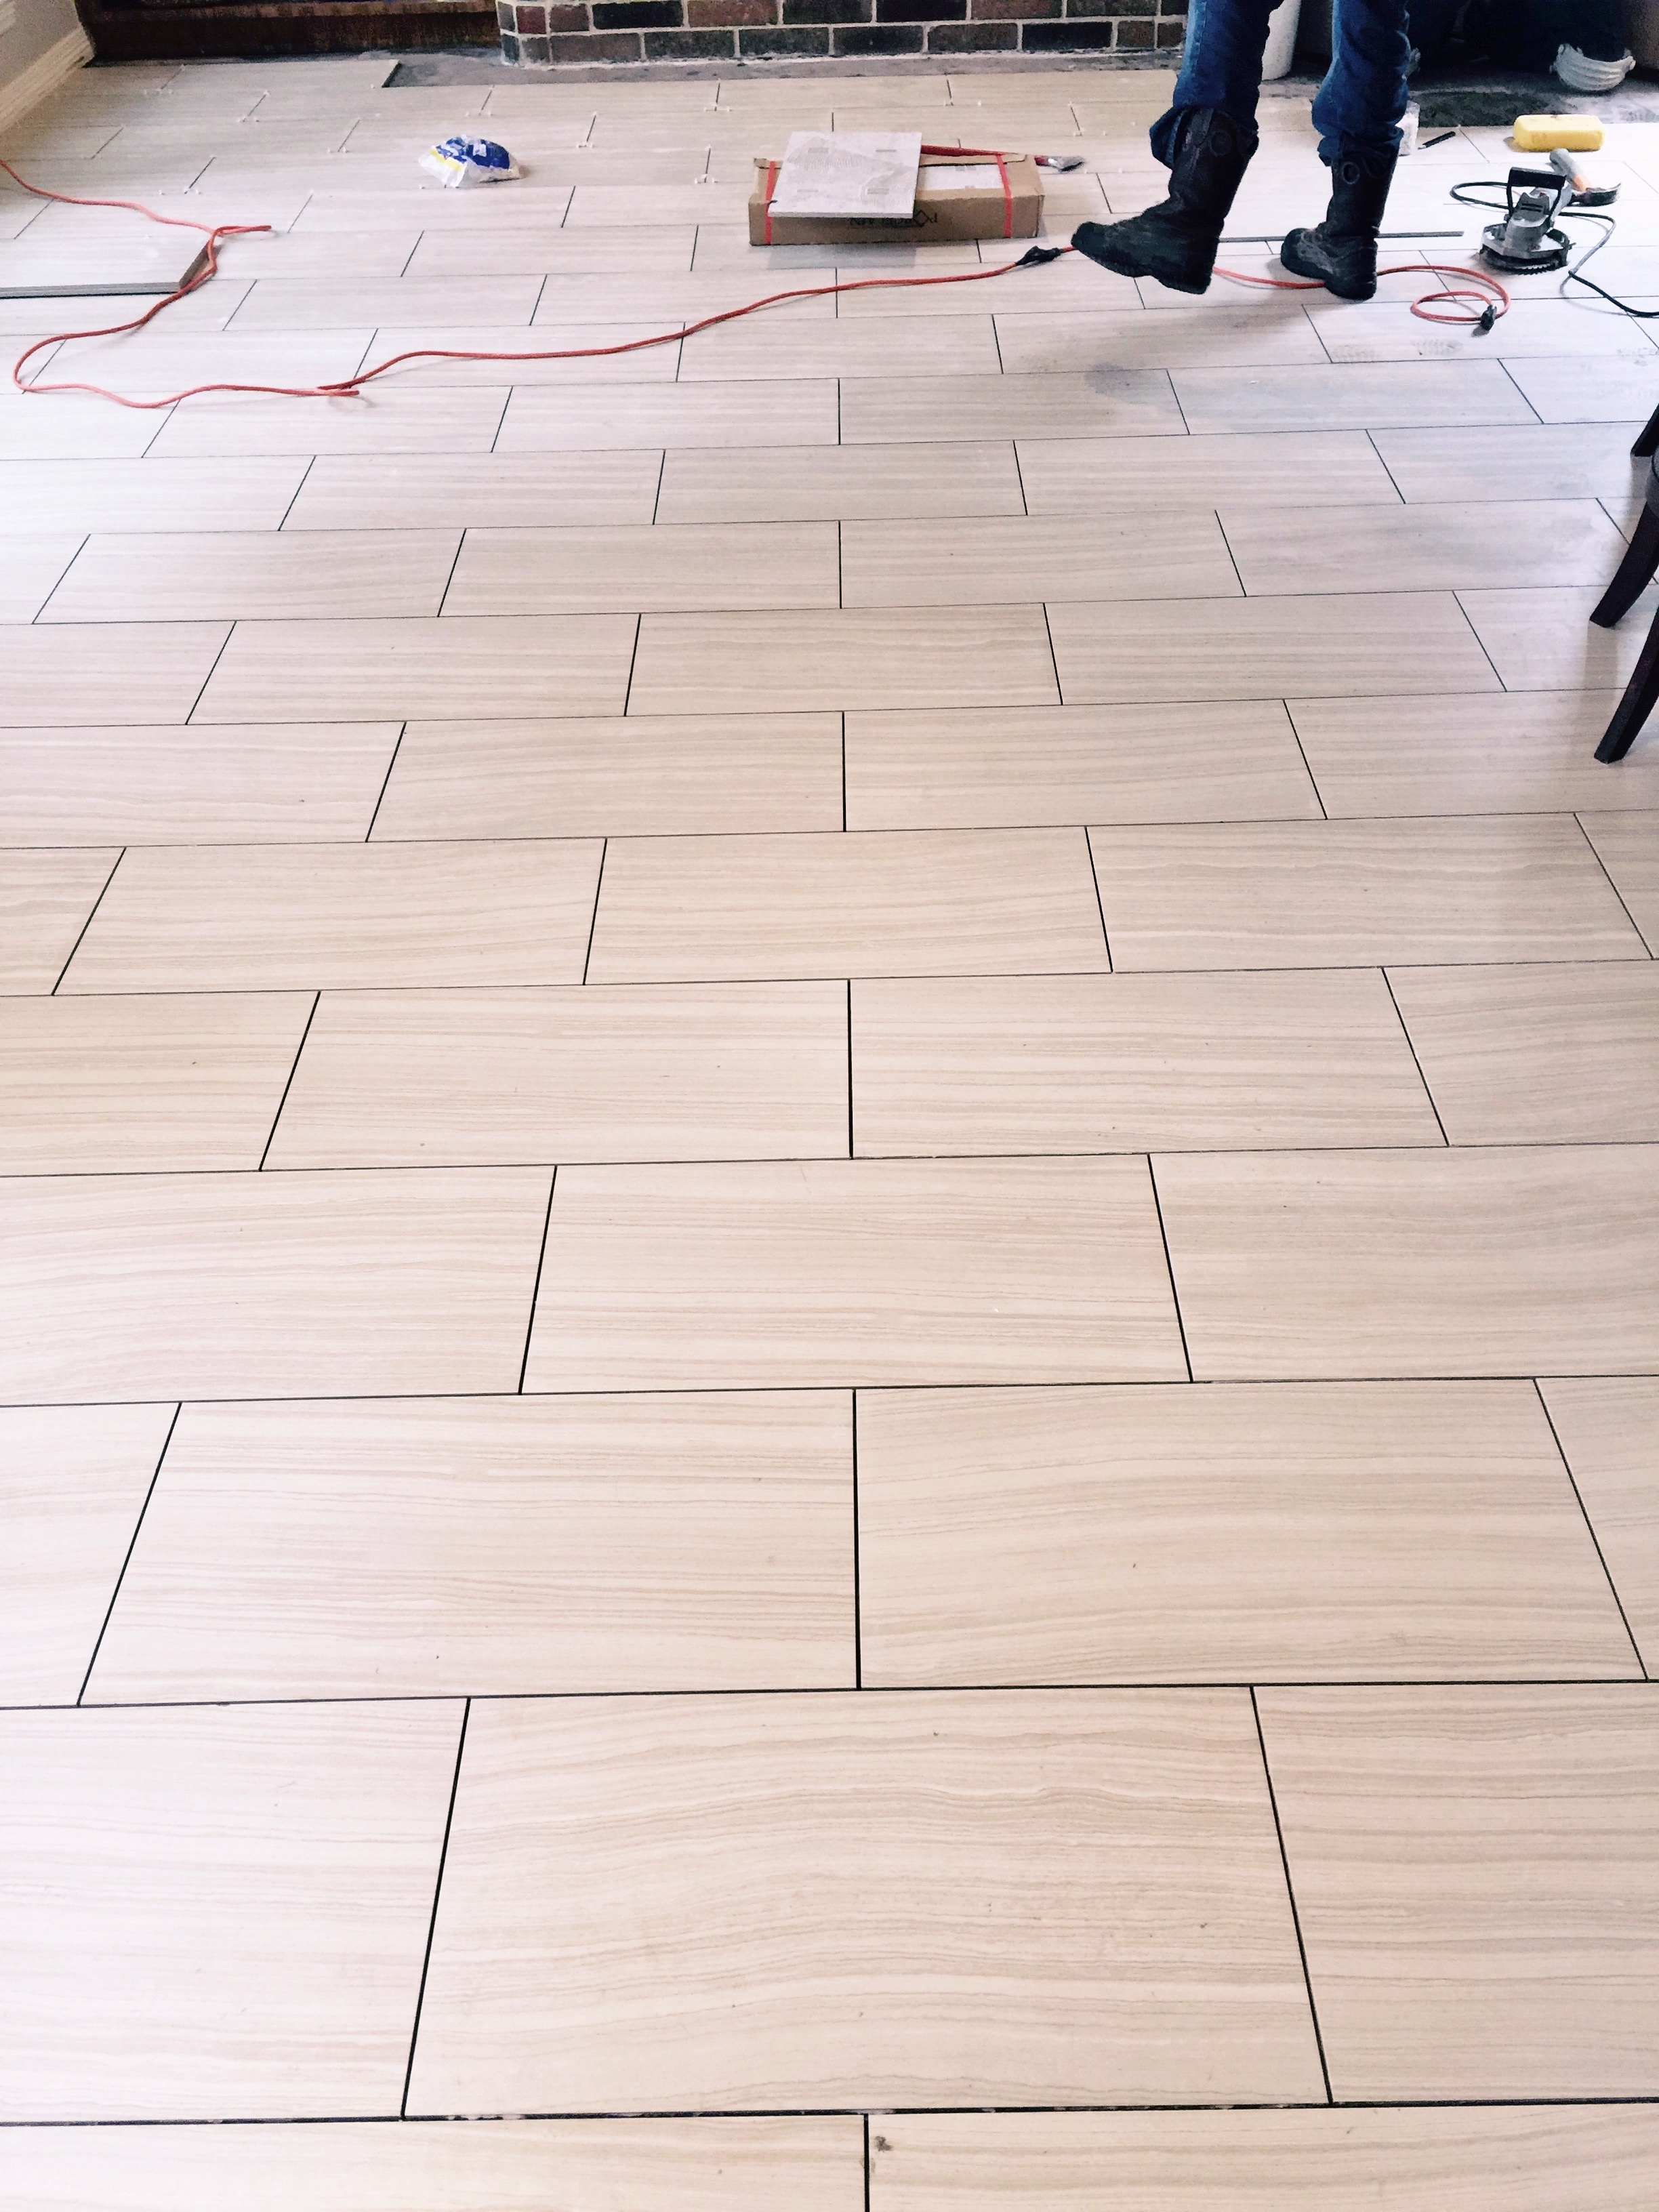
Once the subfloor has been prepared, it is time to begin laying out the tile pattern. It is important to take time to plan out the layout before beginning to lay the tiles; this will help ensure that you get an even coverage over the entire area. To do this, begin by marking a center line on both sides of the room using a chalk line or laser level. Then begin laying out tiles along this center line until you reach one side wall; repeat this process on the other side of the room so that you have two parallel rows of tiles running down each side of the room. Once these rows have been laid out, continue laying tiles in a staggered pattern until you reach the end of each wall. This process is known as “dry layout” because it does not involve using any adhesive yet; it simply allows you to preview how your tile pattern will look before committing to it.
Laying Ceramic Tiles For Tile Flooring
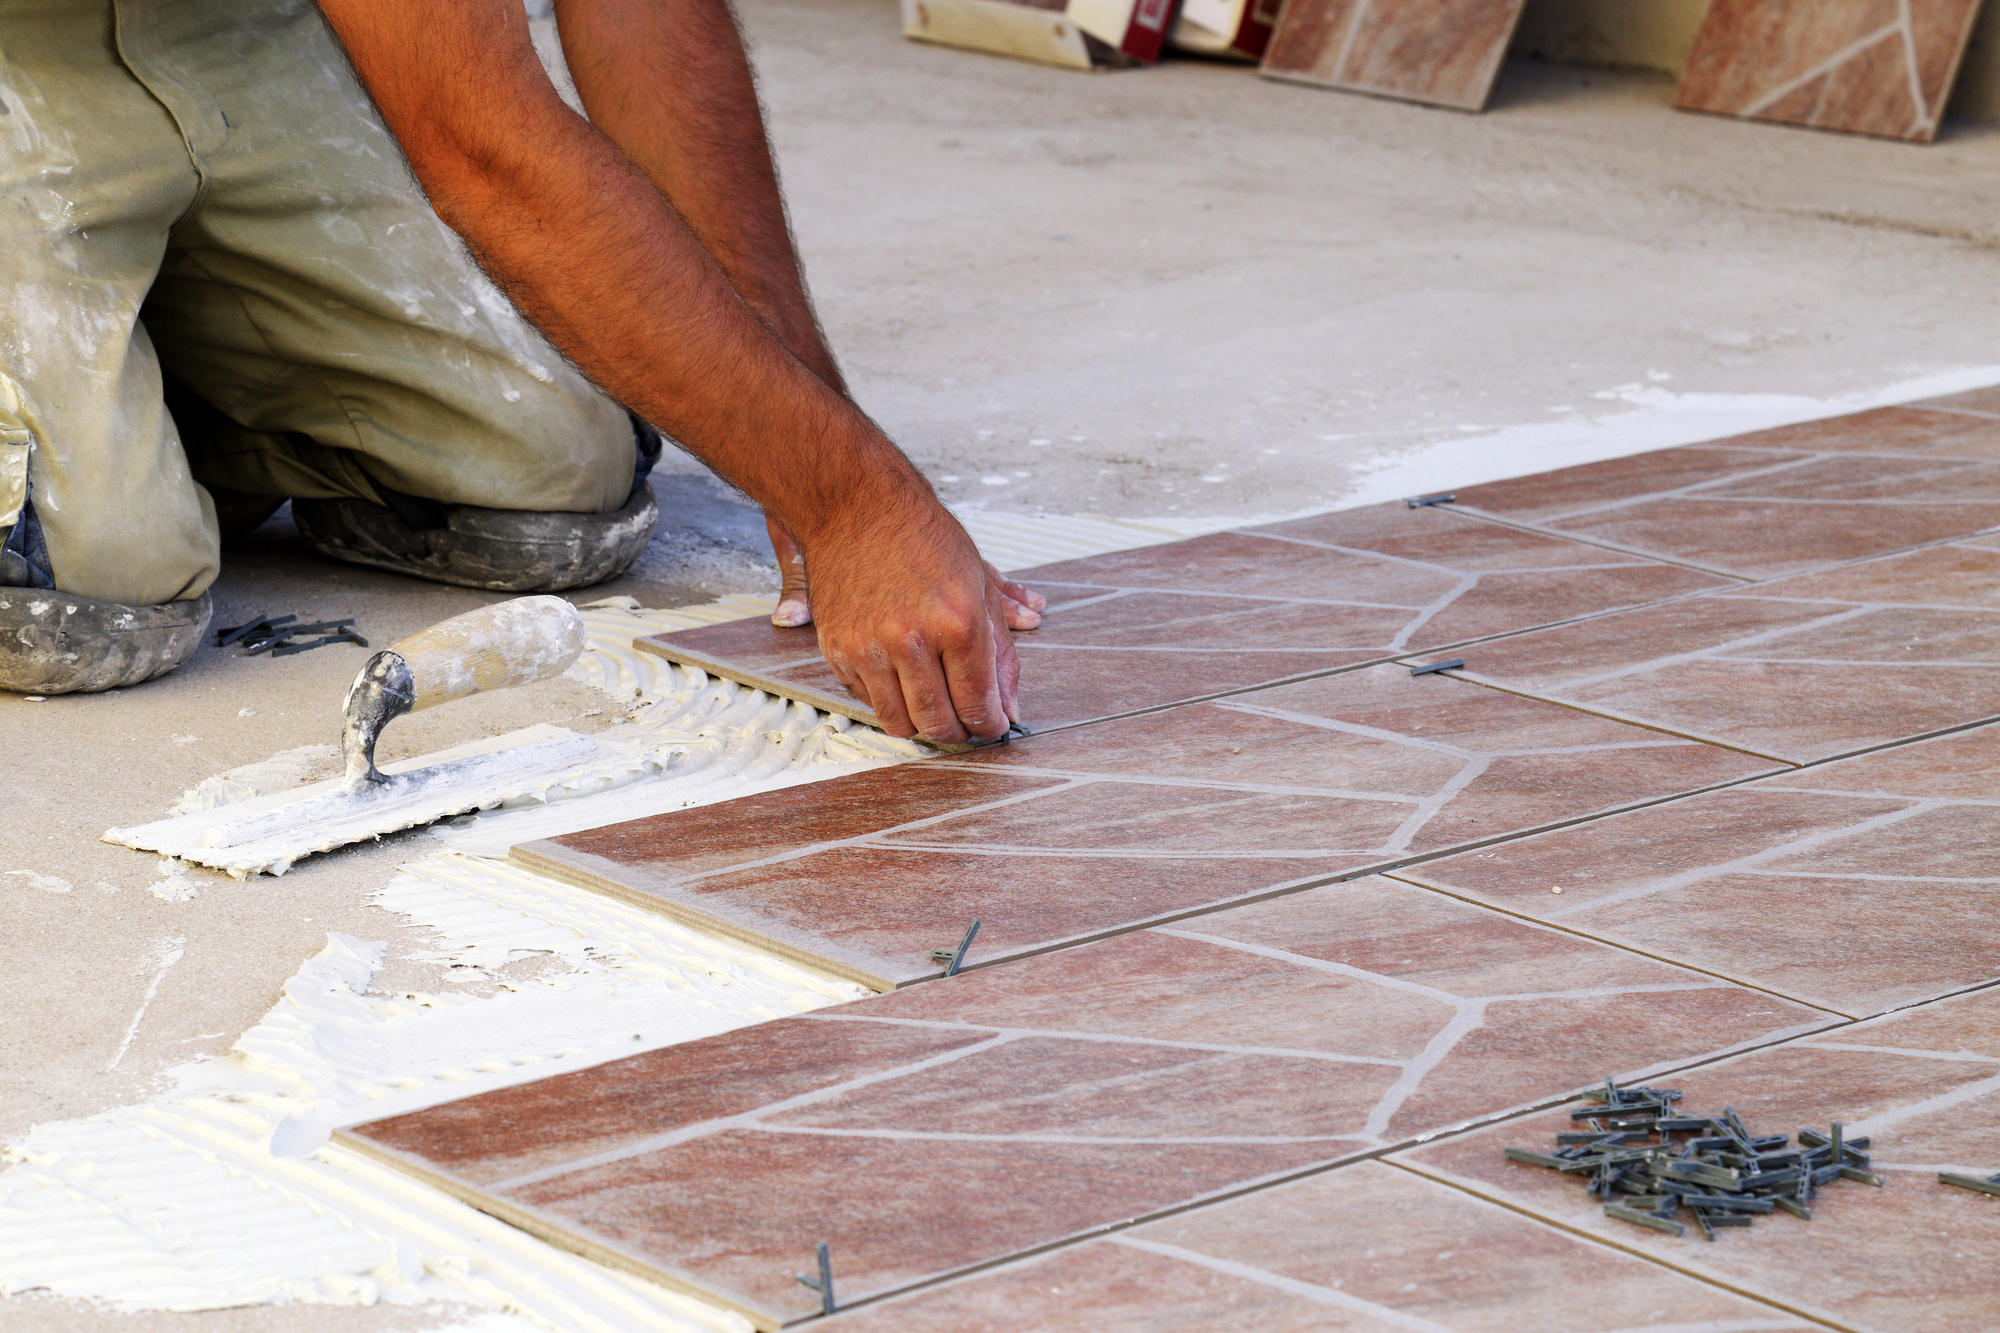
Once you have finalized your tile pattern with a dry layout, it’s time to start laying ceramic tiles. Begin by mixing up a batch of thinset mortar according to package instructions; this type of adhesive works best for ceramic tile flooring because it sets quickly and provides a strong bond between tiles and subfloor. Spread thinset mortar onto small sections of the subfloor using a notched trowel; then place ceramic tiles onto the mortar bed one at a time making sure they are evenly spaced and level with each other. Once all tiles have been laid out onto their respective sections of The subfloor, tap down each tile with a rubber mallet to ensure a tight bond.
Laying Stone Tiles For Tile Flooring
Laying stone tiles is similar to laying ceramic tiles, but there are some key differences to note. First, it is important to use an adhesive specifically designed for stone tile flooring; this type of adhesive is usually stronger and more flexible than thinset mortar and will provide a better bond between stone tiles and the subfloor. Second, it is important to lay stone tiles with minimal grout lines; this will help prevent cracking and shifting that can occur when larger grout lines are used. Finally, before laying stone tiles, they should be sealed with a sealant to prevent staining and discoloration over time.
Grouting For Tile Flooring
Once all of the tiles have been laid out onto the subfloor, it’s time to grout them in place. Start by mixing up a batch of grout according to package instructions; then spread it over the joints between the tiles using a grout float. Once all of the joints have been filled with grout, use a sponge to wipe away any excess grout from the surface of the tiles. Finally, allow the grout to dry completely before walking on it or adding any furniture back into the room.
Additional Tips & Tricks For Laying Tile Flooring
– Always wear safety glasses when cutting or drilling into tile
– Use spacers between tiles when laying out patterns to ensure even spacing
– Use a power saw (such as a wet saw) for cutting ceramic or stone tiles
– Apply sealant to stone tiles before laying them for added protection against staining and discoloration
– Allow grout to dry completely before walking on it or adding furniture back into the room.
What tools are needed to lay tile flooring?
The tools needed to lay tile flooring are:-Tape measure
-Tile saw
-Rubber mallet
-Tile spacers
-Tile nippers
-Notched trowel
-Grout float
-Sponge
-Grout sealer