The concrete floorings setting has caught on and could be found everywhere you look now, including residential properties like high rise condominiums and also basement areas that are restructured to acquire extra room. One more reason why so many individuals are choosing concrete polishing floors for their new home or maybe home renovation is the low maintenance needed.
Images about Building Concrete Floor Slab

The phrase which relates to a number of decorative concrete flooring options which typically end up leaving a concrete surface area preferably exposed while the last final and last floor finishing. For a comprehensive cleaning, wash the floor which has a concrete cleaner and then follow with a good rinsing. Small bumps and ridges are created on textured concrete floor surfaces for a much better traction while walking.
Concrete Slab Types – Construction, Cost, and Applications – The

Actually concrete floors aren't new stuff, any way these were always around. Among the factors concrete polishing floors are rising in demand is because they eliminate further costs that may be the case with a brand new build. Below are several of the pros to building your new home with flooring of polished concrete or even exposing the concrete floor of your current house.
Concrete slab floor and how to make one by hand mixing the concrete
Everything You Need to Know About Concrete Slabs in Building

Concrete Floor Slab Construction Process. Bottom-up method.

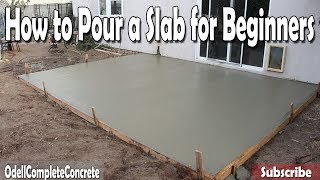
How to Pour a Concrete Slab for Beginners DIY
Concrete Floor Slab Construction Process – The Constructor

What Is Floating Slab Floating Slab Construction How to Build a

Building Guidelines Concrete Floors, Slabs
Building a First-Floor Slab and Walls with Concrete – YouTube

Concrete Floor Slab Construction Process – The Constructor

Concrete Floor Slab Panel In Building Construction Site Stock

Concrete Ground Floor Slab Construction Steel Rebar, Power Floating, Floor Hardener by Power Trowel

How Much Does a Concrete Slab Cost? A Budgeting Guide – Bob Vila

Related Posts:
- Painted Concrete Floors Pros And Cons
- Laying A Concrete Floor With Membrane
- Concrete Floor Slab Reinforcement
- Modern Concrete Floors Interior
- Industrial Concrete Floor Finishes
- Pour Concrete Floor Basement
- Exterior Concrete Floor Tiles
- Perfect Concrete Floors
- Commercial Concrete Floor Cleaning Machines
- Polished Concrete Floors For Patios
Building a Concrete Floor Slab: A Comprehensive Guide
Introduction:
A concrete floor slab is a solid foundation that provides durability, stability, and strength to any structure. Whether you are constructing a residential or commercial building, understanding the process of building a concrete floor slab is crucial. In this article, we will delve into the step-by-step procedure, including sub-base preparation, formwork installation, reinforcement placement, concrete pouring, and finishing touches. Additionally, we will address frequently asked questions regarding materials, curing time, and maintenance.
I. Sub-Base Preparation:
Before starting the construction of a concrete floor slab, it is essential to prepare the sub-base properly. This involves excavating the area to the desired depth and ensuring it is well-compacted. Here are the detailed steps involved:
1. Excavation:
Begin by marking the area where the concrete floor slab will be constructed. Use stakes and string lines to create precise boundaries. Excavate the marked area using machinery like an excavator or backhoe. Remove all vegetation, rocks, and debris to achieve a clean surface.
2. Compaction:
After excavation, compact the sub-base using a plate compactor or roller compactor. This process eliminates air pockets and ensures a stable foundation for the concrete floor slab.
3. Grading:
Proper grading of the sub-base is crucial for drainage purposes. Ensure that the surface slopes away from any structures to prevent water accumulation.
FAQs:
Q1: What type of equipment is required for sub-base preparation?
A1: Equipment such as an excavator or backhoe for excavation and a plate compactor or roller compactor for compaction are commonly used in sub-base preparation.
Q2: Can I skip sub-base preparation if my project has a tight timeline?
A2: Skipping proper sub-base preparation can lead to uneven settling and cracks in your concrete floor slab. It is highly recommended not to compromise on this step.
II. Formwork Installation:
Formwork is the temporary structure that shapes the concrete floor slab during pouring and curing. It provides support and defines the shape and dimensions of the slab. Here is a detailed guide on formwork installation:
1. Material Selection:
Choose the appropriate material for your formwork, such as timber, steel, or aluminum. Consider factors like cost, reusability, ease of handling, and desired finish.
2. Layout:
Based on the dimensions of your floor slab, mark the locations for formwork installation using string lines and stakes. Ensure that the formwork is aligned properly before installation.
3. Installation:
Start by placing the horizontal form boards along the perimeter of the floor slab. Ensure they are level and secured with stakes. Then, install vertical form boards at regular intervals within the perimeter. Use clamps or nails to attach them securely to the horizontal boards.
4. Bracing:
To prevent formwork movement during concrete pouring, install diagonal bracing between vertical form boards. This enhances stability and ensures a consistent slab thickness.
FAQs:
Q1: Can I reuse formwork for future projects?
A1: Depending on the material used, formwork can be reused multiple times if it is well-maintained and not damaged during removal.
Q2: How do I know if my formwork is aligned properly?
A2: Use a spirit level to check that the form boards are level horizontally and vertically before pouring concrete. Adjust them as necessary to ensure accuracy.
III. Reinforcement Placement:
Reinforcement plays A crucial role in ensuring the strength and stability of the concrete floor slab. Here are the steps for reinforcement placement:
1. Design and Layout:
Consult with a structural engineer or designer to determine the required reinforcement for your project. They will provide specifications regarding the size, spacing, and placement of reinforcement bars.
2. Preparation:
Clean the formwork surface to remove any dirt or debris that could interfere with the proper placement of reinforcement. Make sure the formwork is secure and in place before proceeding.
3. Cutting and Bending:
Cut reinforcement bars to the required lengths using a cutting tool. Bend them according to the design specifications using a bending machine or manual bending tools.
4. Placement:
Lay the reinforcement bars on top of the sub-base, following the design layout. Use bar supports or chairs to elevate them to the desired height within the slab.
5. Tying:
Securely tie the intersecting bars together using wire ties or rebar tie gun. Make sure they are properly aligned and spaced according to the design requirements.
6. Additional Reinforcement Features:
If needed, install additional reinforcement features such as dowel bars for connecting adjacent slabs or mesh reinforcement for added strength.
FAQs:
Q1: Can I use any type of steel reinforcement for my concrete floor slab?
A1: It is important to use steel reinforcement that is specifically designed for concrete applications, such as rebar (reinforcing bar) or welded wire mesh.
Q2: How do I ensure proper spacing and alignment of reinforcement bars?
A2: Use spacers or chairs to maintain the desired spacing and height of reinforcement bars. Regularly check and adjust their position before pouring concrete.
IV. Concrete Pouring:
The concrete pouring process involves placing and consolidating the concrete mixture into the formwork. Here are the steps for a successful concrete pour:
1. Concrete Mixture Preparation:
Follow the manufacturer’s instructions to prepare the concrete mixture. The mix should have the appropriate proportions of cement, aggregates, water, and additives.
2. Pouring Strategy:
Determine the pouring strategy based on factors like slab size, access points, weather conditions, and equipment availability. Plan for continuous pouring to avoid cold joints or weak spots in the slab.
3. Pouring Process:
Start pouring the concrete from one end of the formwork, gradually moving towards the other end. Use a chute or pump to distribute the concrete evenly within the formwork.
4. Consolidation:
Consolidate the poured concrete using a vibrating poker or internal vibrator. This helps remove air pockets and ensures proper compaction of the mixture.
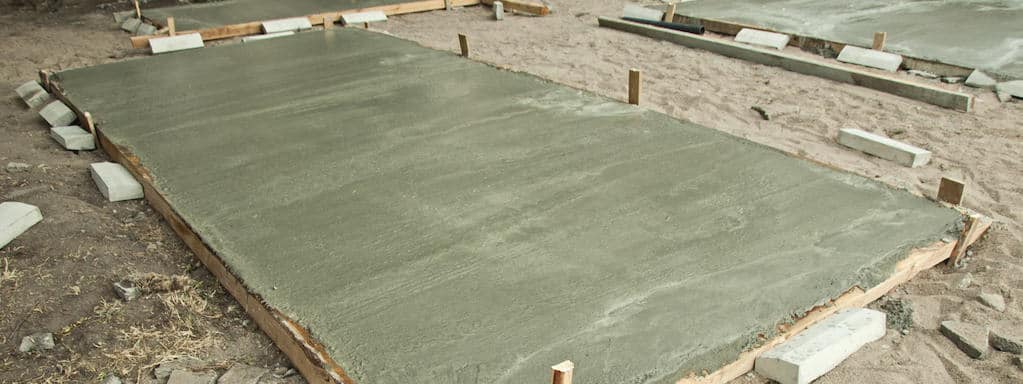
5. Finishing:
Once the concrete is consolidated, use a screed board to level and smooth the surface. Apply any desired finishes, such as broom finishing or troweling, as per project requirements.
FAQs:
Q1: What is the ideal moisture content for concrete during pouring?
A1: The ideal moisture content for concrete during pouring is typically around 5-7%. However, this may vary depending on the specific mix design and project requirements.
Q2: How long does it take for concrete to cure after pouring?
A2: Concrete typically takes about 28 days to fully cure. However, it starts to gain strength within hours of pouring and can be walked on after a few days, depending on the ambient conditions and mix design.