cost which is Low, minimal maintenance and durability make this the perfect flooring choice for industrial, business and other high traffic situations. With this specific technology of concrete floors, the floor is kept hot even in probably the coldest climate and also you are able to walk on the floor even without any footwear.
Images about How To Put A Concrete Floor
Whenever we think of concrete flooring, we very often think of the boring basement floors a dull gray ish color devoid of pattern or design. This may end up saving you hours in labour as well as cleaning costs. So, when you're in the industry for flooring, remember concrete flooring is not only superior to down in health advantages and temperature regulation, but also eco-friendly and highest in customer happiness.
How to Install Concrete Floors: Whatu0027s the Installation Process
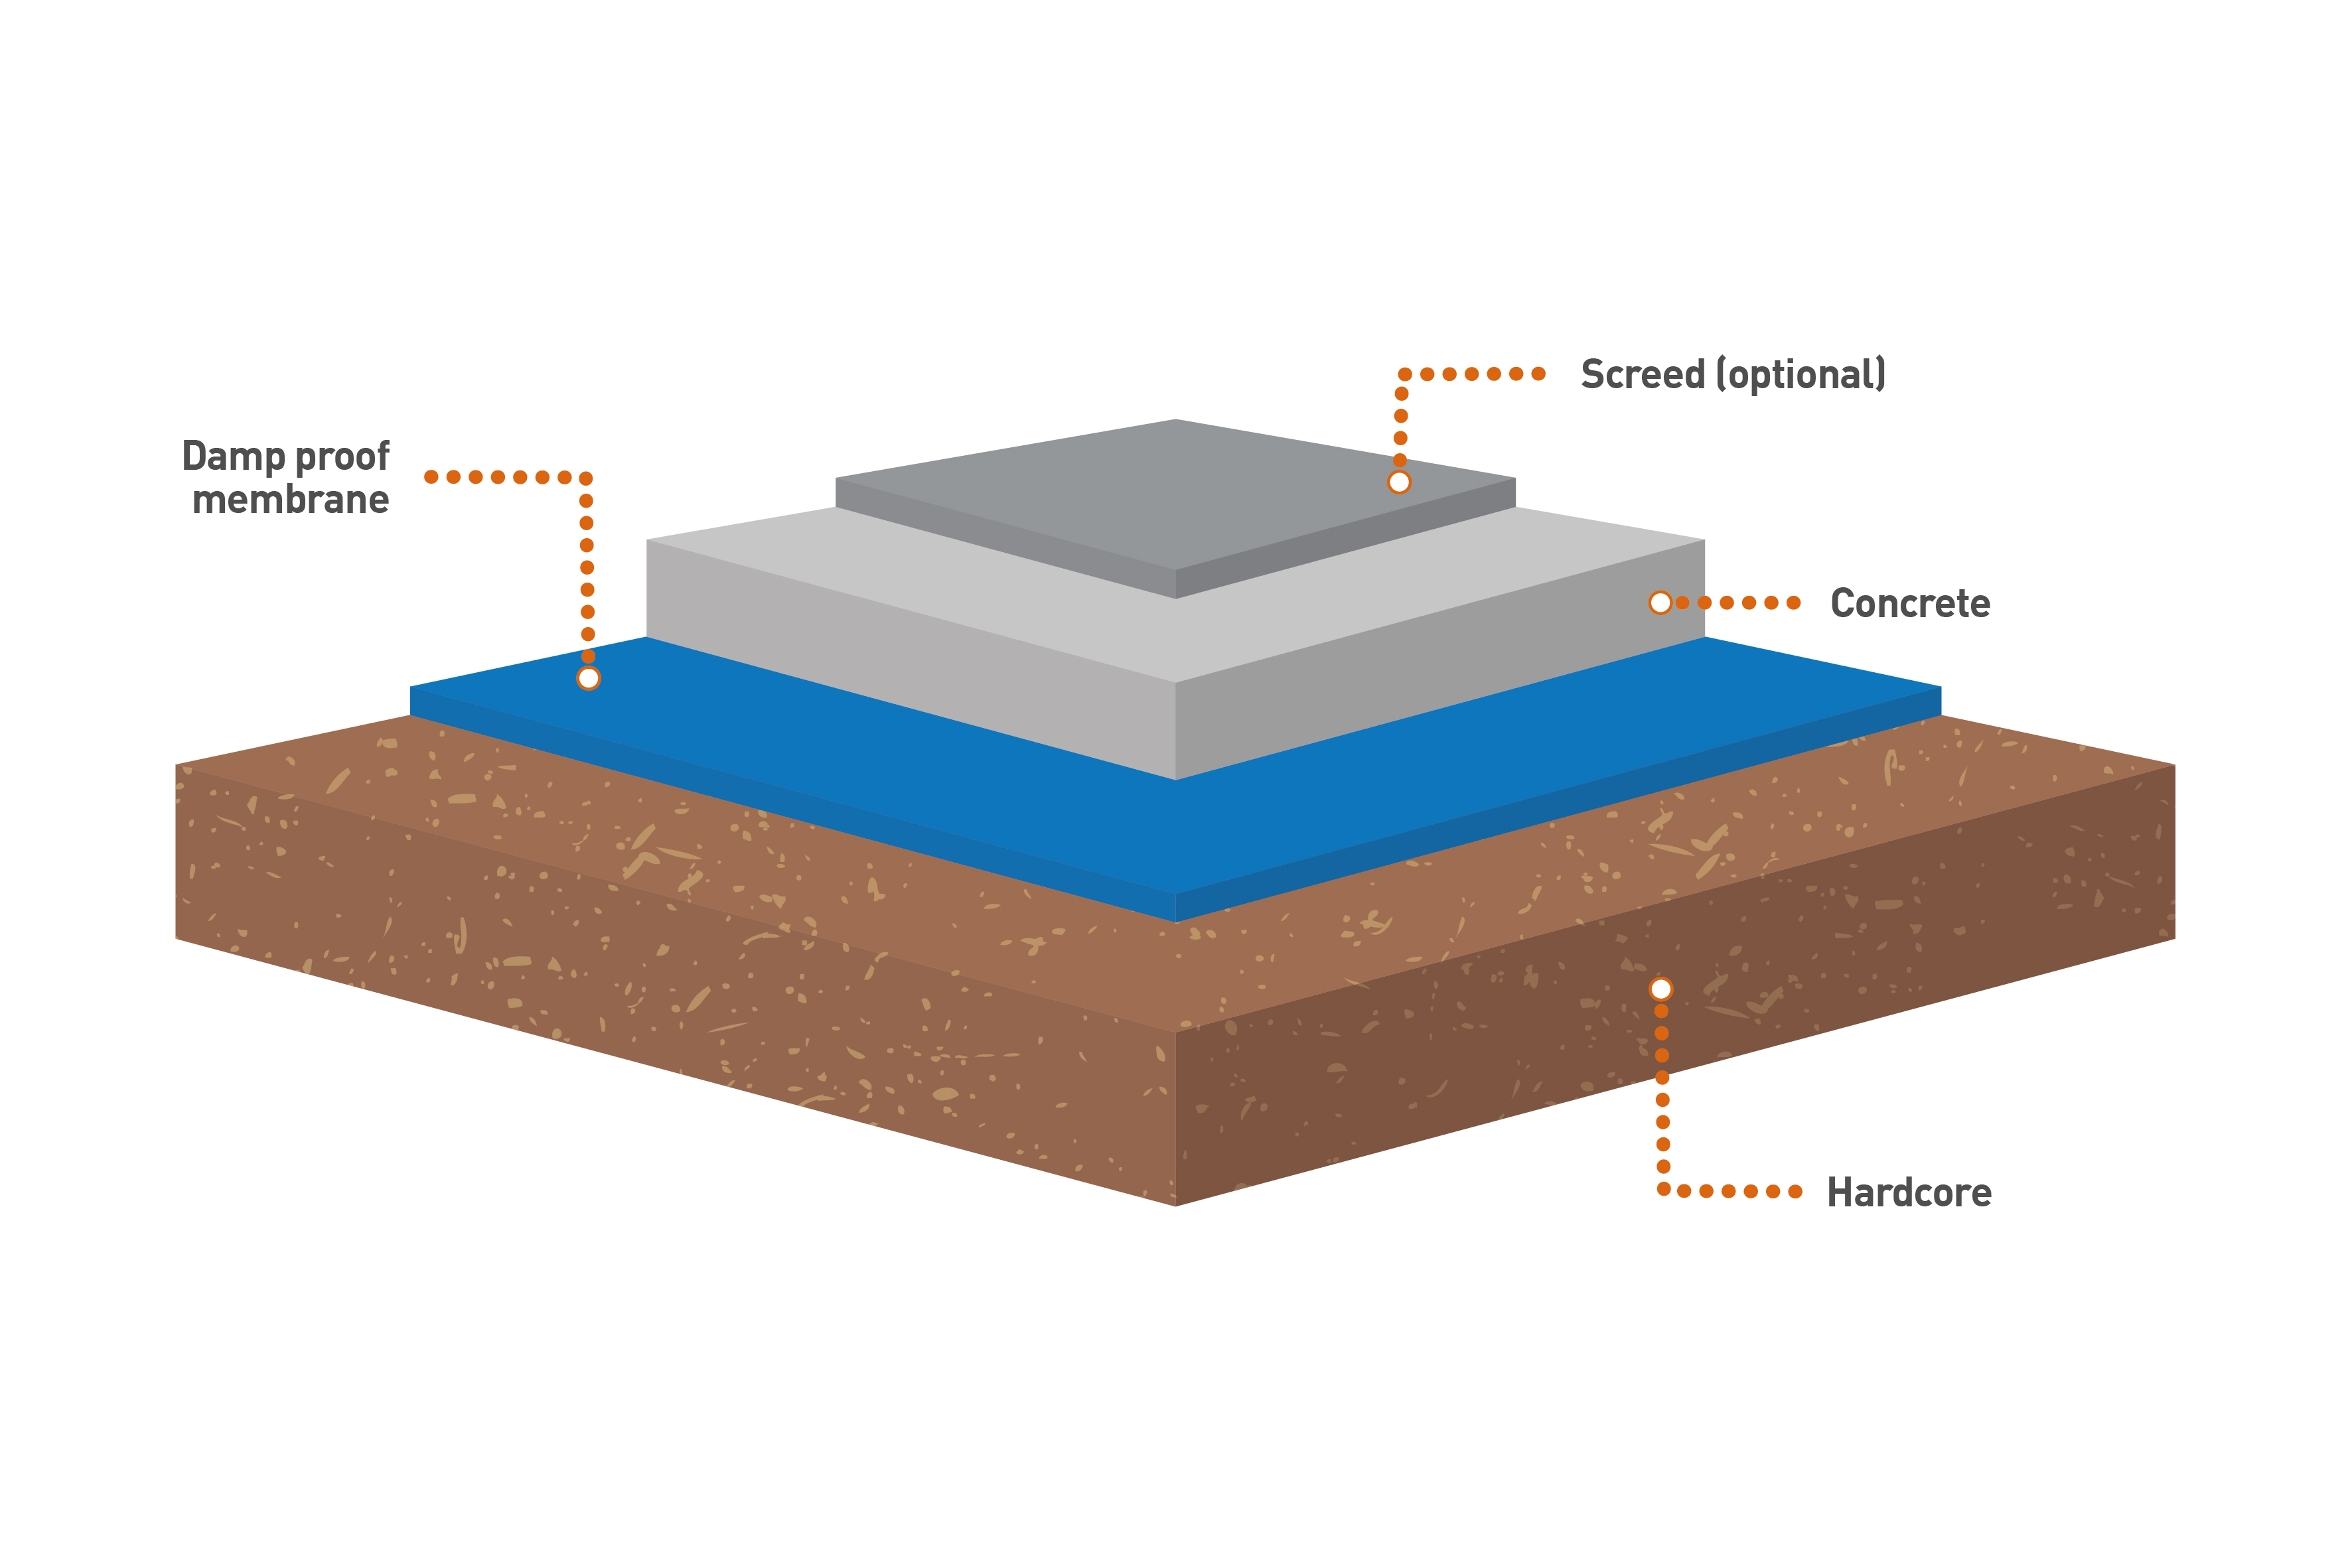
Concrete floors usually get cold especially on colder temperature so before the cement combination is actually poured on the flooring, radiant floor pipes or flexible tubing are for starters laid on the surface. When you are searching for a flooring option for your house project that combines elegance and simplicity, then you definitely will need to explore polished concrete floors.
How to Place and Finish a Concrete Floor (with Pictures) – wikiHow

How to Pour a Concrete Slab (DIY) Family Handyman

How to Pour a Concrete Slab (DIY) Family Handyman

How to level a concrete floor part 1: preparation
How to Pour a Concrete Slab
/PouringConcreteSlab-715d832fef224f53a859947db1914b16.jpg)
DIY Laying a Concrete Slab
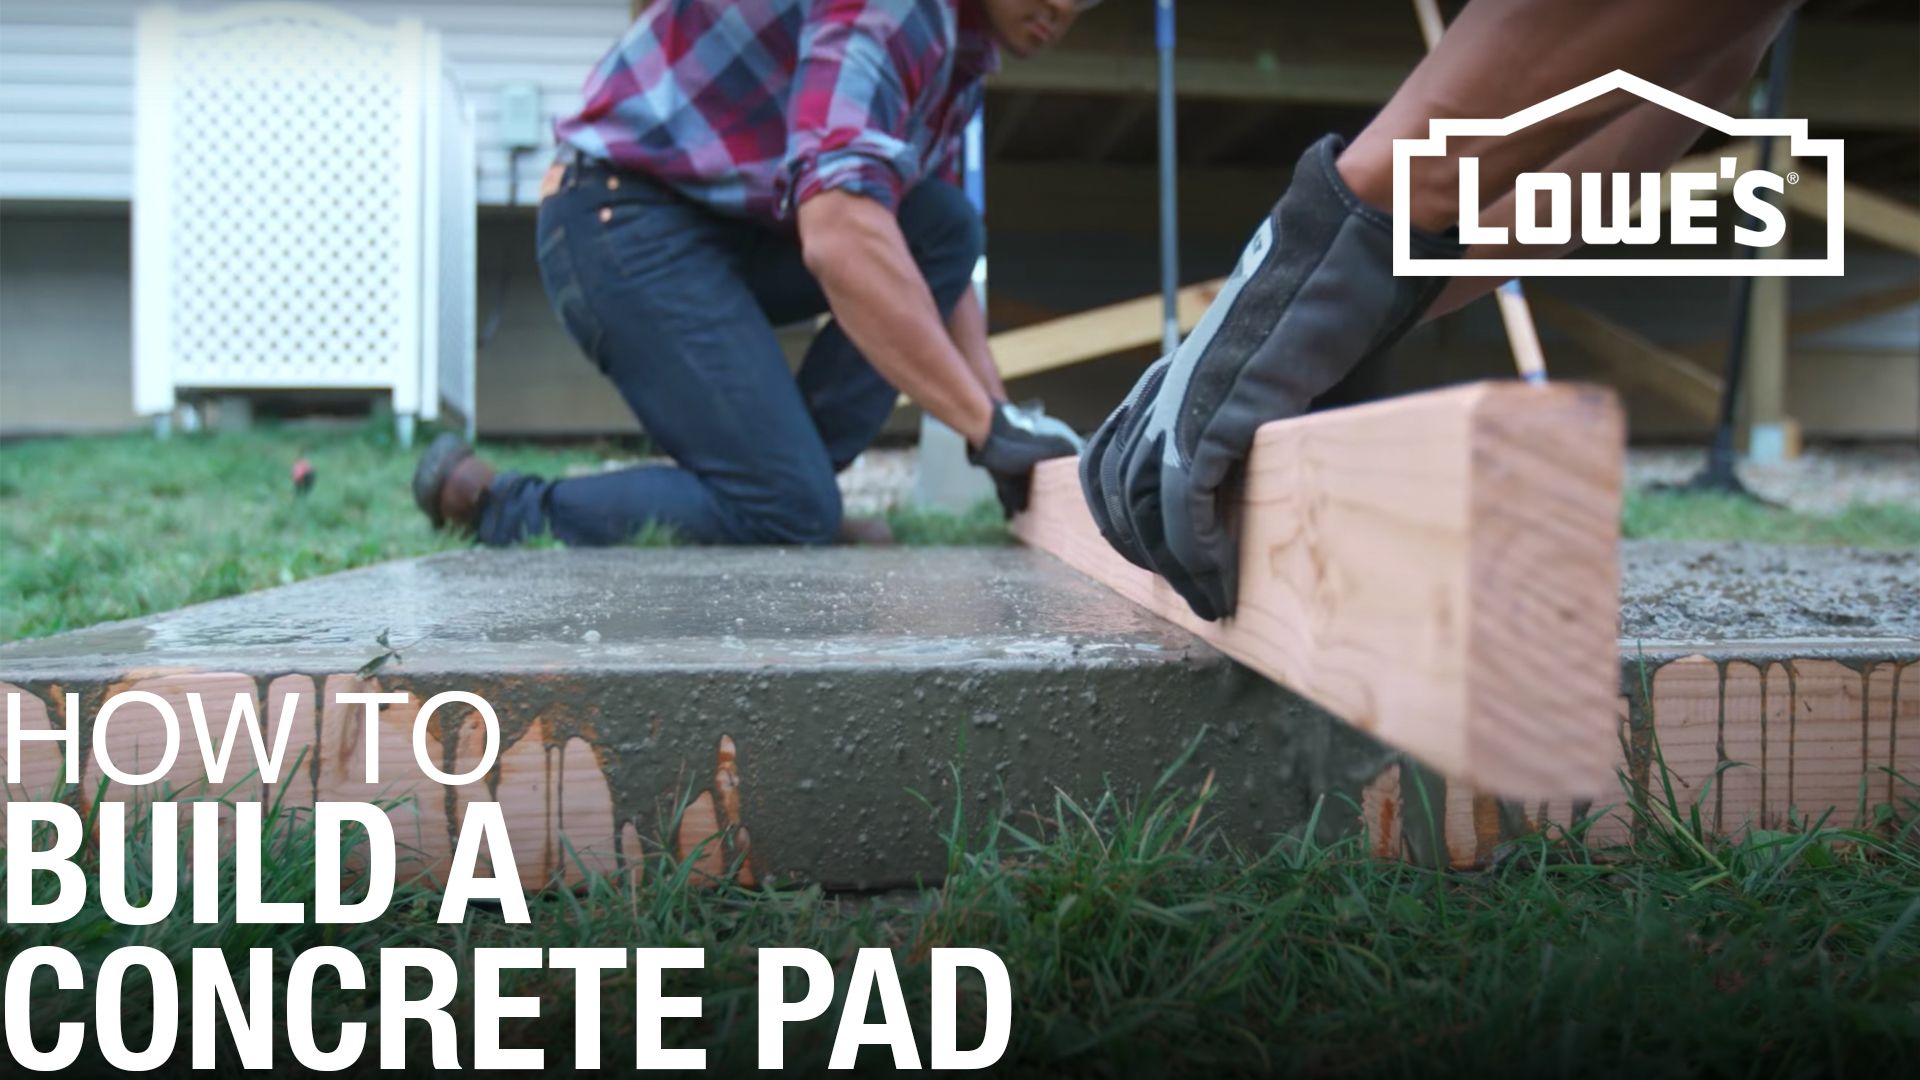
How to Build a Concrete Slab Loweu0027s
How to Pour a Concrete Floor Homebuilding

Concrete slab floor and how to make one by hand mixing the concrete
How to Pour a Concrete Slab (DIY) Family Handyman

How to Pour a Concrete Slab (DIY) Family Handyman
Garage Build Part 13 – Preparing the floor to pour concrete – YouTube
Related Posts:
- Concrete Floor Forms
- Laminate Flooring For Concrete Floors
- Concrete Floor Sanding Pads
- Shield Crete Epoxy Concrete Floor Coating
- Suspended Concrete Floor Slab Specifications
- Concrete Floor Gloss Finish
- Decorative Concrete Floor Painting Ideas
- Latex Screed On Concrete Floor
- Lights In Concrete Floor
- Concrete Floor Beams Sizes
How to Put a Concrete Floor
A concrete floor is a durable and versatile option that can add both functionality and aesthetic appeal to any space. Whether you want to install a concrete floor in your basement, garage, or even your living room, this step-by-step guide will walk you through the process of putting a concrete floor.
Preparation:
Before you begin the process of putting a concrete floor, there are several important steps you need to take to ensure a successful installation.
1. Clear the area: Start by removing any furniture, objects, or debris from the area where you plan to install the concrete floor. This will give you a clean and clear space to work with.
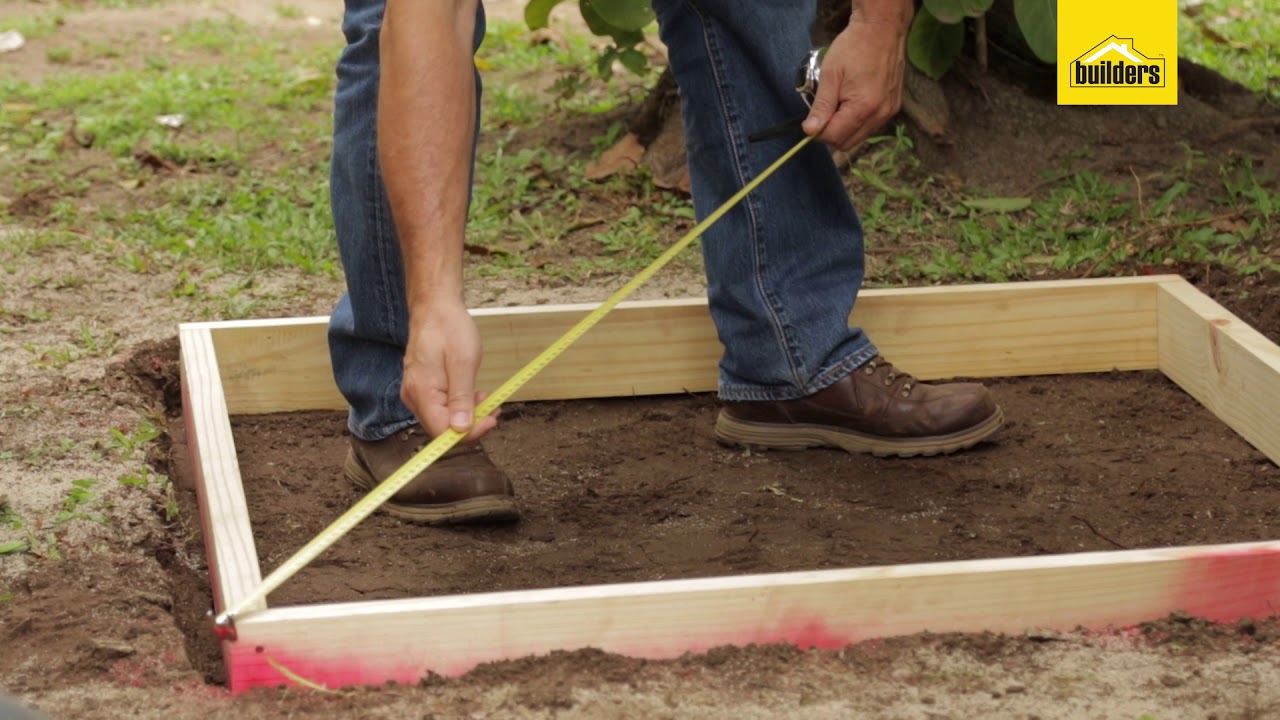
2. Measure and mark: Measure the dimensions of the area and mark it using chalk or tape. This will serve as your guide throughout the installation process.
3. Check for moisture: It’s crucial to assess the moisture levels in the area where you plan to put the concrete floor. Excessive moisture can lead to issues such as cracking or mold growth. Conduct a moisture test by placing plastic sheeting on the floor and leaving it for 24 hours. If there is condensation under the plastic, you may need to address any moisture issues before proceeding.
4. Prepare the subfloor: If you are installing a concrete floor over an existing subfloor, make sure it is clean and free of any loose materials. Sweep or vacuum thoroughly, and if necessary, use a degreaser or detergent to remove any stubborn stains.
Pouring the Concrete:
Once you have completed the necessary preparations, it’s time to start pouring the concrete for your new floor. Follow these steps carefully for optimal results.
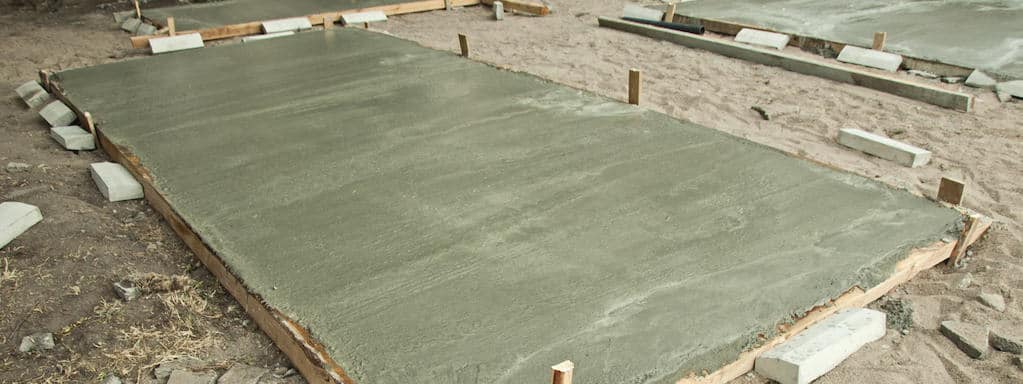
1. Create formwork: Formwork acts as a barrier that contains the liquid concrete until it sets and hardens. Use wooden boards or metal forms to create the shape of your floor according to your marked dimensions. Secure them firmly in place using nails or screws.
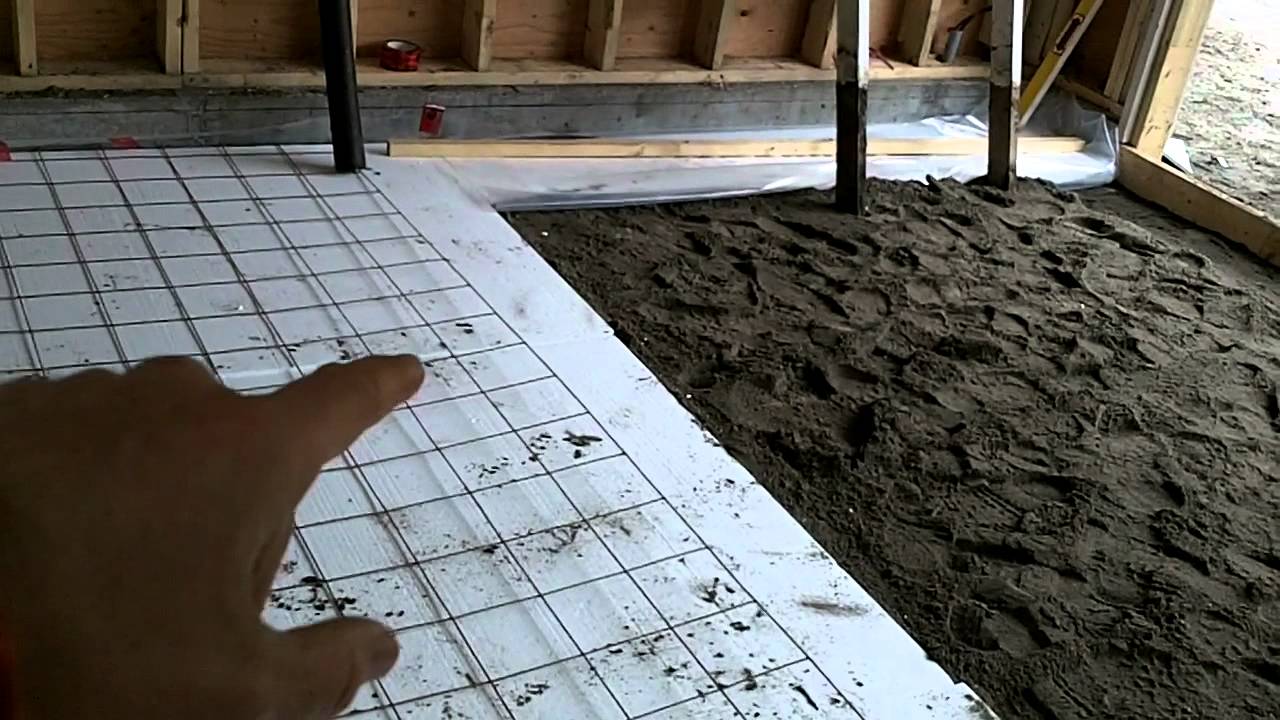
2. Reinforce with rebar: To enhance the strength and durability of your concrete floor, consider reinforcing it with rebar. Lay a grid of steel bars across the formwork, making sure they are evenly spaced and securely tied together.
3. Mix the concrete: Prepare the concrete mixture by following the instructions on the bag of cement. Use a wheelbarrow or mixing tub to combine the cement, sand, and aggregate thoroughly. Gradually add water while continuously mixing until you achieve a workable consistency.
4. Pour the concrete: Start pouring the concrete into the formwork, starting at one end and working your way towards the other end. Use a shovel or rake to spread the concrete evenly within the formwork. Aim for a thickness of around 4 inches for residential applications.
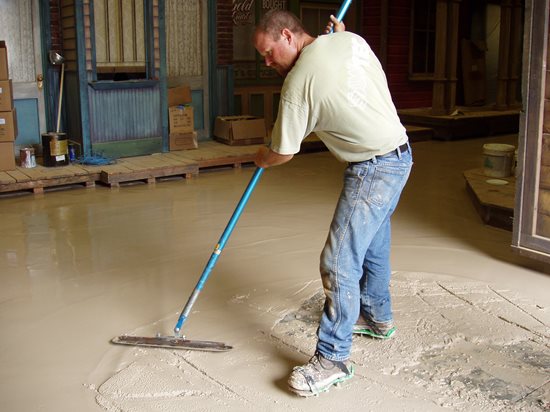
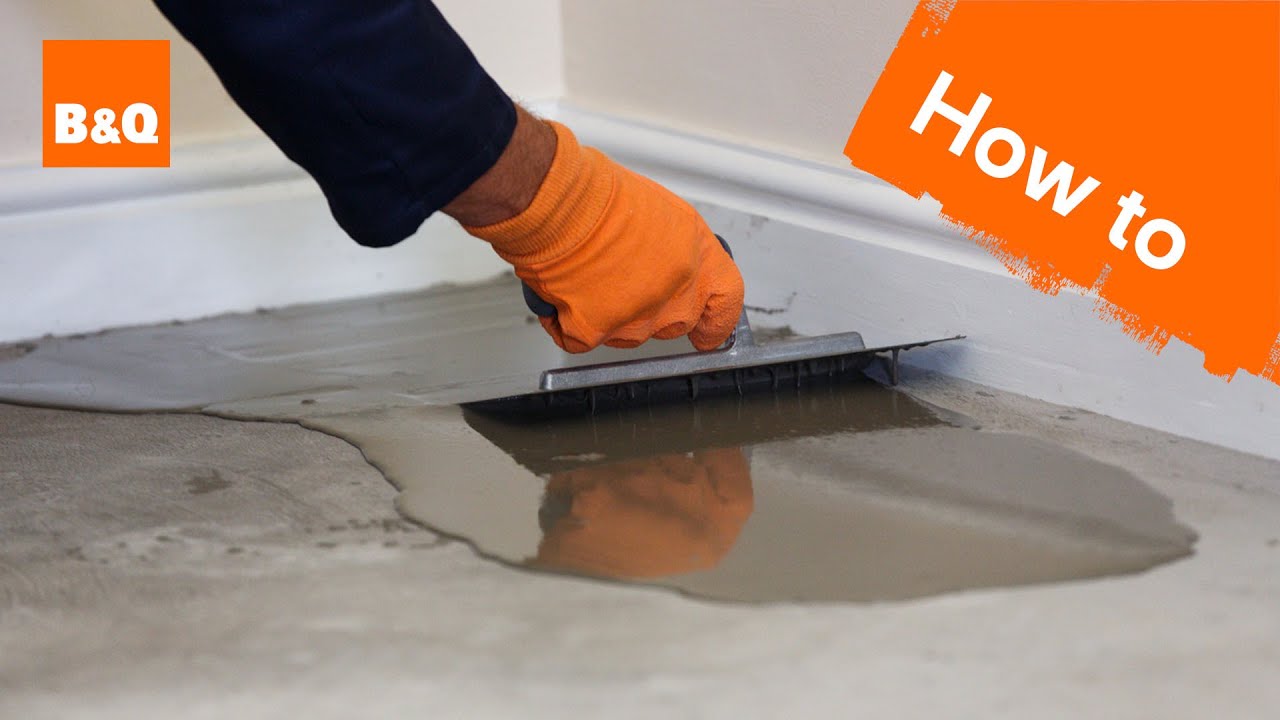
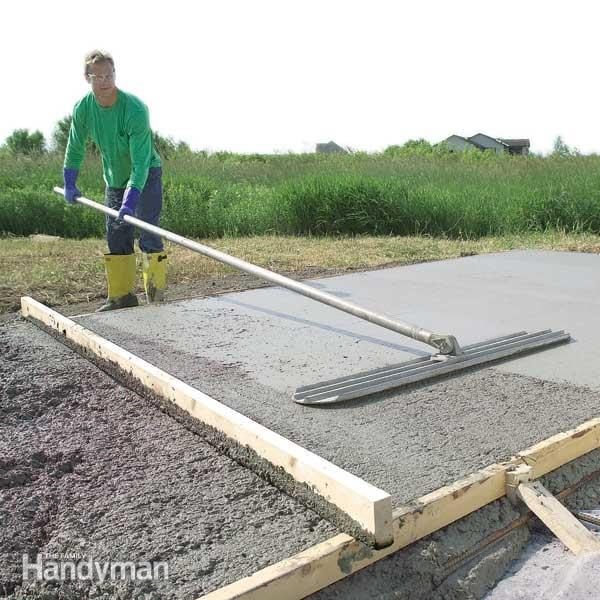
5. Level and smooth: Once all the concrete has been poured, use a screed board to level and smooth the surface. Place the screed board at one end of the formwork and slowly drag it across to remove any excess concrete and create an even surface. Repeat this process until you have covered the entire area.
6. Finish with a trowel: After screeding, use a trowel to further smooth and finish the surface of your concrete floor. Start at one corner and work your way across in overlapping arcs, applying pressure as you go to achieve a polished appearance.
Curing and Sealing:
Curing is an essential step that allows the concrete to harden properly and reach its maximum strength. Follow these guidelines to ensure a successful Curing process:
1. Cover the concrete: After pouring and finishing the concrete, cover it with plastic sheets or a curing compound to retain moisture. This will prevent the concrete from drying out too quickly, which can result in cracking. Make sure the entire surface is covered and sealed tightly.
2. Keep the concrete moist: During the curing process, it’s important to keep the concrete moist. This can be done by regularly spraying the surface with water or using a garden hose. The goal is to maintain a damp environment for at least 7 days.
3. Avoid excessive foot traffic: While the concrete is curing, avoid walking on it or placing heavy objects on it. This can cause damage and disrupt the curing process. If necessary, create temporary walkways using wooden boards to distribute weight evenly.
4. Allow sufficient curing time: Concrete typically takes about 28 days to fully cure and reach its maximum strength. It’s important to allow enough time for this process before subjecting the floor to heavy use or applying any sealants.
5. Apply a sealer (optional): Once the concrete has cured, you may choose to apply a sealer for added protection and aesthetic appeal. There are various types of sealers available, such as acrylic or epoxy-based sealers. Follow the manufacturer’s instructions for proper application.
Remember to always follow safety precautions when working with concrete, such as wearing protective gear and using proper lifting techniques for heavy materials.