Applying concrete floor coating to your floor seems as easy as painting wall surfaces, but as with painting, it requires an experienced call. Stained concrete for the flooring offers options that are abundant choices for interiors such as practically limitless styles along with health benefits.
Images about Removing Tile Mortar From Concrete Floor
Hiring professional concreters or perhaps concrete contractors may cost you a bit although you are guaranteed of a better end result. Concrete floors are significantly proposed by the American Lung Association for people with asthma and allergies. Every one of the above forms of polished concrete floors can be completed in huge looks and styles.
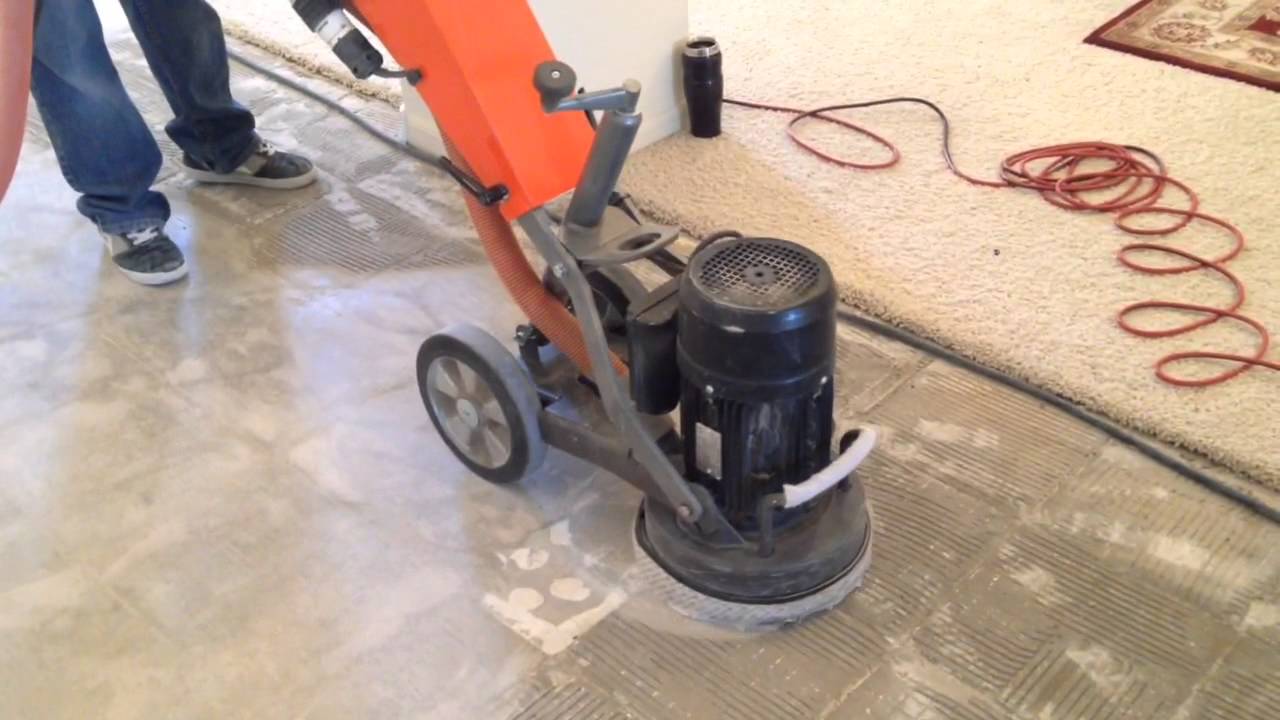
Dust Free Thinset Removal

Polished concrete floors are being detected as the number one material that is actually both highly useful and decorative for public buildings. You are able to blend it in other surfaces to compliment your flooring option. Buyers usually have a variety of preferences. The notion of a dull grey concrete floor has been replaced with delightful surfaces that can be as granite, marble, and also tile.
The Best Way To Remove Thinset From Concrete – From House To Home
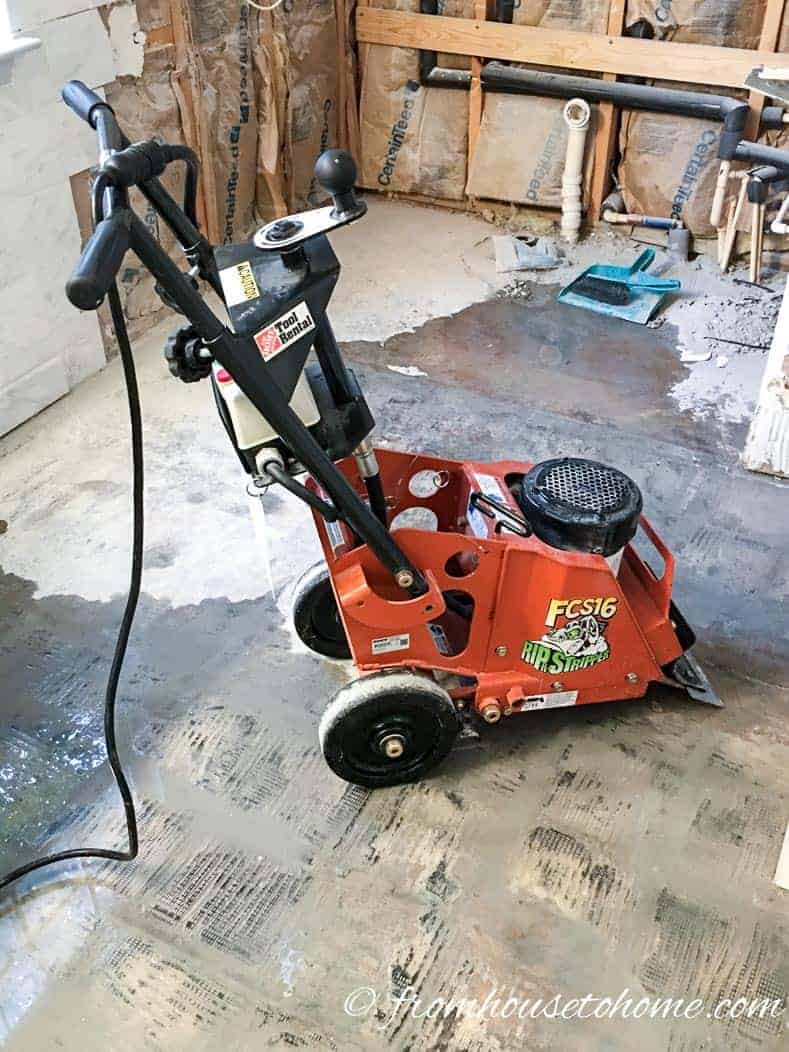
The Best Way To Remove Thinset From Concrete – From House To Home
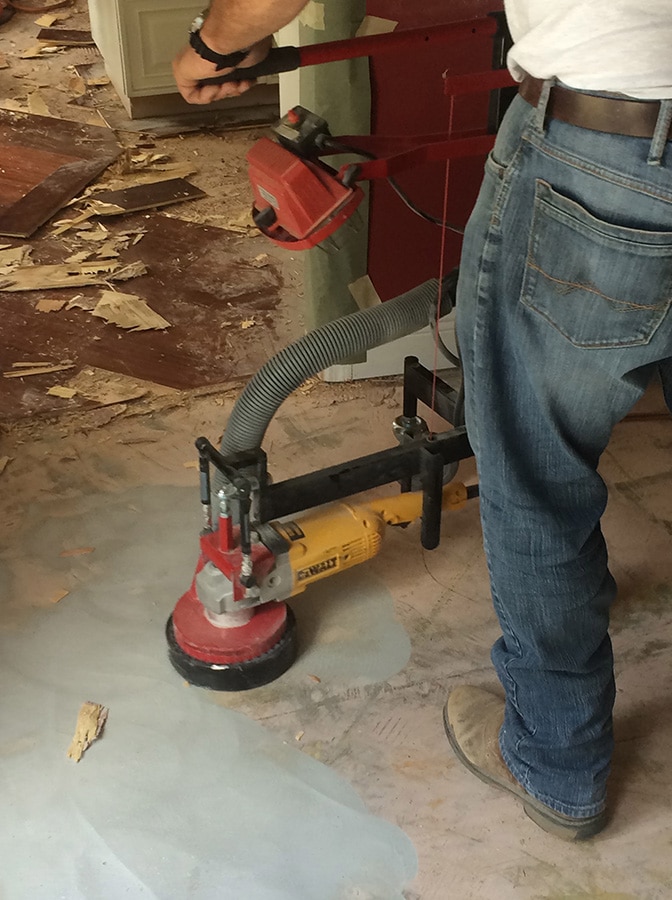
All About Thinset North Central Florida Speedy Floor Removal
How to Remove tile mastic or thinset the easy way – Be Your Own Handyman @ Home

The Best Way To Remove Thinset From Concrete – From House To Home

How to remove tile, mortar and lathe from a subfloor
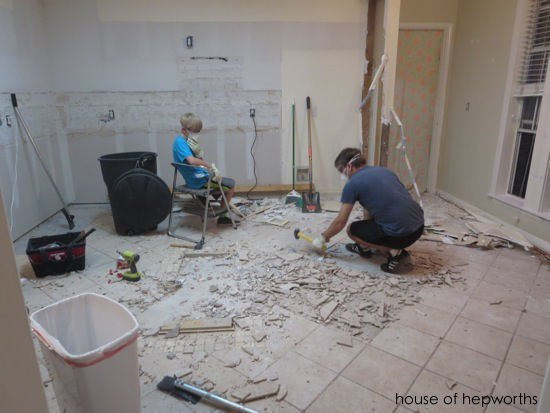
How To Remove Ceramic Tile And Thinset – The Nifty Nester

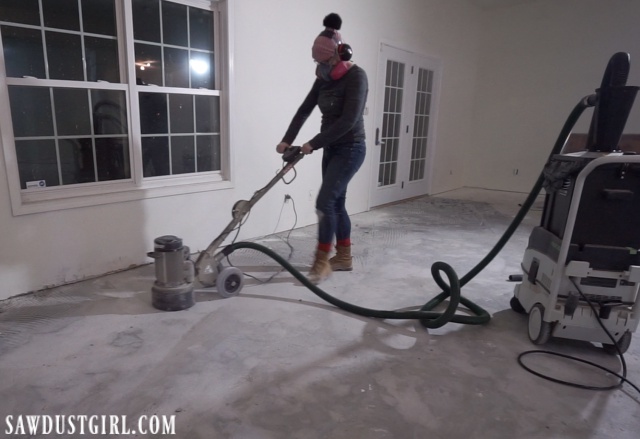
Removing Tile and Thinset from Concrete – Sawdust Girl®
3 Ways to Remove Thinset – wikiHow

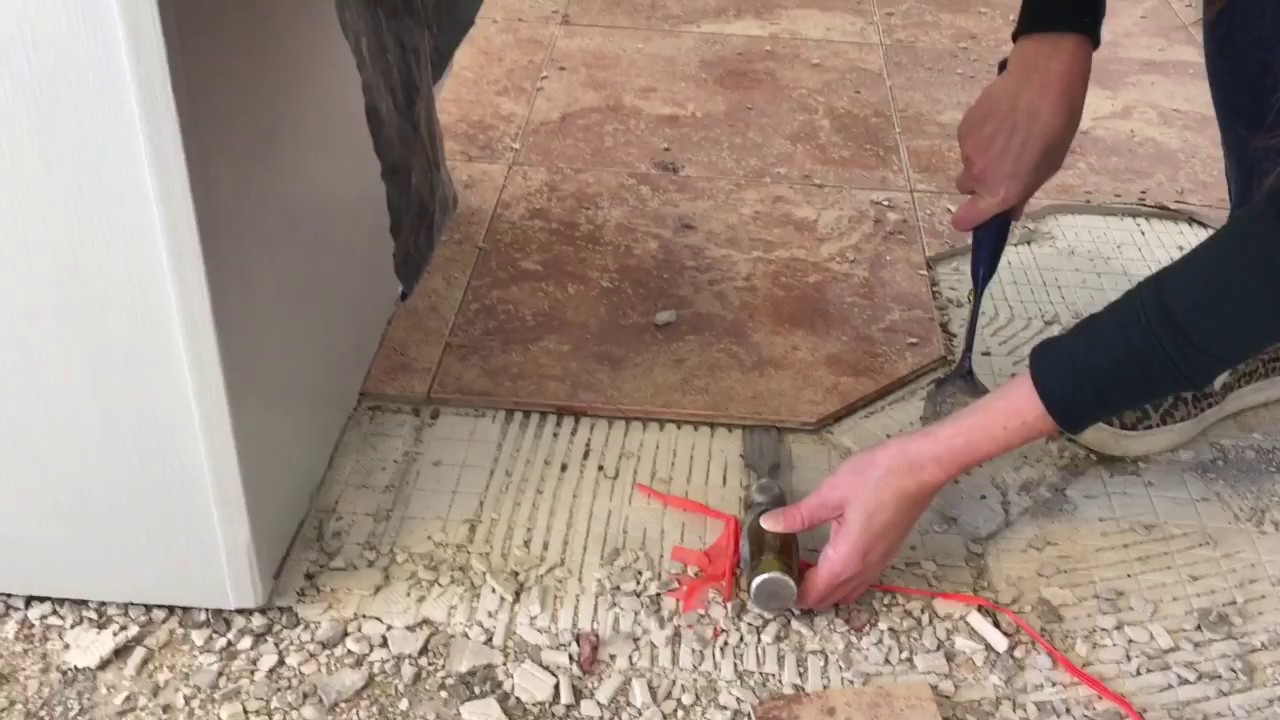
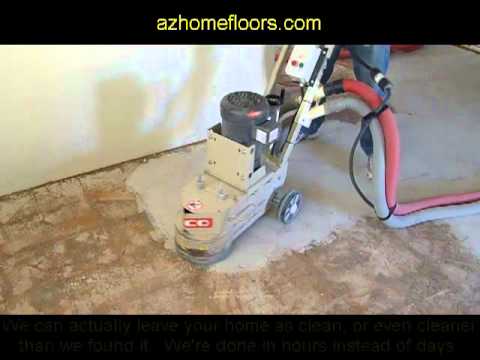
Whoa!! Phoenix Dust Free Tile Removal And Thinset Removal Tool Fast And Clean? Itu0027s True!
The best way to remove Thinset from a cement foundation – House of

The best way to remove Thinset from a cement foundation – House of
Related Posts:
- How To Put Hardwood On Concrete Floor
- Fixing Bottom Plate To Concrete Floor
- How To Fix Uneven Concrete Floor In Basement
- Fixing Cracks In Garage Concrete Floor
- Concrete Floor Coatings Basement
- Acid Etch Stain Concrete Floors
- Leveling Concrete Floor For Hardwood
- Copper Concrete Floor
- How To Insulate A Concrete Floor Under Carpet
- Paint Concrete Floor Living Room
Removing Tile Mortar From Concrete Floor
Introduction:
When it comes to renovating or updating your home, removing tile mortar from a concrete floor is often an essential step. Whether you’re replacing old tiles with new ones or transitioning to a different type of flooring altogether, removing the existing mortar is crucial for achieving a smooth and level surface. In this article, we will guide you through the process of removing tile mortar from a concrete floor, providing detailed instructions and answering frequently asked questions along the way.
I. Gathering the Necessary Tools and Materials:
Before diving into the task of removing tile mortar, it’s important to gather all the necessary tools and materials. Here’s a list of items you’ll need:
1. Safety goggles: Protect your eyes from flying debris or shards of mortar by wearing safety goggles throughout the process.
2. Dust mask: To avoid inhaling dust particles and protect your respiratory system, wear a dust mask while working on removing tile mortar.
3. Heavy-duty gloves: Guard your hands against sharp edges or potential injuries by wearing heavy-duty gloves during the removal process.
4. Chisel: A chisel with a wide blade will be your primary tool for breaking up and removing tile mortar from the concrete floor.
5. Hammer: Use a hammer to strike the chisel gently, aiding in breaking up the mortar effectively.
6. Masonry drill and bit: If you are dealing with thick or stubborn mortar, a masonry drill with an appropriate bit can be helpful in loosening it.
7. Vacuum cleaner with brush attachment: A vacuum cleaner will come in handy for cleaning up loose debris and dust generated during the removal process.
8. Wire brush: Occasionally, some stubborn residue may remain after using the chisel. A wire brush can help remove any remaining mortar remnants effectively.
II. Preparing the Work Area:
Before starting to remove tile mortar, it’s essential to prepare the work area properly. Follow these steps:
1. Clear the area: Remove any furniture, rugs, or objects that might obstruct your workspace. This will ensure a clean and unobstructed area for easy movement during the removal process.
2. Cover adjacent surfaces: Protect any nearby surfaces, such as walls or baseboards, by covering them with plastic sheets or drop cloths. This will prevent damage or staining from flying debris or mortar remnants.
3. Open windows and doors: Proper ventilation is crucial during the removal process to minimize dust accumulation and maintain a healthy environment. Open windows and doors to allow fresh air circulation.
III. Removing Tile Mortar from Concrete Floor:
Now that you have all the necessary tools and have prepared the work area, it’s time to start removing the tile mortar from the concrete floor. Follow these steps:
1. Start at the edges: Begin by targeting the outer edges of the mortar using a chisel and hammer. Position the chisel at a slight angle and tap it gently with the hammer to break up the mortar.
2. Work in small sections: Break up the mortar in small sections rather than attempting to remove it all at once. This approach allows for better control and reduces the chances of damaging the underlying concrete surface.
3. Use a masonry drill if necessary: If you encounter particularly thick or stubborn mortar, use a masonry drill with an appropriate-sized bit to create shallow holes in the mortar. These holes will weaken the bond and make it easier to remove.
4. Apply leverage: Once you’ve loosened a section of mortar, Use the chisel and hammer to apply leverage and pry it off the concrete floor. Place the chisel under the loosened mortar and gently push down to lift it off.
5. Repeat the process: Continue working in small sections, breaking up the mortar and removing it from the concrete floor. Take breaks if needed to avoid fatigue and maintain accuracy.
6. Clean up debris: Use a vacuum cleaner with a brush attachment to clean up any loose debris and dust generated during the removal process. This will help keep the work area clean and safe.
7. Remove stubborn residue: If there are any remaining stubborn residue or mortar remnants, use a wire brush to scrub them away. Apply gentle pressure and scrub in a circular motion until the surface is clean.
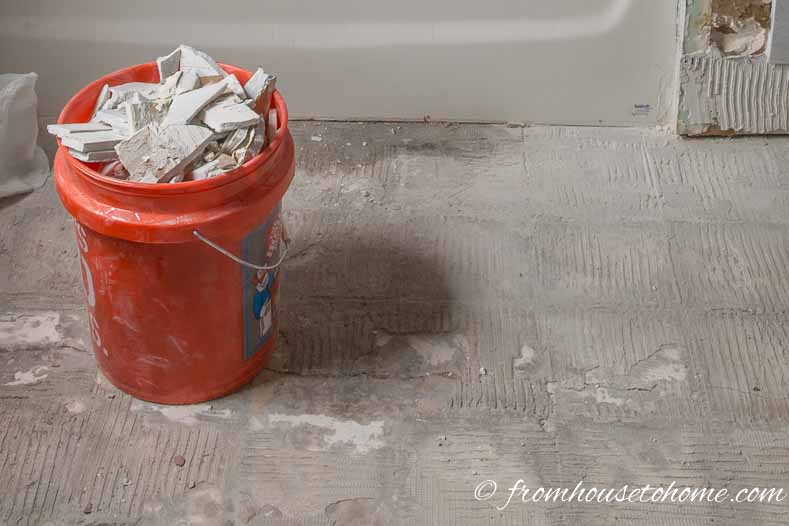
8. Dispose of the debris: Properly dispose of all removed tile mortar and debris according to local regulations. Bag them securely and dispose of them at designated locations.
IV. Post-Removal Care:
After removing tile mortar from a concrete floor, there are some post-removal care steps you can take to ensure a clean and well-maintained surface:
1. Inspect the concrete floor: After removing all the mortar, inspect the concrete floor for any cracks or damages. Address any repairs or cracks before proceeding with further flooring installation.
2. Clean the concrete floor: Use a mild detergent mixed with water to clean the concrete floor thoroughly. Scrub gently using a scrub brush or mop, then rinse with clean water and allow it to dry completely before proceeding with any further steps.
3. Consider sealing or priming: Depending on your intended use for the concrete floor, you may want to consider sealing or priming it to provide added protection and enhance its durability. Consult with a professional for the best sealing or priming options.
4. Prepare for new flooring: Once the concrete floor is clean and dry, you can proceed with installing new flooring if desired. Follow the manufacturer’s instructions for proper installation techniques and materials.
By following these steps and using the right tools, you can successfully remove tile mortar from a concrete floor. Remember to prioritize safety, take breaks when needed, and consult with professionals if necessary.